As you may know, Oracle Virtualbox does not provide any direct way to boot from USB. Luckily, I found a simple solution to allow the Virtualbox virtual machine to boot from a USB flash drive.
Prerequisites
Before you begin, make sure you have the following:
- VirtualBox: Download and install the latest version of VirtualBox from the official website.
- Bootable USB Drive: Create a bootable USB drive with your desired Ubuntu 22.04 or 24.04 ISO image. You can use tools like Rufus or the Startup Disk Creator for this.
To allow Virtualbox (boot) to boot from a USB drive, you need to create a *.vmdk file and point it to your USB drive to boot. The file vmdk here will be a virtual disk file containing all the information of a virtual machine operating on VirtualBox with Linux. Now let’s get started.
Step 1: Create a VMDK File for Your USB Drive
VirtualBox doesn’t directly support booting from USB. To work around this, we’ll create a virtual machine disk (VMDK) file that points to your USB drive.
Identify your USB drive: Connect your USB drive and open a terminal. Run the following command to list your drives:
sudo fdisk -lLook for your USB drive (e.g., /dev/sdb).
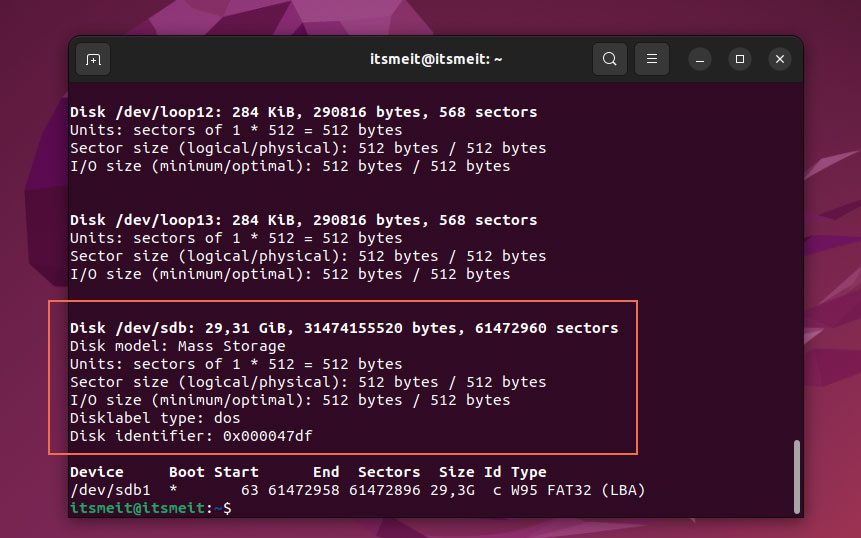
As shown in the image above, my USB drive is identified as /dev/sdb 29.31Gb. To create the VMDK file, open your terminal and run the following command, replacing /dev/sdb with the correct path to your USB drive:
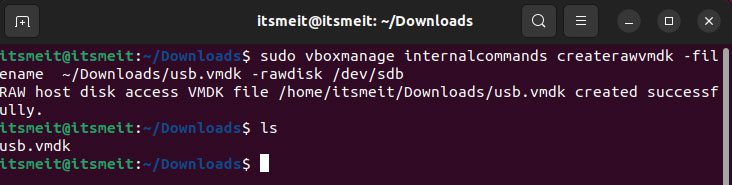
sudo vboxmanage internalcommands createrawvmdk -filename ~/Downloads/usb_boot.vmdk -rawdisk /dev/sdbIn the above command, ~/Downloads is where I saved the usb_boot.vmdk file, you can specify a location to save the file on your device.
Step 2: Set Permissions for the VMDK File
Next, after the usb_boot.vmdkfile has been created, you need to set the appropriate permissions for it.
sudo chown $USER:$USER ~/Downloads/usb_boot.vmdkNext, add your user to the vboxusers and disk groups with the following commands:
sudo usermod -a -G vboxusers ubuntu_username
sudo usermod -a -G disk ubuntu_username
Replace “ubuntu_username” with your user.
Make sure to disconnect the USB drive and reboot your system. This helps ensure that the USB device is re-detected correctly and doesn’t get assigned a different device name (e.g., /dev/sdc instead of /dev/sdb).
Step 3: Configure VirtualBox and Boot from USB
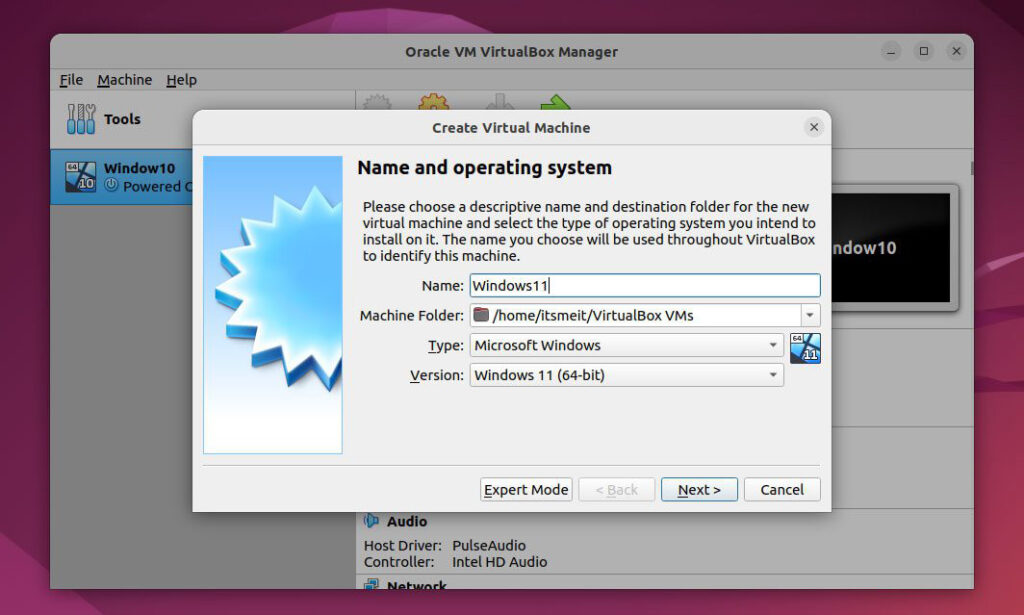
Open the Oracle VirtualBox application and start by creating a new virtual machine. Click the “New” button, then enter a name for your VM (for example, Windows 11). After that, choose the appropriate operating system type and version. Click “Next” to proceed, as shown in the screenshot.
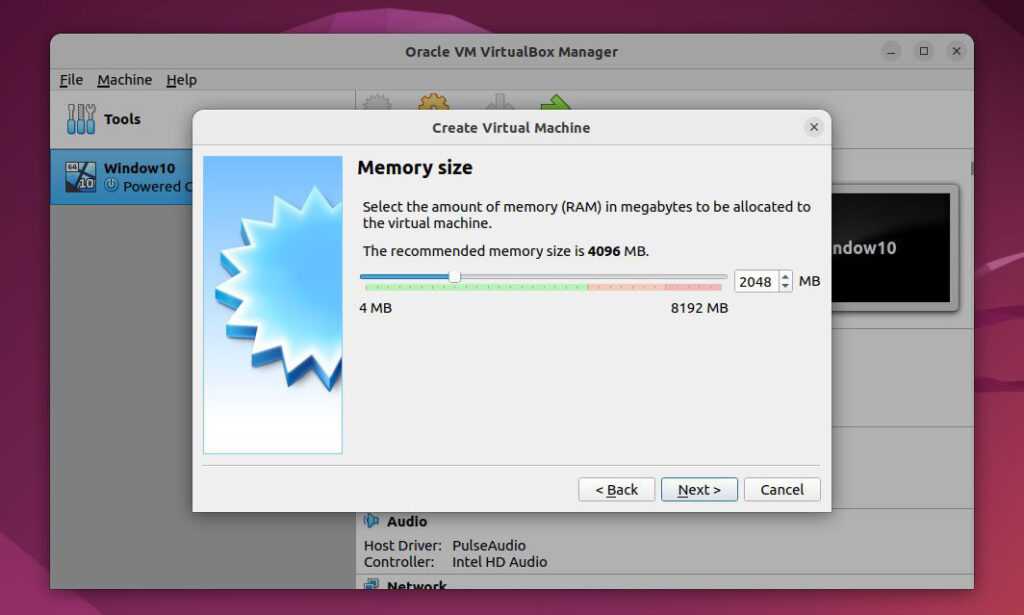
Set up RAM for the virtual device and continue to click Next.
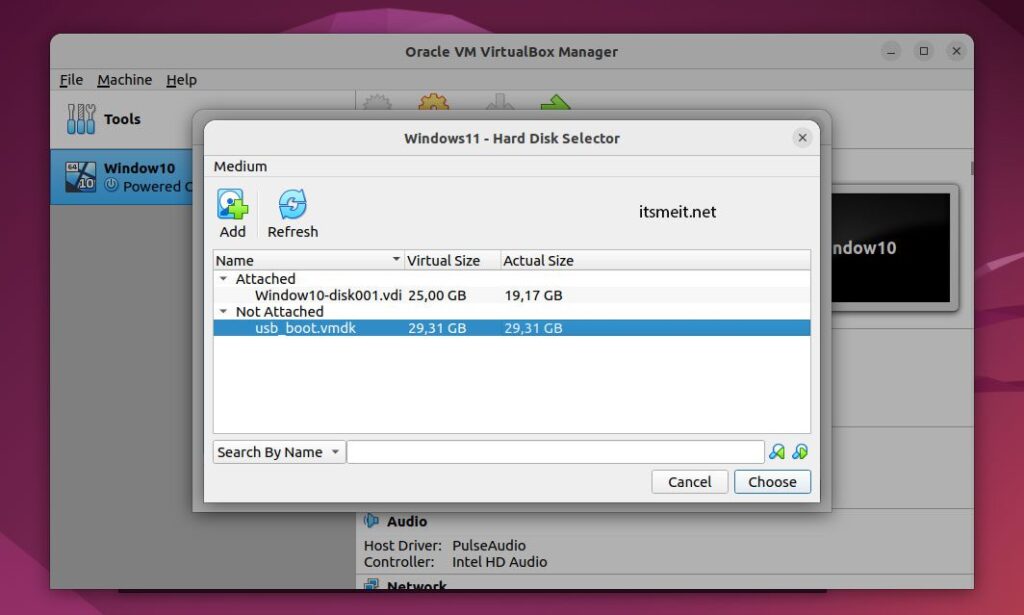
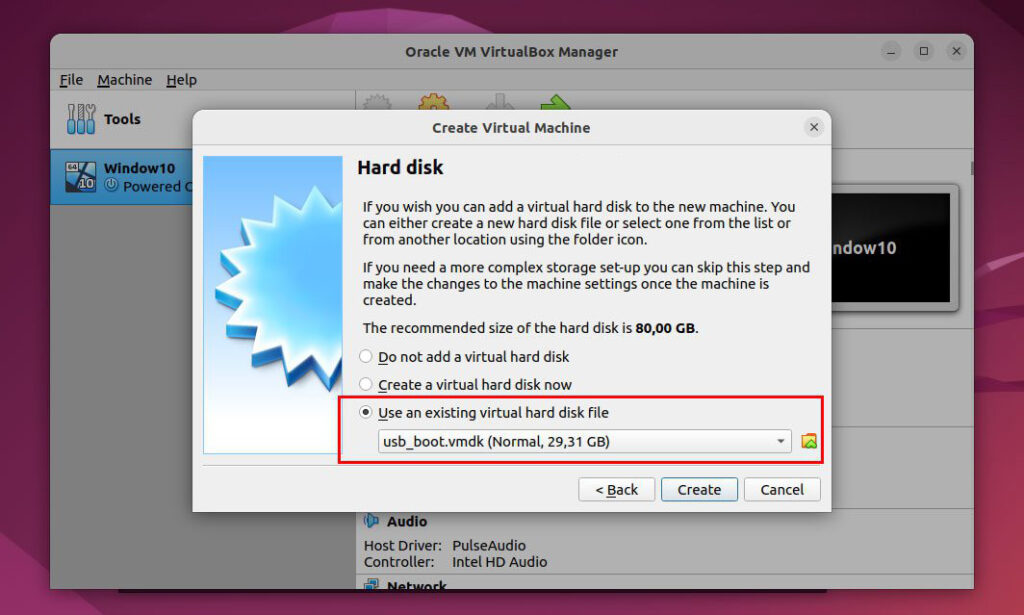
At this important step, select “Use an existing virtual hard disk file.” Then, click the folder icon to browse and locate the usb_boot.vmdk file you created earlier. Once selected, click “Choose” to add the file to your virtual machine.
Click Create after completing the setup.
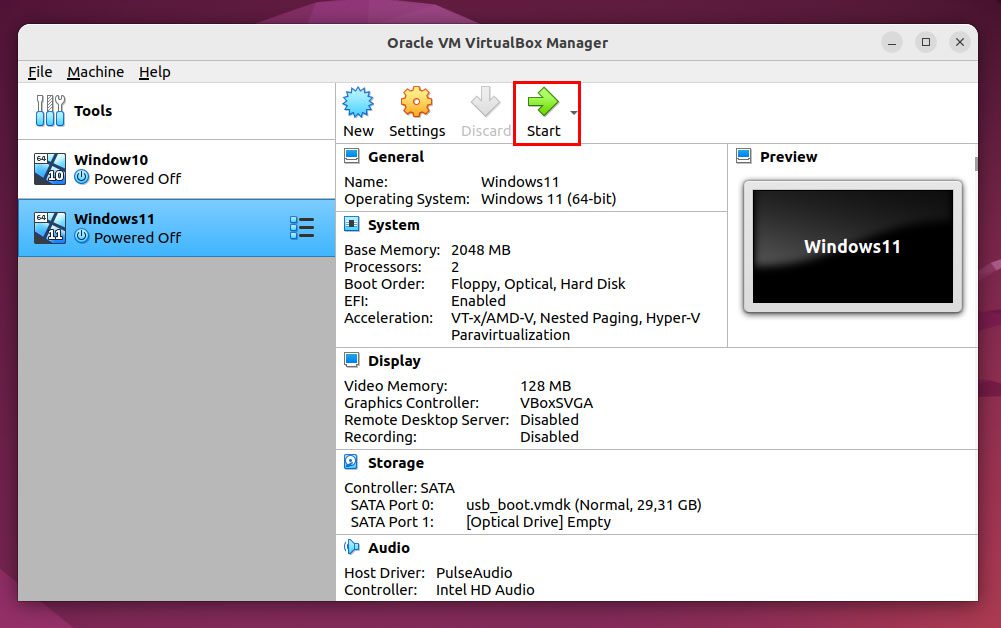
Finally, click the Start button to perform a USB boot into VirtualBox.
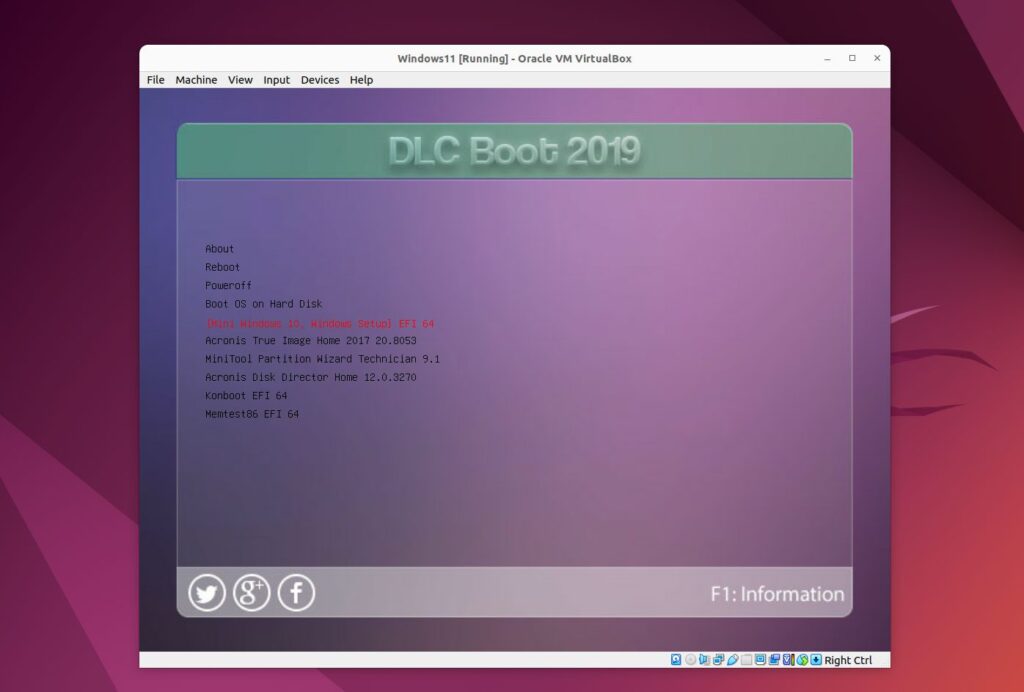
With these steps, you should be able to boot from USB in VirtualBox on your Ubuntu 22.04 or 24.04 system. Let me know if you have any other questions!