In Windows 11, you can choose Dark Mode to reduce eye strain at night, or Light Mode for better visibility during the day. However, Windows 11 does not natively support automatic theme switching by time.
This guide shows you how to set up automatic Dark/Light Mode switching using two methods:
- Using the Auto Dark Mode app (super simple, no technical steps required).
- Using Task Scheduler + PowerShell (leveraging built-in Windows tools, no extra software needed).
Method 1: Use Auto Dark Mode
This is the fastest and easiest way for everyone—even beginners.
Step 1. Install the App
- Open Microsoft Store → search for Auto Dark Mode.
- Click Install.
- The app is free, open-source, and regularly updated.

Step 2. Set Up Automatic Theme Switching
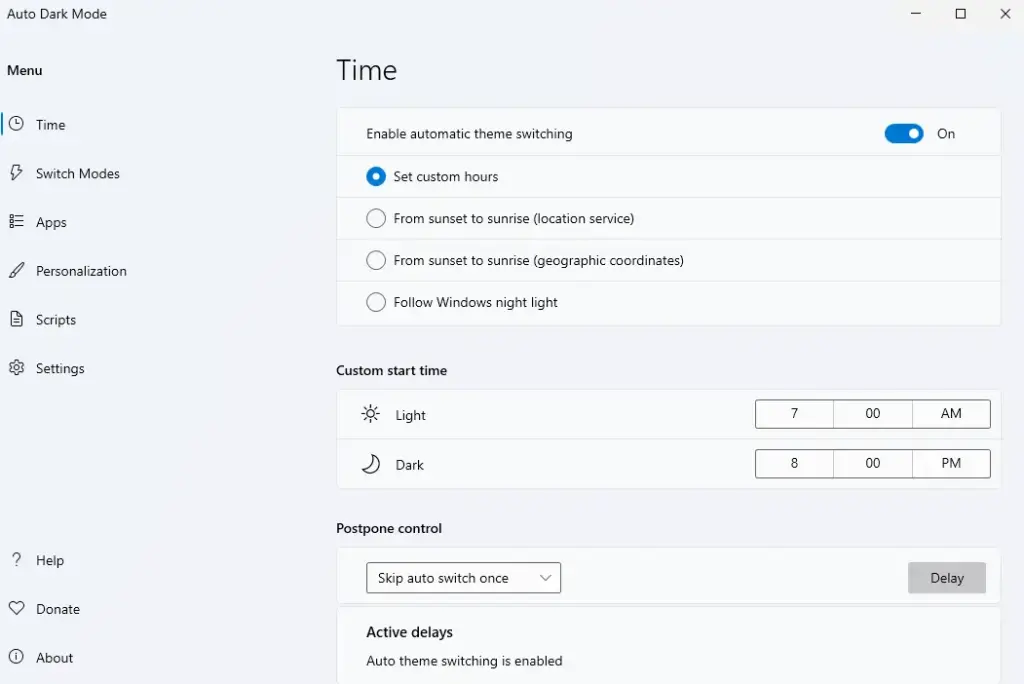
- Open Auto Dark Mode → go to Time.
- Turn on Enable automatic theme switching.
- Choose one of the following:
- Set custom hours: pick your own schedule, e.g., 7:00 AM → Light Mode, 7:00 PM → Dark Mode.
- From sunset to sunrise: the app detects your location and switches themes according to sunrise/sunset.
Step 3. Extra Options (Very Useful)
- Apps: keep specific apps always in light or dark mode.
- Wallpaper / accent color / Office theme: sync wallpaper, accent color, and Office theme with system mode.
- Gaming mode: prevent theme switching while playing full-screen games.
👉 Since Windows 11 doesn’t include this feature by default, Auto Dark Mode is widely considered the simplest and most effective solution.
Method 2: Use Task Scheduler + PowerShell
Best if you don’t want to install third-party software and prefer automating with built-in Windows tools.
Step 1: Create Scripts for Dark Mode and Light Mode
- Open Notepad, paste the following, and save it as
C:Scriptsset-dark.ps1:
$RegPath = 'HKCU:SoftwareMicrosoftWindowsCurrentVersionThemesPersonalize'
New-Item -Path $RegPath -Force | Out-Null
Set-ItemProperty -Path $RegPath -Name AppsUseLightTheme -Type DWord -Value 0
Set-ItemProperty -Path $RegPath -Name SystemUsesLightTheme -Type DWord -Value 0
→ This switches Windows to Dark Mode.
- Create another file
C:Scriptsset-light.ps1with:
$RegPath = 'HKCU:SoftwareMicrosoftWindowsCurrentVersionThemesPersonalize'
New-Item -Path $RegPath -Force | Out-Null
Set-ItemProperty -Path $RegPath -Name AppsUseLightTheme -Type DWord -Value 1
Set-ItemProperty -Path $RegPath -Name SystemUsesLightTheme -Type DWord -Value 1
→ This switches Windows to Light Mode.
(In the Registry: 0 = Dark, 1 = Light)
Step 2: Schedule Automatic Switching with Task Scheduler
- Open Task Scheduler → Create Basic Task.
- Name it: Set Dark Mode.
- Under Trigger, choose Daily → 7:00 PM.
- Under Action, select Start a program:
- Program/script:
powershell.exe - Add arguments:
-ExecutionPolicy Bypass -File "C:Scriptsset-dark.ps1"
- Program/script:
- Finish setup, then open the Properties of the created task:
- General tab → check Run only when user is logged on.
- Settings tab → check Run task as soon as possible after a scheduled start is missed.
- Create another task Set Light Mode at 7:00 AM with the
set-light.ps1script.
👉 Now Windows will automatically switch themes in the morning and evening without additional apps.
⚠️ Editing the registry is safe in this case, but you should still create a System Restore Point as a precaution.
Verify and Confirm
- Go to Settings → Personalization → Colors → Choose your mode to see the active theme.
- If File Explorer or apps don’t switch immediately, restart them or sign out and back in.
Extra Tips
- Enable Night light (Settings → System → Display → Night light) to reduce blue light in sync with theme switching.
- With Auto Dark Mode, enable Office theme sync for consistent appearance across Microsoft Office.
- To stop automatic switching, simply disable the Auto Dark Mode app or the tasks in Task Scheduler.
By doing this, you’ll get a bright interface for daytime visibility and a dark interface at night—protecting your eyes and giving a more professional user experience.