SSH keys provide a secure authentication method by replacing traditional passwords with an encrypted key pair. This guide will help you generate SSH keys on Linux systems like Ubuntu or Debian and convert them into PEM, PPK, and PUB formats. Using SSH keys enhances security, minimizes the risk of password theft, and prevents unauthorized access to your server.
1. Install PuTTY Tools and OpenSSH
Although ssh-keygen generates an id_rsa file in OpenSSH format by default, you may need to convert it to .ppk or .pem format for use with PuTTY on Windows or other systems.
To install putty-tools and enable conversion, run:
sudo apt install putty-toolsIf OpenSSH is not installed, install it with:
sudo apt install openssh-server
sudo systemctl start ssh
sudo systemctl enable ssh
2. Generate an SSH Key Pair (PPK Format)
On Linux, the terminal is commonly used to connect via SSH with keys in .pem or .ppk format. There are two security levels:
- 2048-bit: Lighter while still providing good security.
- 4096-bit: Uses stronger encryption but consumes more resources when connecting.
Below is a step-by-step guide to generating a PPK key pair based on your specific needs.
📌 Generate a 4096-bit key (higher security, recommended for critical systems):
puttygen -t rsa -b 4096 -C "your_user@ip_server" -o my_secure_key.ppk📌 Generate a 2048-bit key (good balance between security and speed):
puttygen -t rsa -b 2048 -C "your_user@ip_server" -o keyfile.ppk
🔹 your_user: Your SSH account on the server (root or a specific user).
🔹 ip_server: Your server’s IP address or domain name (e.g., 192.168.1.100).
🔹 keyfile.ppk: Choose any filename that makes sense for you.
🔹 Set up a password with uppercase, lowercase letters, and number
3. Configure SSH Key Authentication
Connect to the server via SSH using the following command:
ssh your_user@ip_serverOnce you have connected, it is important to verify the existence of the ~/.ssh directory. If it does not exist, you will need to create it.
mkdir -p ~/.sshIn the directory containing the PPK file you created in Step 2, run the command to display the key:
puttygen -L keyfile.ppk
Open the authorized_keys file on the server to add the SSH key at the end:
nano ~/.ssh/authorized_keysSet correct rermissions for the .ssh directory
chmod -R go= ~/.sshRestart SSH to apply changes
sudo systemctl restart ssh📌 Note: If you are setting up an SSH key for a non-root account, grant ownership of the .ssh directory to that user:
chown -R $USER:group ~/.ssh4. Connect to the Server Using SSH Key
Convert .ppk to .pem for OpenSSH Use:
puttygen /path/keyfile.ppk -O private-openssh -o /path/keyfile.pemSet secure permissions for the .pem file to ensure that only the owner has read and write access, while all other users are denied access:
sudo chmod -R 600 keyfile.pemUse SSH with the Private Key:
ssh -i /path/keyfile.pem your_user@ip_server5. Disable Password Authentication
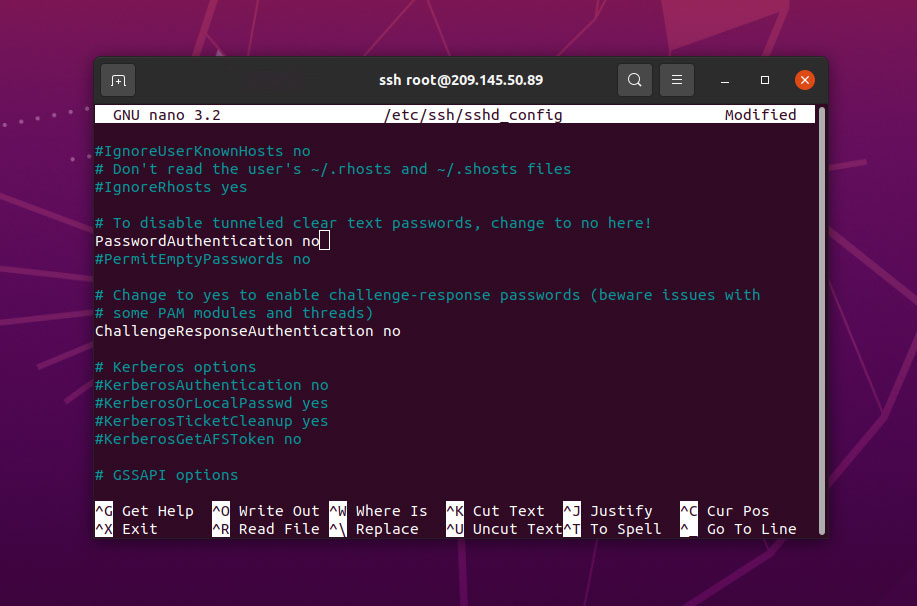
After successfully connecting using the SSH key, password-based SSH login is no longer necessary. Disable it with the following steps:
Open the SSH configuration file:
sudo nano /etc/ssh/sshd_configFind the PasswordAuthentication line and set it to no:

PasswordAuthentication noRestart SSH to apply changes:
systemctl restart ssh📌 Important: Store your SSH keys in a secure location and avoid sharing them or saving them on an unsecured machine.
6. Manage and Convert SSH Keys
Change the SSH Key Password:
puttygen keyfile.ppk -PConvert SSH Key Formats (PPK, PEM, PUB):
puttygen keyfile.ppk -O private-openssh -o keyfile7. Troubleshoot Common SSH Errors
❌ Error: “Permissions are too open”
Cause: The system requires the key file to be readable only by the owner.
Solution:
chmod 600 keyfile.pem❌ Error: “Server refused our key”
Cause: The key may not have been copied correctly or may have been modified.
Solution:
cat ~/.ssh/authorized_keys
echo "SSH_KEY_CONTENT" >> ~/.ssh/authorized_keys
chmod 700 ~/.ssh
chmod 600 ~/.ssh/authorized_keys
sudo systemctl restart ssh
❌ Error: “No such file or directory”
Cause: The key file may not exist or was moved.
Solution:
ls -l /home/user/keyfile.pem
ssh -i ~/Downloads/keyfile.pem your_user@ip_server
❌ Error: “Permission denied (publickey)”
Cause: The server only accepts SSH key authentication but does not recognize the provided key.
Solution:
cat ~/.ssh/authorized_keys
ssh -v -i keyfile.pem your_user@ip_server
For AWS users:
ssh -i keyfile.pem your_user@ip_server❌ Error: “Could not load private key”
Cause: OpenSSH does not directly support PuTTY’s .ppk format.
Solution:
puttygen keyfile.ppk -O private-openssh -o keyfile.pem
chmod 600 keyfile.pem
ssh -i keyfile.pem your_user@ip_server
This guide helps you create SSH keys on Linux/Ubuntu and enhance server security. If you have any questions, feel free to leave a comment below!