Docker is the most popular containerization platform today. It allows you to package your applications along with their entire runtime environment (libraries, configs, etc.) into an independent block — called a container. On Windows 11, Docker works stably thanks to tight integration with WSL2 (Windows Subsystem for Linux 2).
This guide explains how to properly install Docker Desktop on Windows 11, with detailed step-by-step instructions to help you avoid common issues.
1. System Requirements
| Component | Requirement |
|---|---|
| Operating System | Windows 11, version 21H2 or later |
| CPU | Virtualization support; usually enabled in BIOS |
| RAM | At least 8GB if running multiple containers simultaneously |
| WSL2 | Required – Docker runs entirely on top of WSL2 |
Check if Virtualization is enabled:
Open Task Manager → go to the Performance tab → look for the line “Virtualization: Enabled”
If you see “Virtualization: Disabled”, the following resources might be useful:
- How to Check if Virtualization is Enabled or Disabled on Windows
- How to Enable Virtualization Technology (VT) on Dell Computers
- How to Enable VT (Virtualization Technology) on HP Desktops and Laptops (Intel & AMD)
- How to Enable VT (Virtualization Technology) on ASUS PCs and Laptops
- How to Enable VT (Virtualization Technology) on Lenovo PCs (2025 Update)
2. Enable WSL2
Docker Desktop does not use Hyper-V (except in special cases). Starting with Windows 11, WSL2 is the main backend Docker relies on to run the Linux environment.
👉 How to enable WSL2:
Open PowerShell as Administrator and enter:
wsl --install --no-distributionThis command will:
- Enable the WSL feature
- Automatically install the Linux kernel
- Not include any Linux distribution
Restart your computer afterward — this is necessary to avoid the common “WSL 2 installation is incomplete” error, even if the command ran successfully.
3. Install Docker Desktop
Step 1: Download the official installer from: 👉 https://www.docker.com/products/docker-desktop/
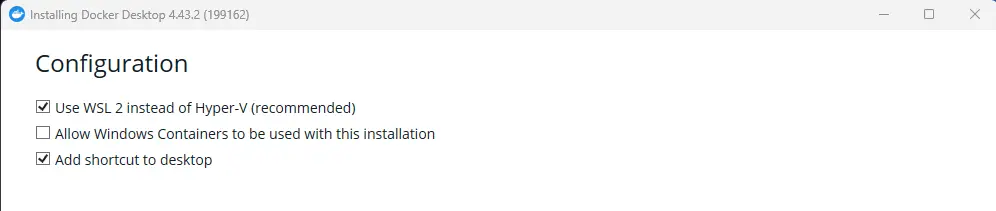
Step 2: Run the downloaded file Docker Desktop Installer.exe
Check these options:
- ✅ Use WSL 2 instead of Hyper-V
- ✅ Add shortcut to desktop (optional)
Docker Desktop will automatically create a dedicated WSL2 distro named docker-desktop. This is where the Docker Engine and container ecosystem will run.
4. Verify Docker Is Working
Open CMD or PowerShell and run:
docker version→ If both Client and Server info appear, Docker is installed successfully.
Run a sample container:
docker run hello-world→ If you see the line Hello from Docker!, Docker is working properly.
5. Where Does Docker Store Data on Windows?
Docker does not store data in C: like traditional apps. All Docker data — images, containers, volumes — are stored inside WSL2, specifically within the docker-desktop distro.
Storage location:
\wsl$docker-desktopmntdocker-desktop-diskdatadockerHere you’ll find:
containers/– running containersimages/– pulled or built imagesvolumes/– data mounted to containersoverlay2/– layered file systems
⚠️ Note: This is a system-level directory. You can explore everything, but only make changes if you fully understand what you’re doing — to avoid unexpected errors.
6. Resource Management (RAM/CPU)
WSL2 dynamically uses resources based on demand but does not automatically release RAM after containers stop.
To limit resources:
Create a config file at:
C:Users<your-username>.wslconfigContents:
[wsl2]
memory=4GB
processors=2
Then, run the following command to apply changes:
wsl --shutdownKey Notes
- Docker Desktop only uses WSL2 with the
docker-desktopdistro. - The
docker-desktop-datadistro is no longer in use. - Paths like
\wsl.localhost...are outdated – ignore any older guides that refer to them. - Docker’s folder structure is an isolated and performance-optimized filesystem that enables containers to run fast, lightweight, and efficiently.