Elasticsearch is a powerful open-source search and analytics engine. It allows you to store, search, and analyze vast amounts of data quickly and almost in real time. I have personally tested Elasticsearch on Ubuntu 22.04/24.04 and found it to be very stable, especially when integrated with Magento 2. In this guide, I will share detailed steps so you can install and use it effectively.
Step 1: Install OpenJDK
To run Elasticsearch, you need to install OpenJDK. If you already have it installed, you can skip this step.
sudo apt install openjdk-11-jdk -yStep 2: Add the Elasticsearch PGP Key
Elasticsearch Ubuntu packages are registered with PGP key D88E42B4, you can view at https://pgp.mit.edu with authentication key:
4609 5ACC 8548 582C 1A26 99A9 D27D 666C D88E 42B4Download and add the key with the following command:
wget -qO - https://artifacts.elastic.co/GPG-KEY-elasticsearch | sudo gpg --dearmor -o /usr/share/keyrings/elasticsearch-keyring.gpgDownload and add the key with the following command:
Next, add the Elasticsearch repository to /etc/apt/sources.list.d/elastic-7.x.list:
echo "deb [signed-by=/usr/share/keyrings/elasticsearch-keyring.gpg] https://artifacts.elastic.co/packages/7.x/apt stable main" | sudo tee /etc/apt/sources.list.d/elastic-7.x.listStep 3: Install from the APT Repository
You may need to install the apt-transport-https package before proceeding:
sudo apt-get install apt-transport-httpsStep 4: Install Elasticsearch
sudo apt-get update && sudo apt-get install elasticsearch -yStep 5: Configure Elasticsearch
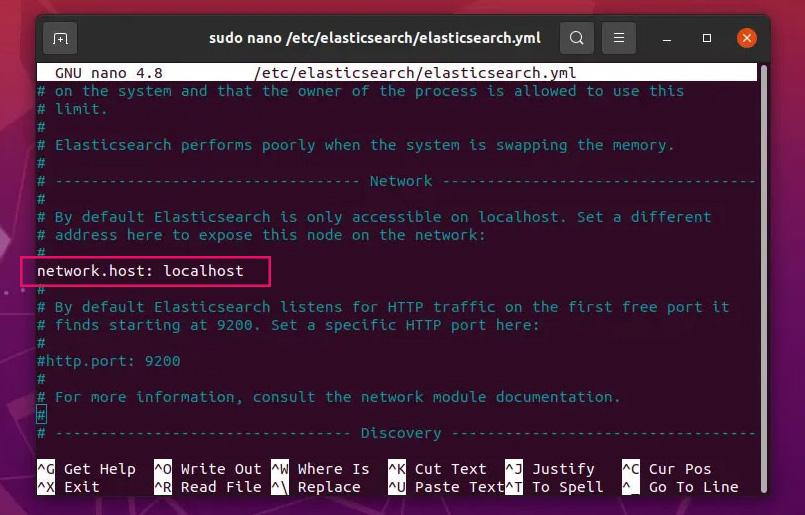
Next, open the elasticsearch.yml file, find the network.host line, remove the # (uncomment it), and change the default IP 192.168.0.1 to localhost as follows:
sudo nano /etc/elasticsearch/elasticsearch.yml
Apply the Configuration
After making the changes, press Ctrl + X, then select Y to save the configuration and start Elasticsearch:
sudo systemctl start elasticsearch.serviceTo enable Elasticsearch to start automatically with Ubuntu, run:
sudo systemctl enable elasticsearch.serviceIf you only modified the configuration, you can reload the service without restarting:
sudo systemctl daemon-reloadCheck Elasticsearch’s running status:
sudo systemctl status elasticsearchStep 6: Verify Elasticsearch is Running
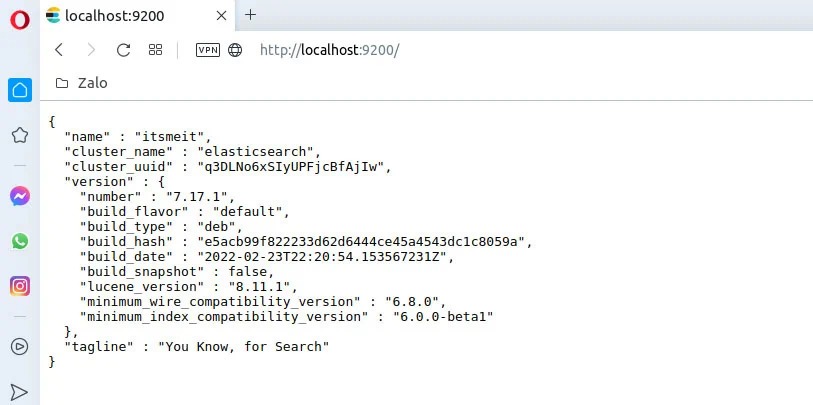
Since we configured network.host as localhost in Step 5, you can open a browser and access the following URL to check: http://localhost:9200

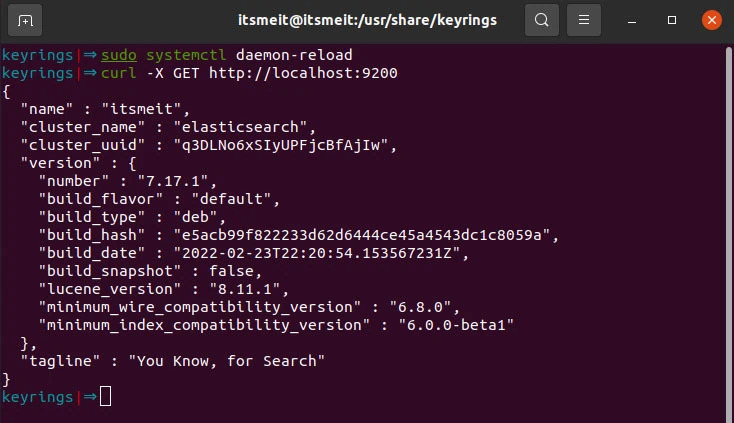
I always verify Elasticsearch using both a browser and a curl command to ensure it is functioning correctly. You can try both methods as follows:
curl -X GET http://localhost:9200
Troubleshooting Common Errors
Error 1: Elasticsearch Fails to Start
👉 Cause: Could be due to insufficient memory or incorrect Java installation.
👉 Solution: Check logs for specific errors:
sudo journalctl -u elasticsearch --no-pager | tail -50If the error is Java-related, check the installed Java version:
java -versionIf Java is not the correct version, reinstall it:
sudo apt install openjdk-11-jdk -yError 2: Permission Denied When Running Elasticsearch
👉 Cause: Elasticsearch runs under the elasticsearch user, but the data/log directories may lack proper permissions.
👉 Solution: Grant the necessary permissions:
sudo chown -R elasticsearch:elasticsearch /var/lib/elasticsearch
sudo chown -R elasticsearch:elasticsearch /var/log/elasticsearch
Then restart Elasticsearch:
sudo systemctl restart elasticsearchError 3: Cannot Connect to Elasticsearch on Port 9200
👉 Cause: Elasticsearch may not be running or could be blocked by the firewall.
👉 Solution: Check the service status:
sudo systemctl status elasticsearchIf the service is not running, restart it:
sudo systemctl start elasticsearchAdditionally, check and configure the firewall:
sudo ufw allow 9200
sudo ufw enable
After completing these steps, you have successfully installed Elasticsearch 7 on Ubuntu. Continue exploring and leveraging Elasticsearch’s powerful search and analytics features!