Installing the correct NVIDIA driver helps optimize graphics performance and ensures system stability. Below is a step-by-step guide to installing NVIDIA drivers on Ubuntu 22.04 and 24.04 LTS.
Why Should You Install or Update the Driver?
Although Ubuntu can automatically detect and install basic drivers, installing or updating the official NVIDIA driver provides several key benefits:
🎮 1. Optimize Graphics Performance
- Ubuntu’s default driver (nouveau) is open-source but lacks optimal performance for NVIDIA graphics cards.
- The official NVIDIA driver (e.g.,
nvidia-driver) significantly boosts graphics performance, especially for demanding applications and gaming.
🆕 2. Support for New Features
- NVIDIA regularly updates its drivers to introduce new features, improve compatibility, and fix bugs.
- Ensures system stability with the latest Ubuntu versions and graphics-intensive software.
⚙️ 3. Improved Compatibility and Stability
- Enhances compatibility with high-performance graphics applications.
- Prevents issues like black screens, flickering, system crashes, and performance drops when gaming or editing videos.
🔒 4. Security and Bug Fixes
- Frequent updates include security patches and bug fixes.
- Keeps your system safe from potential threats while enhancing overall performance.
🤖 5. Support for Advanced Technologies (AI, Deep Learning)
- Enables optimal performance for AI, deep learning, and other compute-intensive tasks.
- Essential for leveraging technologies like CUDA or Tensor Cores.
Step 1: Remove Existing NVIDIA Drivers (If Any)
Before installing a new driver, remove any old NVIDIA drivers to avoid conflicts. Run the following commands in the Terminal:
sudo apt autoremove nvidia* --purge
sudo apt-get autoremove
Then, update the system and reboot:
sudo apt update && sudo apt upgrade -y
sudo reboot
Step 2: Identify Your NVIDIA Graphics Card and Recommended Driver
After rebooting, run the following command to check your graphics card and the recommended driver:
ubuntu-drivers devicesThe system will list the available drivers. For example:

In this example, the system recommends nvidia-driver-530. Note this version for the next step.
Step 3: Install NVIDIA Driver on Ubuntu 22.04
Option 1: Automatically Install the Recommended Driver
If you want Ubuntu to automatically select and install the appropriate NVIDIA driver, run:
sudo ubuntu-drivers autoinstallOption 2: Manually Install a Specific Driver Version
If you prefer to install a specific driver version, use this command (replace 530 with your desired version):
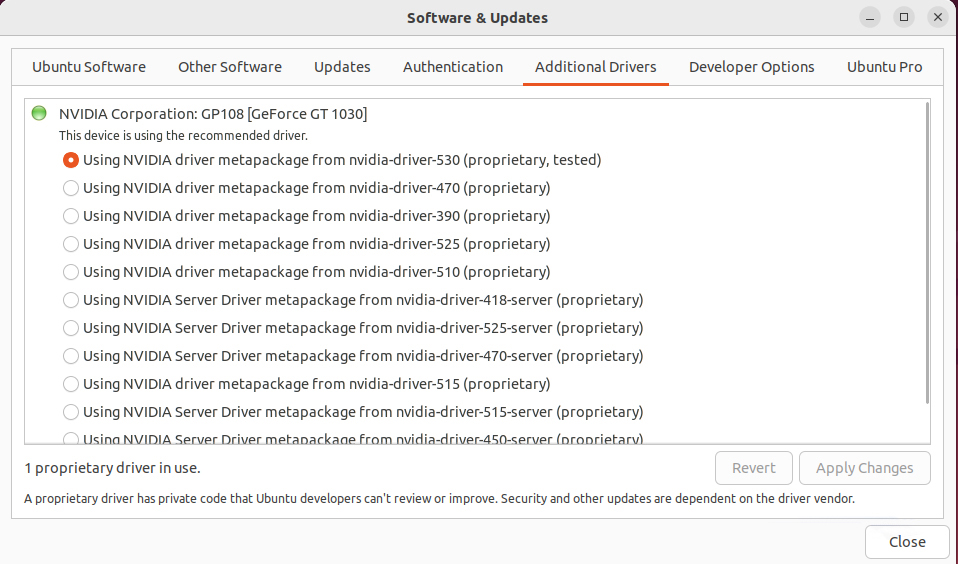
sudo apt install nvidia-driver-530Then, you can go to Setting -> Software & Updates -> Additional Drivers, and you will see the new Driver selector, just like in the screenshot.

After installation, reboot the system:
sudo rebootStep 4: Verify the NVIDIA Driver Installation
After rebooting, check whether the driver was installed correctly by running:
nvidia-smiIf the installation was successful, you will see information about your GPU and the installed NVIDIA driver.
You have now completed the NVIDIA driver installation process on Ubuntu 22.04/24.04. To update drivers in the future, simply repeat the checking and installation steps to get the latest version.