When I first started working with MySQL, managing databases without a user-friendly interface felt overwhelming. If you’ve ever struggled with command-line queries, you’ll understand the challenge. That’s where phpMyAdmin comes in—it provides a clean, graphical interface that makes database administration much easier. In this guide, I’ll walk you through installing phpMyAdmin on Ubuntu 22.04 or 24.04 with Nginx, so you can streamline your workflow effortlessly.
Step 1. Prerequisites for Installing
Before beginning the installation of phpMyadmin on Ubuntu 22.04 or 24.04, make sure that you have already installed PHP, MYSQL, and NGINX.
Step 2. Install & Secure phpMyAdmin
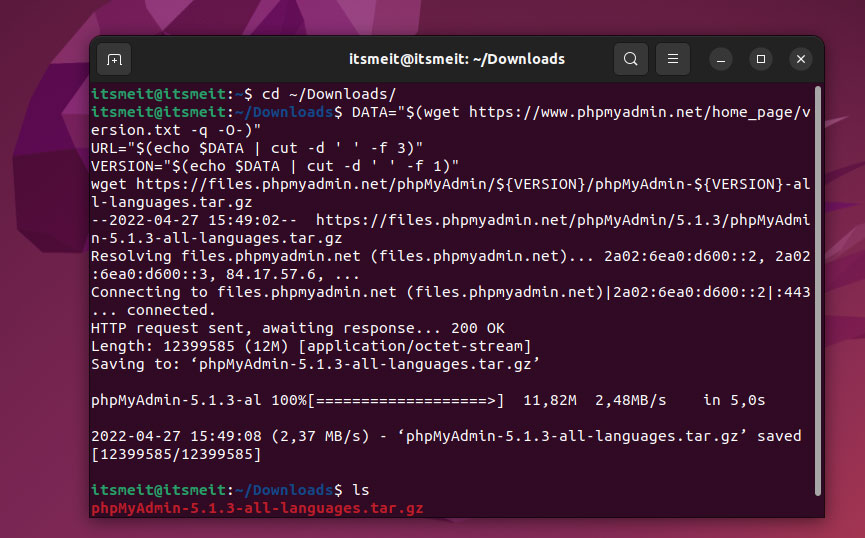
To begin, run the following command to download the phpMyAdmin source code:
phpMyAdminon Multiple language version:
DATA="$(wget https://www.phpmyadmin.net/home_page/version.txt -q -O-)"
URL="$(echo $DATA | awk '{print $3}')"
VERSION="$(echo $DATA | cut -d ' ' -f 1)"
wget https://files.phpmyadmin.net/phpMyAdmin/${VERSION}/phpMyAdmin-${VERSION}-all-languages.tar.gz
phpMyAdminon Only English version:
DATA="$(wget https://www.phpmyadmin.net/home_page/version.txt -q -O-)"
URL="$(echo $DATA | awk '{print $3}')"
VERSION="$(echo $DATA | cut -d ' ' -f 1)"
wget https://files.phpmyadmin.net/phpMyAdmin/${VERSION}/phpMyAdmin-${VERSION}-english.tar.gz
If you prefer to use the English version, you can replace the end line with the following command.
wget https://files.phpmyadmin.net/phpMyAdmin/${VERSION}/phpMyAdmin-${VERSION}-english.tar.gzNote: If the command gives a 404 error, you can go to phpmyadmin.net to download the file and then extract it.
Step 3. Securely set up phpMyAdmin
After the file has been downloaded, extract it and copy or move the files to the “/usr/share/” directory to start install phpMyadmin on Ubuntu 22.04 with Nginx. To do this, run each of the following commands in the terminal.
tar xvf phpMyAdmin-${VERSION}-all-languages.tar.gz
sudo mv phpMyAdmin-*/ /usr/share/phpmyadmin
sudo mkdir -p /usr/share/phpmyadmin/tmp
Note: If you download the English version, the command will be as follows:
tar xvf phpMyAdmin-${VERSION}-english.tar.gz
sudo mv phpMyAdmin-${VERSION}-english /usr/share/phpmyadmin
sudo mkdir -p /usr/share/phpmyadmin/tmp
As you can see from the command above, after we moved the source code to the /usr/share/ directory, I ran the command to create the tmp directory. By default, when installing phpMyAdmin, the tmp directory is not automatically created. Therefore, you need to create this directory manually.

PhpMyAdmin uses Blowfish to encrypt user passwords when logging into the system. When users log in, the password is encrypted using Blowfish and compared to the previously encrypted password in the database. Using Blowfish helps ensure that passwords are secure and unreadable even when attacked by hackers. In the next step of the process of installing phpMyAdmin on Ubuntu or Linux, to use the Blowfish encryption method, you need to provide a value for it.
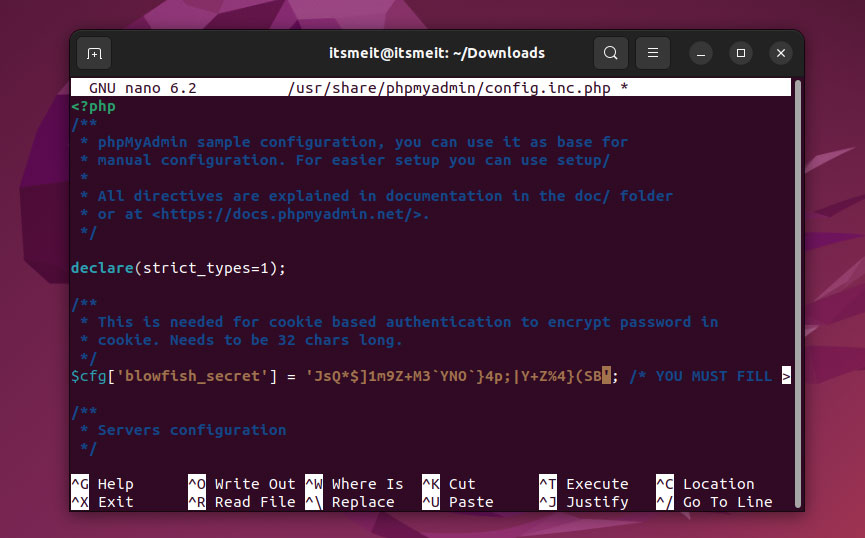
Continuing, you need to copy the config.sample.inc.php file and rename it to config.inc.php, and then open the config.inc.php file and set the Blowfish value.
sudo cp /usr/share/phpmyadmin/config.sample.inc.php /usr/share/phpmyadmin/config.inc.php
sudo nano /usr/share/phpmyadmin/config.inc.php
Scroll down to the line starting with $cfg['blowfish_secret'], and give it any value. You can generate a random value here: tools/blowfish-salt.
$cfg['blowfish_secret'] = 'JsQ*$]1m9Z+M3`YNO`}4p;|Y+Z%4}(SB';
And add the configuration for the temp (tmp) directory at the end.
$cfg['TempDir'] = '/tmp/';After you have entered the correct values as instructed, press Ctrl + X, select Y to save the file. Finally, you need to set permissions for the directories and files so that phpmyadmin can operate properly.
sudo chown -R www-data:www-data /usr/share/phpmyadmin/
sudo find /usr/share/phpmyadmin/ -type d -exec chmod 755 {} ;
sudo find /usr/share/phpmyadmin/ -type f -exec chmod 644 {} ;
Step 4. Config phpMyadmin with Nginx
To configure phpMyAdmin to work with Nginx on Linux/Ubuntu, you will need to create a configuration file for it. Use the following command to add and save the configuration for phpMyAdmin:
sudo nano /etc/nginx/conf.d/phpmyadmin.confserver {
listen 80;
listen [::]:80;
server_name 127.0.0.1;
root /usr/share/nginx/html/;
index index.php index/ index.htm index.nginx-debian/;
location / {
try_files $uri $uri/ =404;
}
error_page 404 /404/;
error_page 500 502 503 504 /50x/;
location = /50x/ {
root /usr/share/nginx/html;
}
location ~ .php$ {
fastcgi_pass unix:/run/php/php8.1-fpm.sock;
fastcgi_param SCRIPT_FILENAME $document_root$fastcgi_script_name;
include fastcgi_params;
include snippets/fastcgi-php.conf;
}
location ~ /.ht {
deny all;
}
location /phpmyadmin {
root /usr/share/;
index index.php;
try_files $uri $uri/ =404;
location ~ ^/phpmyadmin/(doc|sql|setup)/ {
deny all;
}
location ~ /phpmyadmin/(.+.php)$ {
fastcgi_pass unix:/run/php/php8.1-fpm.sock;
fastcgi_param SCRIPT_FILENAME $document_root$fastcgi_script_name;
include fastcgi_params;
include snippets/fastcgi-php.conf;
}
}
}Note:
- I’m using php8.1, so my fastcgi_pass config is /run/php/php8.1-fpm.sock. Therefore, please replace the php version you want to use accordingly.
- This guide is for installation on localhost, so we’ll be using listen 80 for regular HTTP. If you’re installing on a server, you can use SSL with listen 443 and add your own SSL configuration file.
After finishing the installation of phpMyadmin with Nginx on Ubuntu and adding the configuration of the file phpmyadmin.conf, save the file and restart nginx to apply the changes.
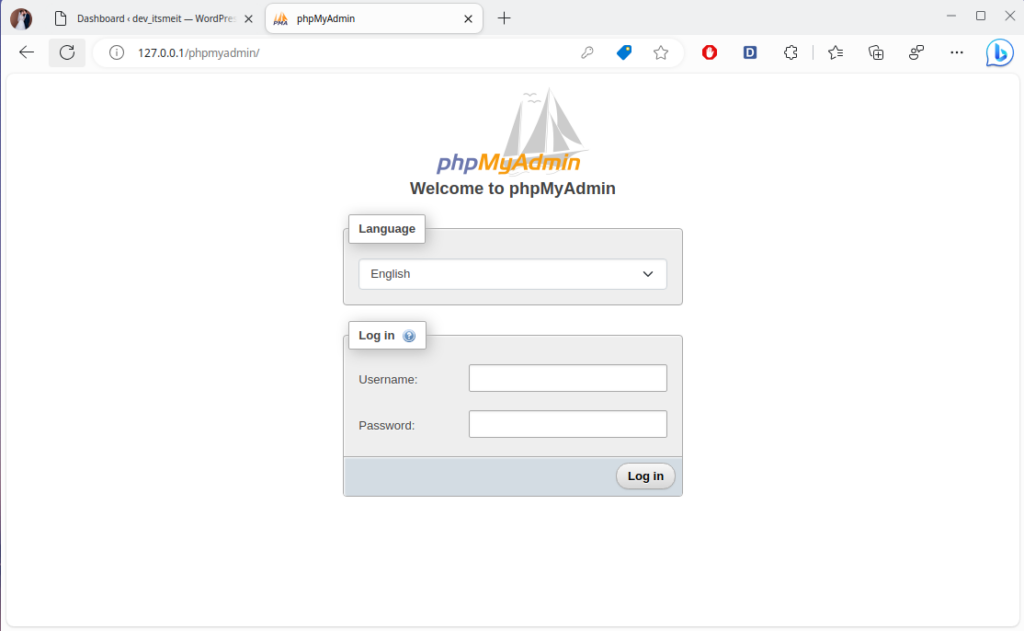
sudo service nginx restartYou’re done! Now, open your web browser and enter the address 127.0.0.1/phpmyadmin or localhost/phpmyadmin to access phpMyAdmin.

Setting up phpMyAdmin with Nginx on Ubuntu may seem complex at first, but once everything is in place, managing databases becomes so much more convenient. Personally, I’ve found that having a web-based interface saves me a lot of time compared to using command-line queries. Hopefully, this guide helps you get started smoothly—happy coding!