As a developer who frequently needs to simulate a production environment, I find using a real domain name (like dev.itsmeit.co, itsmeit.co, etc.) to access a website running on localhost through Nginx to be a very effective technique for both development and testing.
This approach allows you to closely mimic your production setup, thoroughly test domain-specific features (such as cookies, redirects, and SSL), and experiment safely without affecting your live website.
Requirements:
- A computer or laptop running Linux, Ubuntu, or any Linux-based distro
- Nginx installed and running (status: Active (Running))
sudoor root privileges
Step 1: Create a Domain Configuration File
Assume you’re configuring for the domain: youdomain.com. You can use any domain name you want—even a real one. For example, I’ll use dev.itsmeit.co.conf for my case.
Create the config file:
sudo nano /etc/nginx/sites-available/dev.itsmeit.co.confAdd the following content:
server {
    listen 80;
    listen [::]:80;
    root /var/www/vhosts/dev.itsmeit.co/httpdocs;
    index index.html index.php;
    server_name dev.itsmeit.co;

    access_log  /var/log/nginx/dev.itsmeit.co.vhosts.log;
    error_log   /var/log/nginx/dev.itsmeit.co.vhosts.err;

    location / {
        try_files $uri $uri/ /index.php?$args;
    }

    #.....
}
Explanation:
listen: Listens on the default HTTP port 80root: Path to your website’s source codeindex: Default index filesserver_name: Domain to be mapped to localhostaccess_log/error_log: Separate log files for each virtual host
Note: If you have multiple domains, create one config file for each.
Create a symbolic link to enable the site:
sudo ln -s /etc/nginx/sites-available/dev.itsmeit.co.conf /etc/nginx/sites-enabled/Step 2: Map Domain to Localhost IP
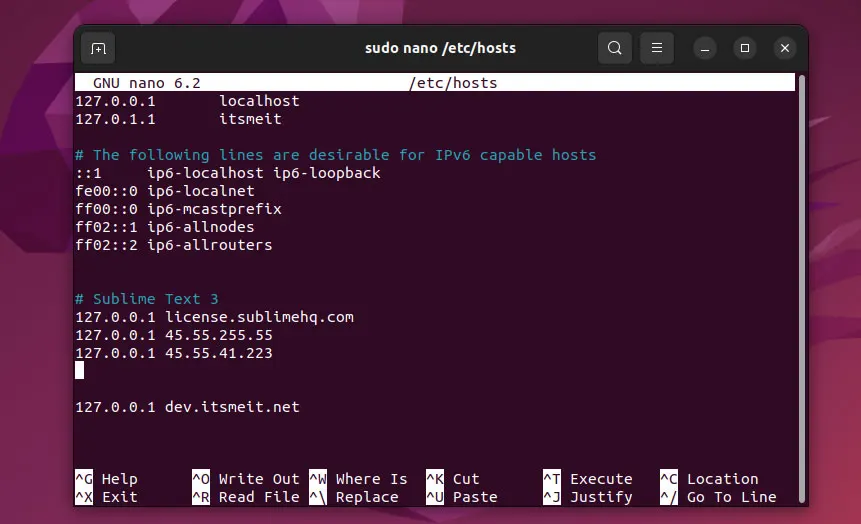
This is a crucial step. Edit the /etc/hosts file:
sudo nano /etc/hostsAdd the line:
127.0.0.1 dev.itsmeit.co

This tells your machine to resolve dev.itsmeit.co to your local machine.
Restart Nginx to apply the new configuration:
sudo service nginx restartIf you encounter errors, run:
sudo nginx -tto diagnose issues. Check the error logs at:
/var/log/nginx/dev.itsmeit.co.vhosts.err
for further debugging.
Open your browser and visit the domain you configured, for example: https://itsmeit.co. If everything is set up correctly, your local website should load.
If the domain doesn’t resolve to localhost, try clearing your browser cache and cookies, or switch to another browser.
Enabling HTTPS on Localhost (Optional)
To test HTTPS on localhost, you can either generate a self-signed certificate or use a tool like mkcert. Once generated, add an additional server block for port 443 to your domain configuration file.
[See how to create a localhost SSL certificate using mkcert].
server {
    listen 443 ssl;
    server_name dev.itsmeit.co;

    ssl_certificate /path/to/dev.itsmeit.co.pem;
    ssl_certificate_key /path/to/dev.itsmeit.co-key.pem;
    ...
}
Tip: If you already have a real domain running on a server with Let’s Encrypt or Cloudflare, you can download the corresponding .pem and .key files and use them here. This will allow your localhost to support HTTPS just like your production environment.
With this setup, you can use a custom domain directly on your localhost as if you’re working in a real environment—making development, testing, and debugging more intuitive and productive.