Most HP desktops and laptops with Intel or AMD CPUs have Virtualization Technology (VT) disabled by default in the BIOS. This hardware feature is a total game-changer for running software like WSL 2, Docker, or emulators that need virtualization. Without VT enabled, these apps might not launch, or they’ll run slower than molasses.
To turn on VT, you gotta dive into the BIOS (or UEFI firmware) and flip the virtualization switch for your CPU. It’s not rocket science, but the steps can vary slightly depending on your HP model and BIOS version.
Get into the BIOS on an HP Machine
Two ways to access the BIOS, depending on your situation:
Option 1: When powering on, mash the Esc key until the Startup Menu pops up → hit F10 to enter the BIOS.
Option 2: If you’re already in Windows:
Go to Settings > Update & Security > Recovery > Advanced startup > Restart now
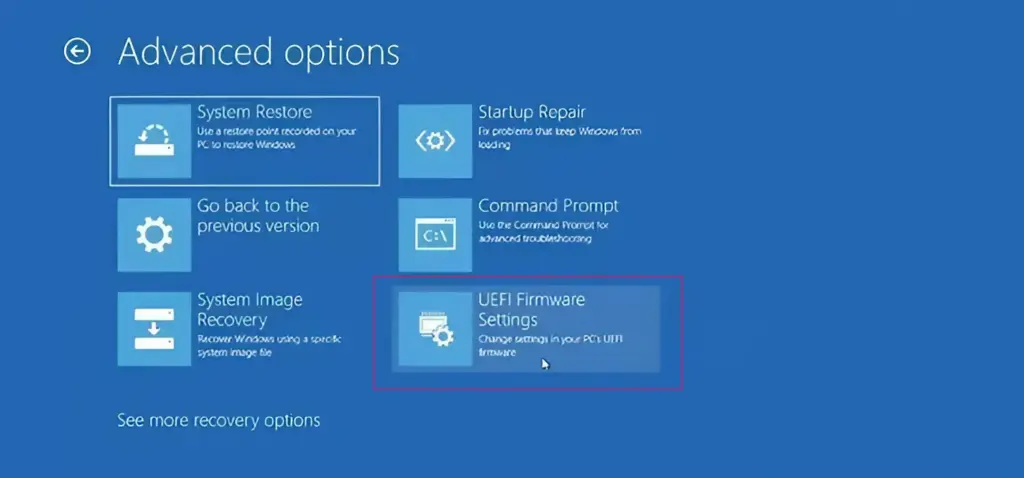
→ Pick Troubleshoot > Advanced options > UEFI Firmware Settings > Restart
Access BIOS on HP
When you power on and see the HP logo, hammer the Esc key. The Startup Menu will show up; then press F10 to jump into the BIOS Setup.
If you’re in Windows:
Open Settings > Update & Security > Recovery
Under Advanced startup, click Restart now
Choose Troubleshoot > Advanced options > UEFI Firmware Settings > Restart
Enable VT in BIOS/UEFI
Once you’re in the BIOS, the interface might differ depending on your HP model (Pavilion, Envy, Omen, EliteBook, ProBook) and BIOS version. Here’s the lowdown on enabling VT:
Enable Virtualization in BIOS for Intel CPUs
NOTE: The layout of BIOS settings may vary depending on your motherboard, chipset, computer model, and OEM.
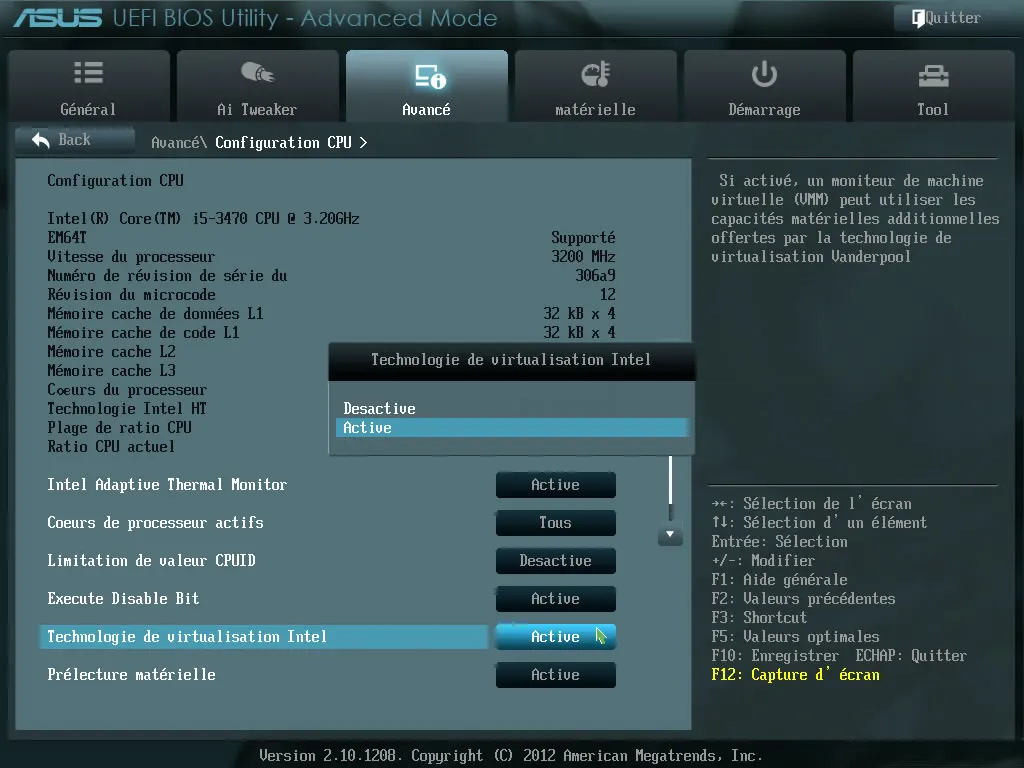
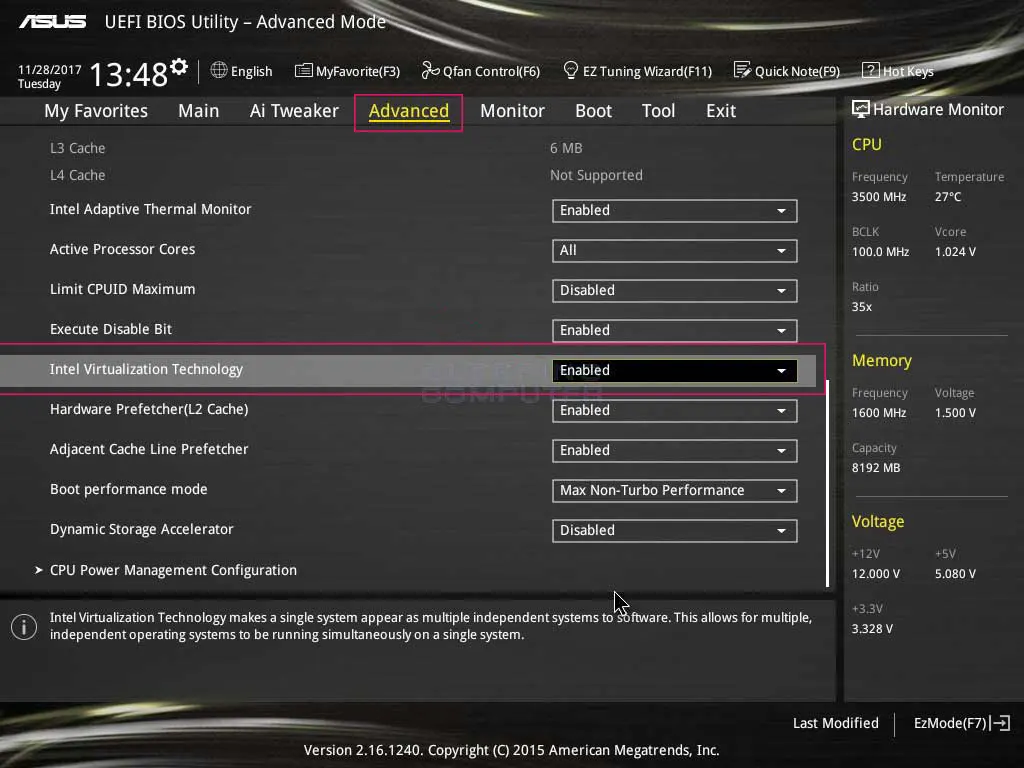
- Once you’re in the BIOS settings, press F7 or click the Advanced Mode button, as shown below.
- Now, open the Advanced tab.
- Here, you’ll see various options. Select CPU Configuration.
- To enable virtualization, click on Disabled next to Intel Virtualization Technology and change it to Enabled.
- Finally, click Exit and choose Save changes & reset.
NOTE: The option names might differ slightly depending on your PC model, but in any case, make sure to save before exiting.
Enable Virtualization in BIOS for AMD CPUs
NOTE: The layout of BIOS settings may vary depending on your motherboard, chipset, computer model, and OEM.
- In the BIOS settings, press F7 or click on Advanced Mode, as shown below.
- Now, navigate to the Advanced tab.
- Find and select CPU Configuration.
- To enable virtualization, open the drop-down menu next to SVM Mode and select Enabled.
- Next, click Exit.
- You will now be prompted to save your changes.
Click OK to apply the changes you’ve made to the BIOS settings.
Heads-up:
On some HP models, the VT setting might be chilling in Security > System Security.
BIOS layouts vary across HP lines (e.g., Pavilion vs. EliteBook). If you’re stumped, check your model’s manual or hit up HP’s support site here.
Verify VT Status in Windows
After rebooting:
- Open Task Manager with Windows + X.
- Go to the Performance tab, select CPU.
- Check the Virtualization line — if it says Enabled, you’re golden.