WSL2, launched in 2020, is a complete upgrade over WSL1 — faster, more powerful, and much closer to a real Linux experience. Installation can be done either via command line or through the Microsoft Store, depending on whether you prefer simplicity or more control.
System Requirements for WSL2 Installation
Step 1. Check Windows Version
– Requirement: Windows 10 version 2004 or later, with build number 19041 or higher.
– Check: Open CMD, type winver, and press Enter — a window will show the version and build. Alternatively, search for “About your PC” in the Start menu.
Note: If your build is too low, WSL2 will not work. Many users follow all the steps correctly but still face issues because their Windows version is outdated — often resulting in errors like 0x800701bc or failure to launch the Linux kernel.
→ Update Windows: Go to Settings > Update & Security > Windows Update if your version does not meet the requirement.
Step 2. Enable Required Windows Features for WSL2
– Press Win + R, type optionalfeatures.exe, and press Enter.
– Check the following two features:
✅ Windows Subsystem for Linux
✅ Virtual Machine Platform
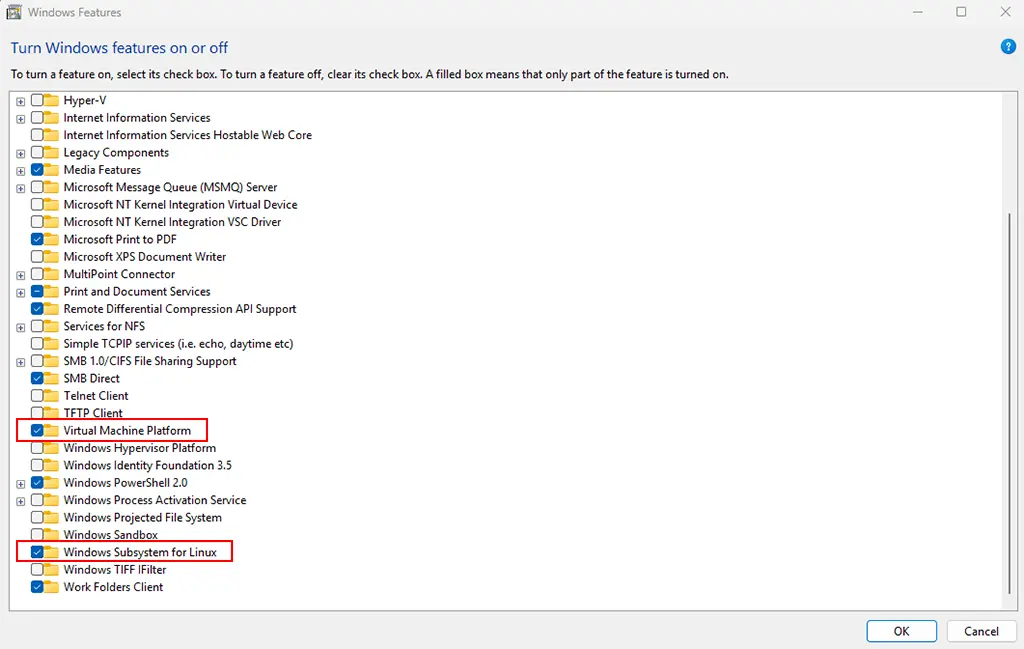
→ Click OK and restart your computer when prompted.
Step 3. Virtualization Must Be Enabled in BIOS
– This feature is usually labeled as VT-x (Intel) or AMD-V.
– If disabled, WSL2 will not function even if everything else is properly installed.
Refer to BIOS guides by manufacturer:
Step 4. Install the Linux Kernel Update Package
This package is not installed automatically.
→ Download from Microsoft: https://aka.ms/wsl2kernel
(This will download wsl_update_x64.msi. Run and install it like a normal application.)
If not installed, you’ll encounter error 0x800701bc.
Step 5. Set WSL2 as the Default Version
Open PowerShell as Administrator and run:
wsl --set-default-version 2Install Ubuntu from the Microsoft Store
Now you’re ready to install Ubuntu:
- Open the Microsoft Store.
- Search for Ubuntu (you can also choose another distro like Debian or Kali Linux).
- Click Install and wait for the download to finish.
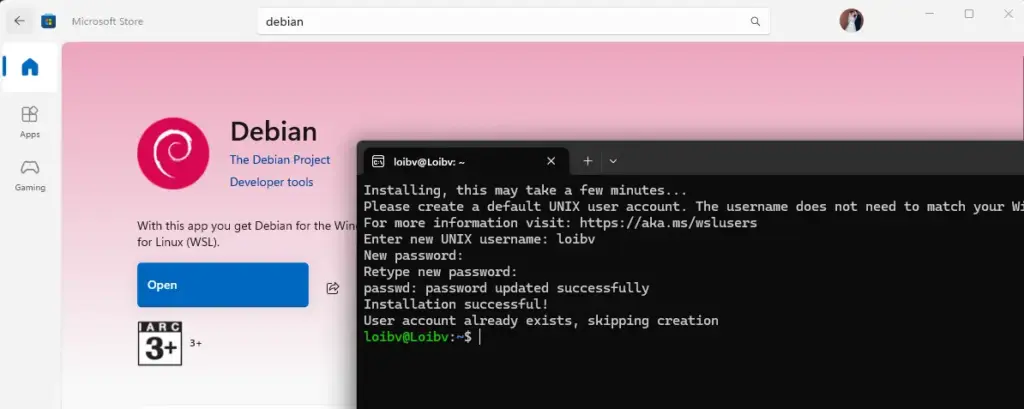
Once installed, open it from the Start menu and follow the setup instructions.
Common Errors and How to Fix Them
- Error
0x800701bc: Missing WSL2 kernel. Download and install it from https://aka.ms/wsl2kernel. - Error
0x80370114: Virtualization is disabled in BIOS, or Virtual Machine Platform has not been enabled. - Distro runs under WSL1 after installation:
Run the following:wsl --set-version <distro> 2
Also make sure the default version is set to 2:wsl --set-default-version 2 - WSL becomes unusually slow after sleep/restart:
This might be caused by network drivers or conflicts with antivirus software. Try updating Windows or temporarily disabling antivirus to test.
WSL2 is a powerful tool for developers, system engineers, and anyone who wants a flexible Linux environment inside Windows. On Windows 10, installation isn’t entirely “plug & play” — you need to meet system requirements, enable the correct features, install the kernel update, and choose the right installation method. Doing it right from the start ensures WSL2 runs smoothly, with no glitches, and is robust enough for long-term use.