While Windows Defender is an important security feature, there are valid reasons to disable it. This guide will walk you through two methods to disable Windows Defender on Windows 10 and 11, offering both temporary and permanent solutions.
Method 1: Temporary Disable Using Windows Settings
This method is quick and easy, ideal for temporarily disabling Windows Defender.
- Open Settings: Click the Start button and select the gear icon (Settings).
- Go to Windows Security: Click on “Update & Security” and then select “Windows Security” from the left menu.
- Disable Real-time Protection: Under “Virus & threat protection,” click “Virus & threat protection settings.” Toggle the “Real-time protection” switch to “Off.”
A pop-up window will appear asking for confirmation. Click “Yes” to temporarily disable Windows Defender Antivirus.

Remember: Real-time protection will automatically re-enable after a short period or after restarting your computer.
Method 2: Permanent Disable Using Defender Control
Defender Control is a free, third-party tool designed to permanently disable Windows Defender. This method is recommended for advanced users who are comfortable modifying system settings.
Defender Control Features:
- Turn Windows Defender on/off with a single click.
- Simple and easy-to-use interface.
- Free and open-source.
- Supports all versions of Windows 10 and 11.
Steps to Permanently Disable Windows Defender:
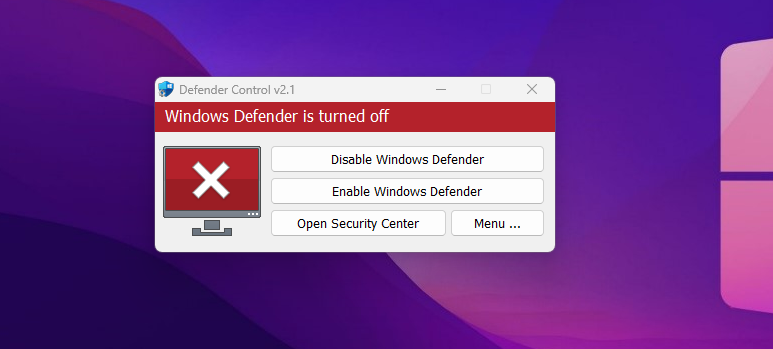
The interface is straightforward, allowing you to toggle this feature on or off at any time.
– Step 1: Download and extract the Defender Control tool [link].
– Step 2: Open the “dControl.exe” file.
– Step 3: Click the “Disable Windows Defender” button. Upon successful completion, the button will turn red, as shown in the screenshot below.
Disabling Windows Defender Antivirus can be beneficial in certain situations. However, keep in mind that this will make your computer more vulnerable to online threats. Ensure you have an alternative security solution in place to maintain the safety of your system.