Windows 11 keeps itself updated with automatic downloads and installations to ensure your system is secure and stable. But those surprise updates can be a real pain, interrupting your work. Want to take back control of your update schedule? Here’s how you can disable automatic updates on Windows 11, whether you want a temporary pause or a permanent solution.
How to Disable Windows 11 Updates for Good: 6 Effective Ways
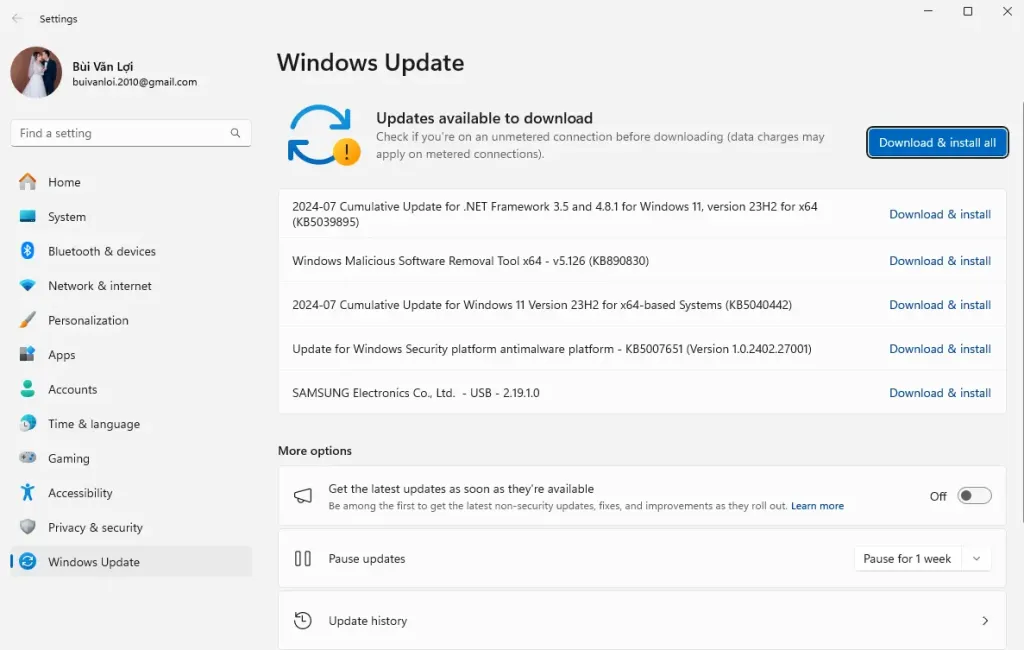
Method 1: Temporarily Pause Windows 11 Updates
This is the easiest way to postpone updates for a short period.
- Open the Settings app (press Windows + I).
- Select Windows Update.
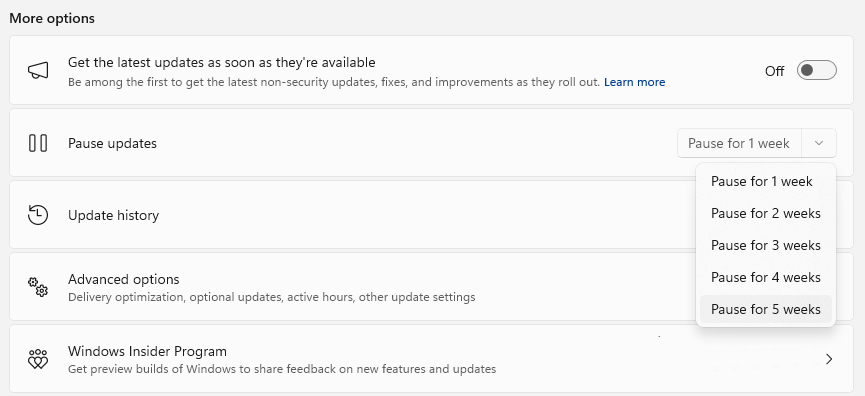
- Click the Pause for 1 week button or choose a longer pause period from the drop-down menu.
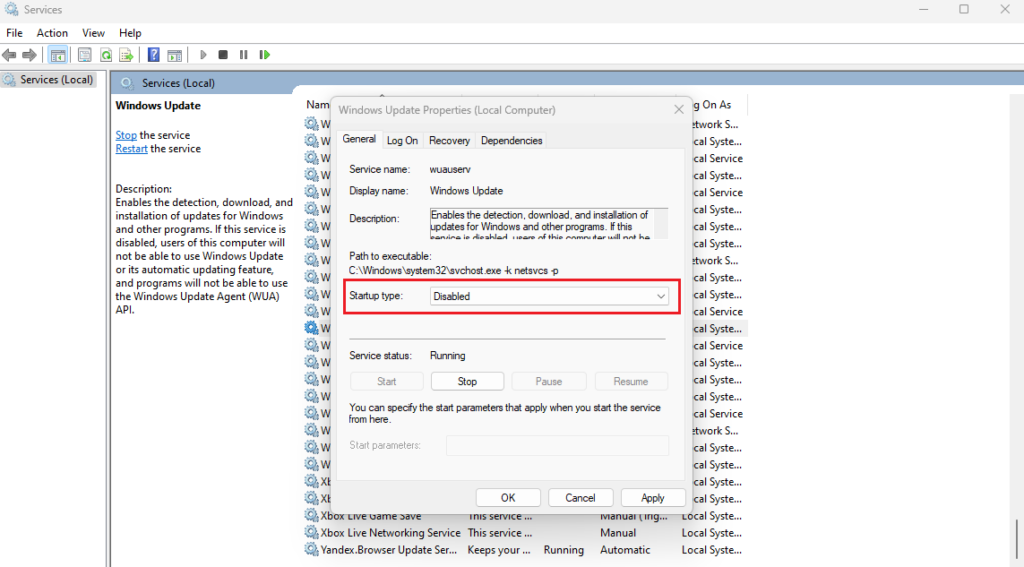
Method 2: Stop Automatic Updates Using Windows Services:
- Press Windows + R, type
services.msc, and press Enter. - Locate the Windows Update service, right-click it, and select Properties.
- In the General tab, under Startup type, select Disabled.
- Click Apply, then OK.
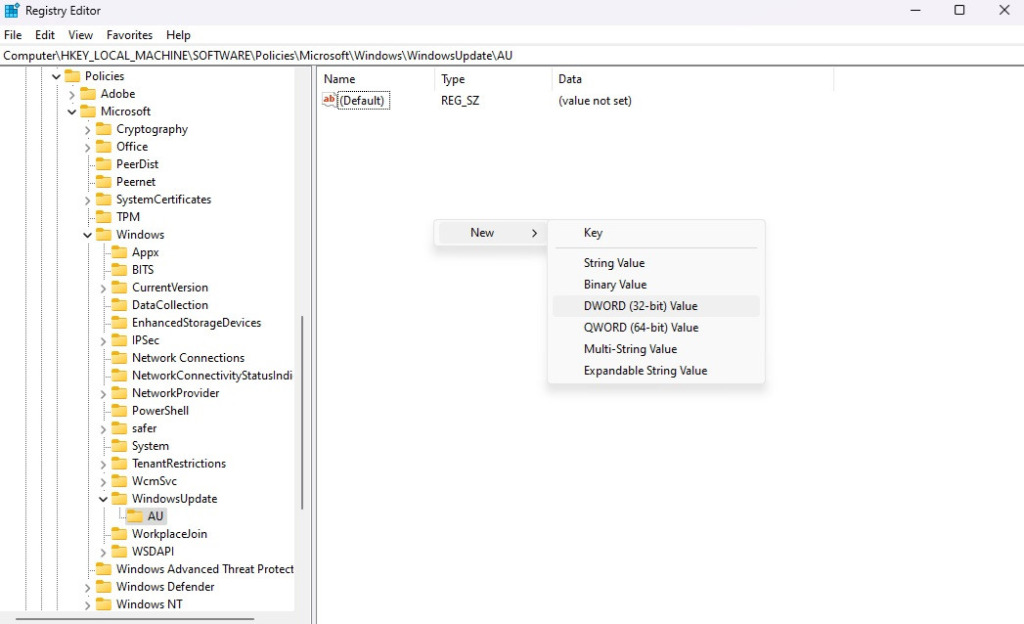
Method 3: Disable Updates Using Registry Editor
Caution: Modifying the Registry can cause system errors if not done correctly. Back up the Registry before proceeding.
- Press Windows + R, type
regedit, and press Enter. - Navigate to: HKEY_LOCAL_MACHINESOFTWAREPoliciesMicrosoftWindowsWindowsUpdateAU
- Right-click and select New -> DWORD (32-bit) Value.
- Name it NoAutoUpdate and set the value to 1.
- Restart your computer.
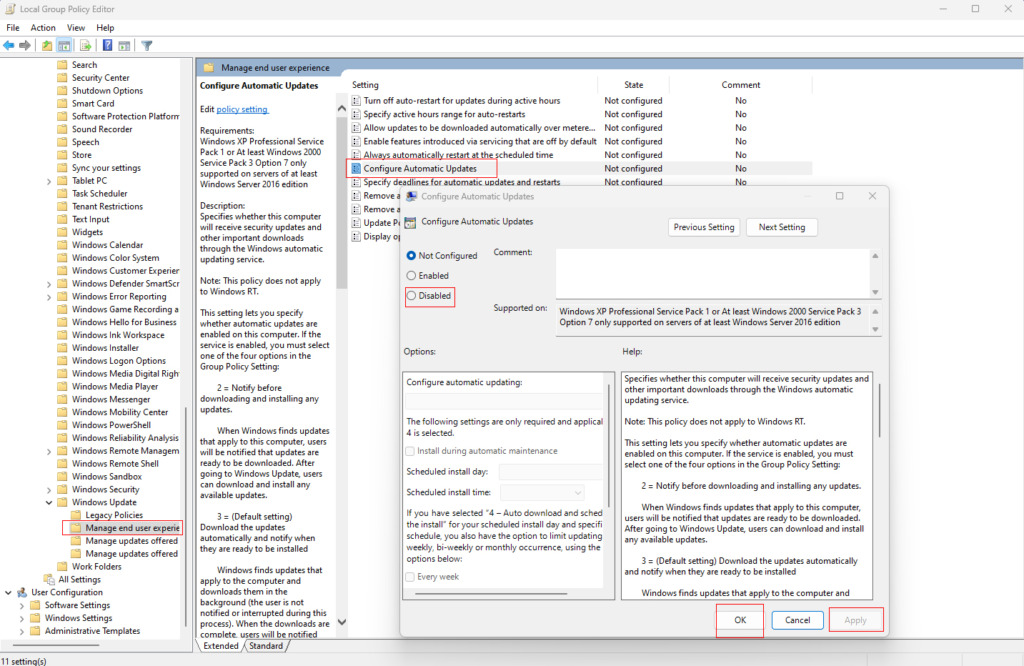
Method 4: Disable Automatic Updates Using Group Policy Editor:
This method is only available on Windows 11 Pro, Education, and Enterprise editions.
- Press Windows+ R, type
gpedit.msc, and press Enter. - Navigate to: Computer Configuration > Administrative Templates > Windows Components > Windows Update > Manage end user experience.
- Double-click on Configure Automatic Updates, select Disabled, and press OK
Method 5: Stop Updates by Setting a Metered Connection
- Connect to a Wi-Fi network.
- Open Settings > Network & internet > Wi-Fi.
- Select the connected Wi-Fi network and turn on the Metered connection option.
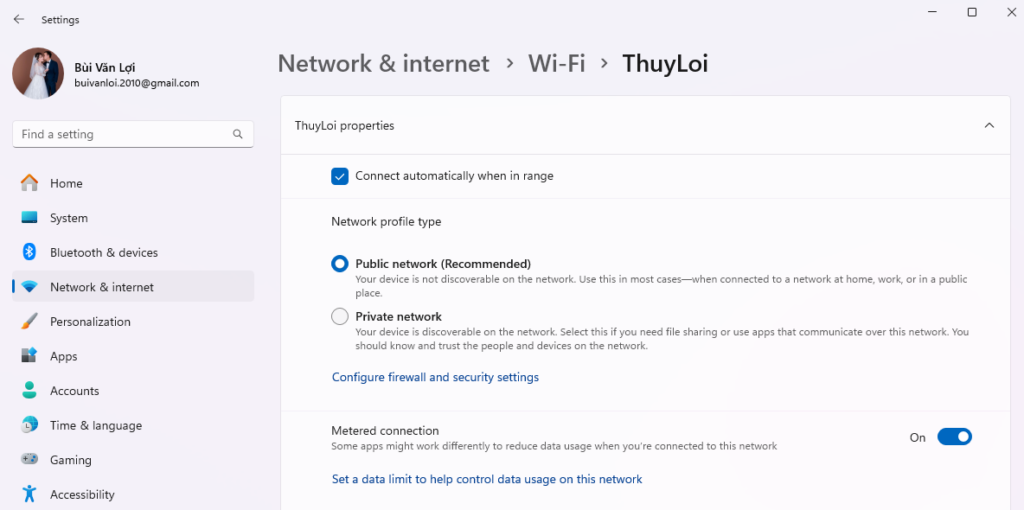
Note: This method only works with Wi-Fi networks and may not block all updates.
Method 6: Permanently Disable Windows 11 Updates Using Tool
Windows Update Blocker is a simple tool that allows you to easily enable/disable Windows updates permanently and protect service settings from unwanted changes.
Steps:
Step 1: Download and extract the Windows Update Blocker tool [link].
Step 2: Run Windows Update Blocker: Open the “Wub_x64.exe” file.
Step 3: Disable updates: If the Windows Update service is enabled (indicated by a blue shield icon), select “Disable Service” and click “Apply Now,” as shown in the screenshot below.

Note when using the software:
You should save this tool so you can re-enable updates in the future.
While disabling automatic updates on Windows 11 may offer some benefits, it’s important to remember that updates often contain crucial bug fixes, performance improvements, and security enhancements for your system. Carefully consider before deciding to completely disable this feature, and make sure to regularly check for and install important updates manually to keep your computer protected and running at its best.