SSH (Secure Shell) is a powerful and secure network protocol used to establish a secure and encrypted connection between a personal computer and a remote server. On Windows 10 and Windows 11, you can use SSH keys to increase security and facilitate the process of connecting to the server and using SSH services. In this article, we will learn how to generate SSH key Windows 10, 11 as well as how to use SSH key on Windows to connect to Linux/VPS server.
Step 1: Download & install Putty Tool
Download and install PuTTY from the official putty.org website if you haven’t already.

Click Download PuTTY, you will be redirected to the download page, choose the version suitable for your Windows operating system.
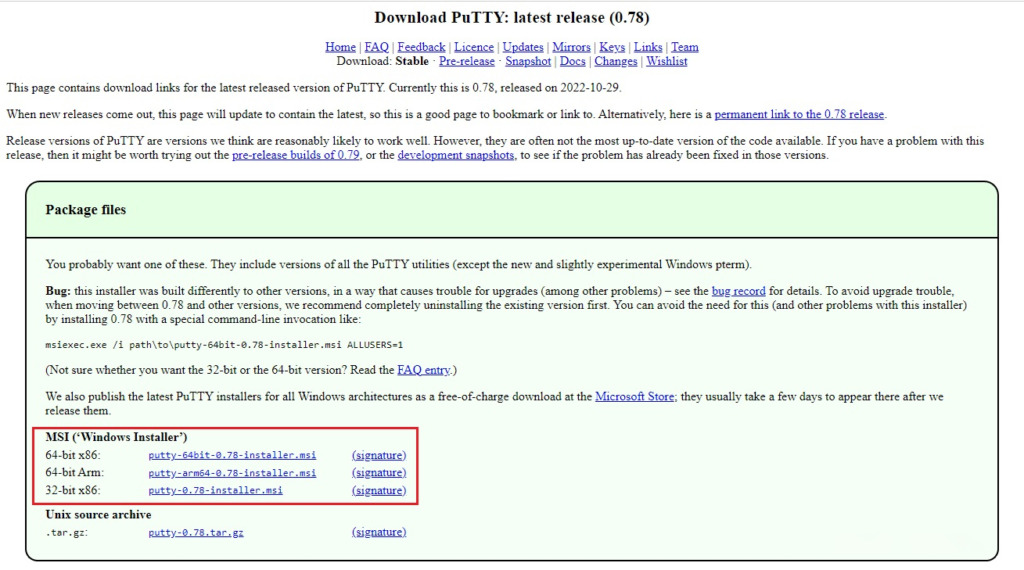
After successful download, click File putty-64bit-xxx-installer.msi and click Next until Finish.
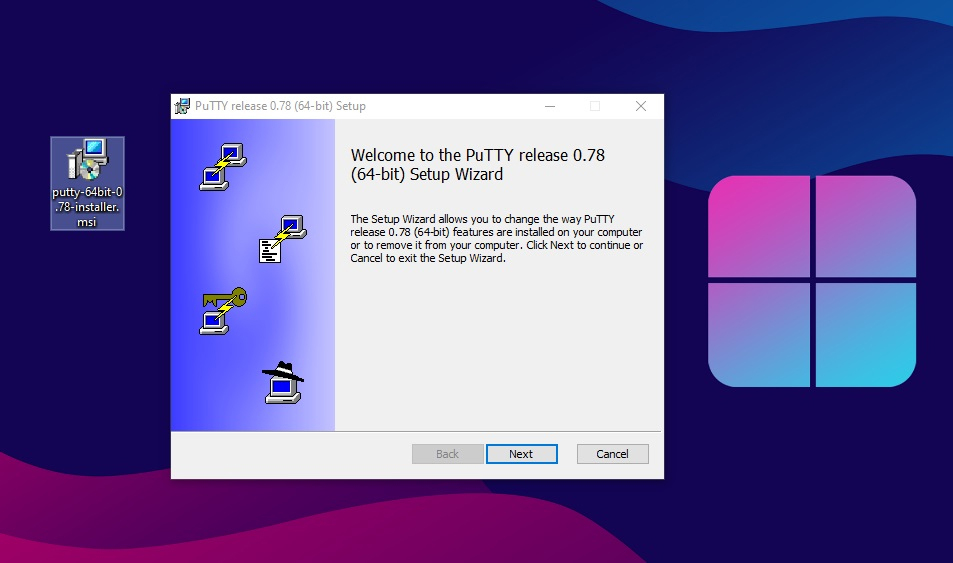
Step 2: Use PuTTY to generate SSH key
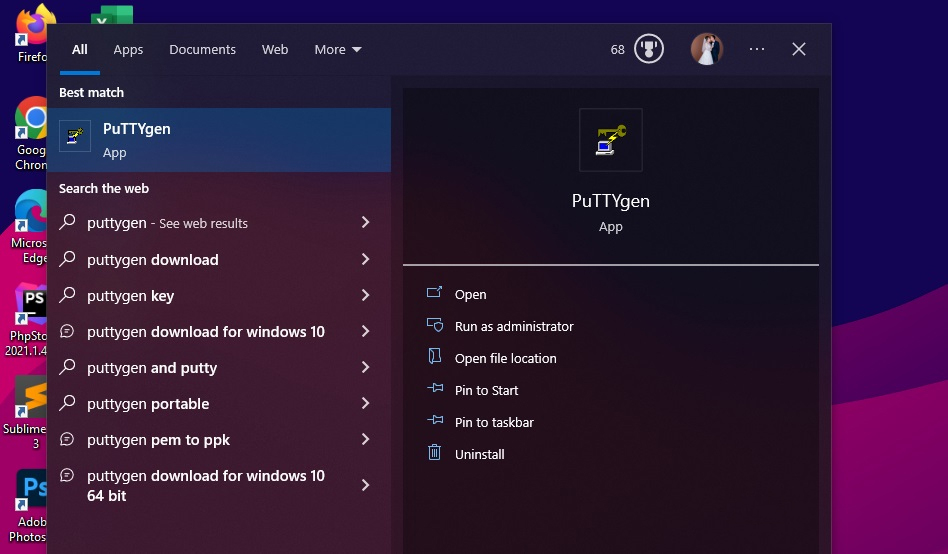
To use SSH key on Windows 11 or Windows 10, you need to first generate a public key and a private key. Look for “PuTTYgen” in the search bar to open the app. Note that it is “PuTTYgen” not “PuTTY”.
When the PuTTY Key Generator interface is opened, leave the default or choose as shown below and click “Generate” to generate SSH Key Windows. The file creation process will need some time, please wait patiently. wait.
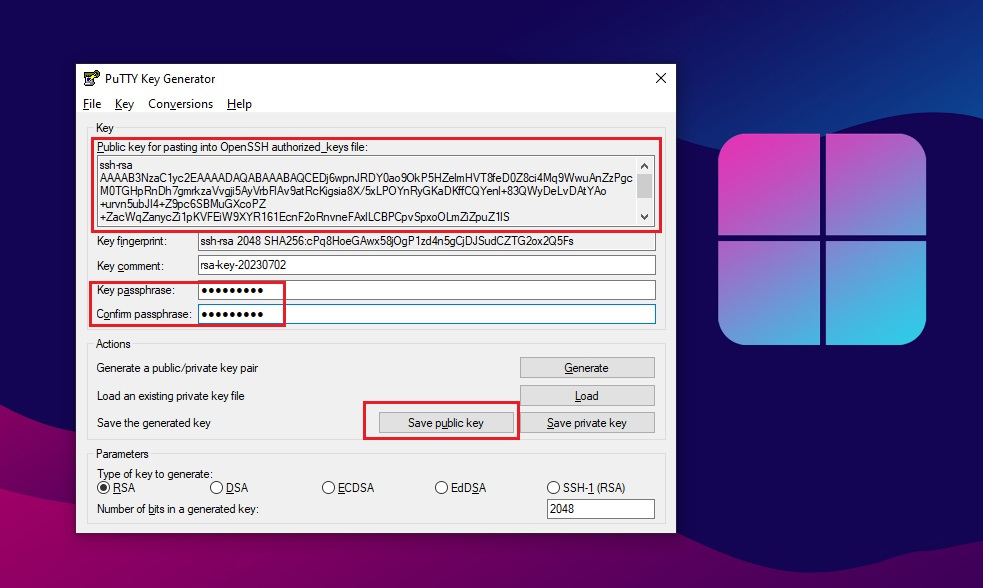
Continue to enter the password twice in the “Key passphrase” and “Confirm passphrase” fields to create a password for the private key, then click the “Save private key” button. Name the file and save it. For example, I have named the private key itsmeit.ppk to use SSH key on Windows.
Continue to copy the public key code (in the red box) and save it to notepad or word then go to step 3 to configure SSH Key authentication on the server.
Step 3: Configure SSH Public Key
Windows SSH key generation is successful, now need to copy the public key (public key) to the server. The public key will be used to configure the server to accept connections when you use SSH Key to log in to the VPS server.
To copy your SSH key to a server like Linux debian or Ubuntu, on a Windows computer open cmd and log in to the server using SSH, you need to login as root user or user with sudo privileges. In this tutorial We will use root.
ssh root@{IP-ADDRESS}In it, replace it {IP-ADDRESS}with the server’s IP address. You will be prompted for the password of the user on the server to authenticate access.
After you have successfully connected you should make sure that the ~/.ssh directory exists. If not, create it by running the command below:
mkdir -p ~/.sshNext, you need to create the authorized_keys file located in the .ssh folder and paste the key in. Then press Ctrl + X , enter the letter Y to save (on the server interface cmd (terminal) right-click to paste the public key).
nano ~/.ssh/authorized_keys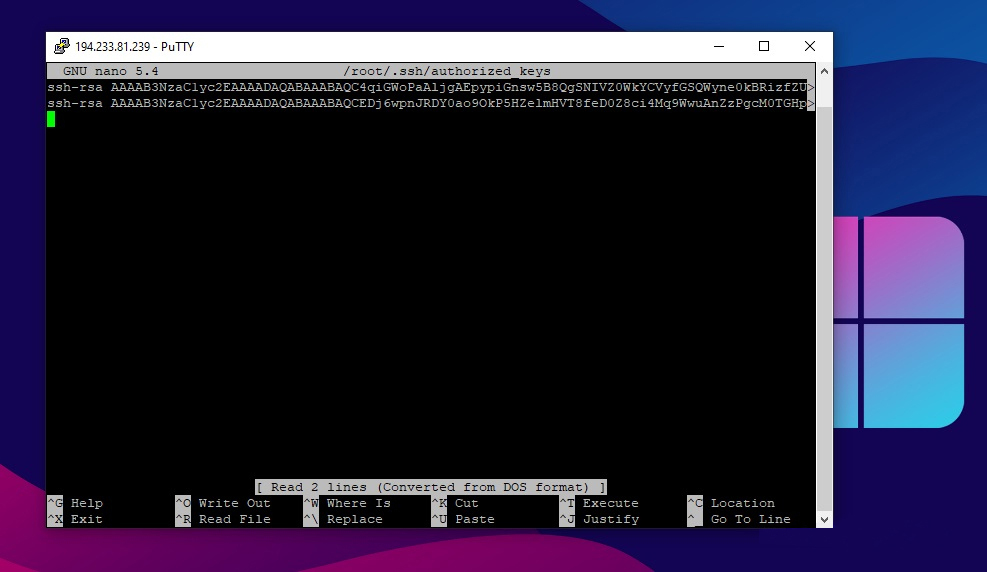
Continue to assign permissions to the directory .ssh:
chmod -R go= ~/.sshFinish configuring the SSH Key on the server, restart SSH for the changes to take effect and start use SSH key on Windows to log in to the server (VPS):
sudo systemctl restart sshStep 4: Use Putty and SSH Key to login to the server
Once you have completed the steps of creating and configuring the SSH key on your server. You should now be able to use PuTTY to log into the server. Find “PuTTY” in the Windows search bar and open the application and perform the following configuration steps:
- Session: Enter the IP address in the Host Name (or IP address) line.
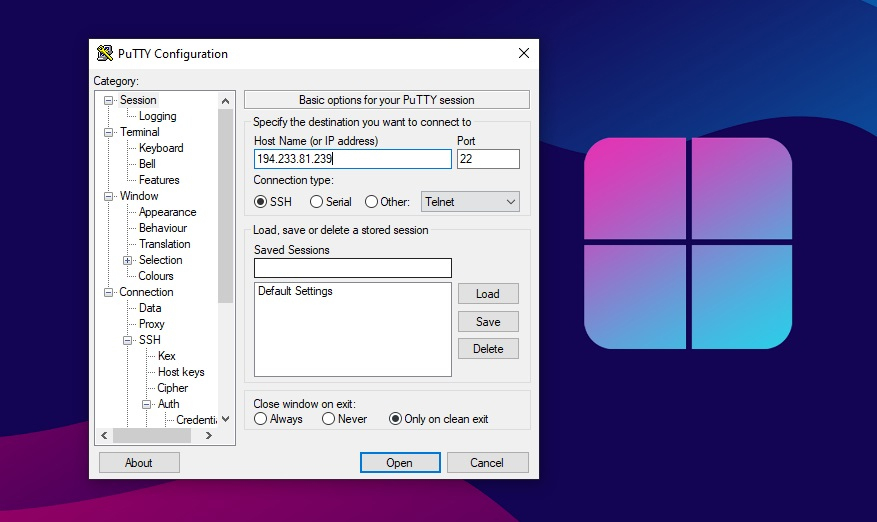
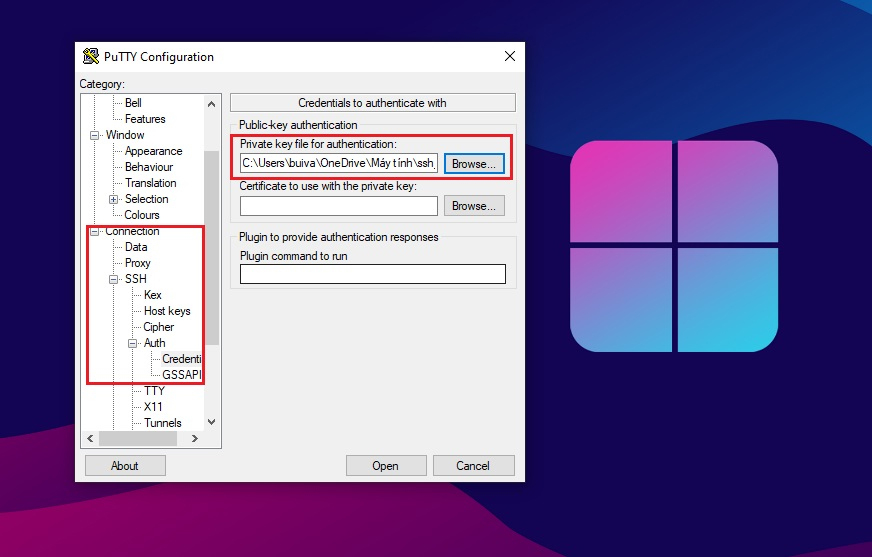
- Connection: Click SSH -> SSH -> Auth -> Credentials, then click “Browser”. Find the ppk file you saved earlier. Continue to click “Open” to open SSH and connect to the server.
- login as: enter user root or user with sudo privileges.
- Passphrase for key “rsa-key-xxxx”: Enter the password of the private key.
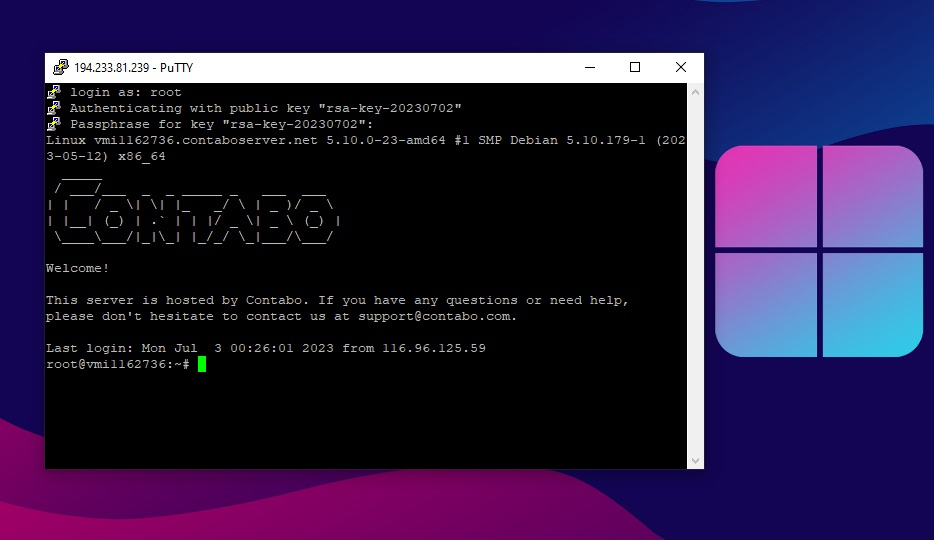
If you followed your steps correctly, then you have used SSH key on Windows to successfully connect to your server via SSH key like the screenshot above.
Step 5: Disable SSH password login authentication
Once you have successfully connected to the server via SSH Key, of course, you will no longer need the old login method. So the next step is to disable password authentication. That means only allowing login to the server via ssh key. This helps you keep your server more secure. Even if the password is revealed, without the private key, other people won’t be able to log into your system..
Open the file sshd_config on your server:
sudo nano /etc/ssh/sshd_configSearch for the PasswordAuthentication line , uncomment it (remove the leading #) and set the value to “ no“. Save and close the file by pressing CTRL + X, enter the text key Yto confirm -> Enter. Finally, restart SSH for the changes to take effect.
sudo systemctl restart sshThat’s all the steps to generate and use SSH key on Windows 10, 11, thereby helping your server to be more secure and not need to worry about the ability to detect SSH passwords. Please note that you should back up the public_key and private_key file to a safe place. If you lose this SSH key you will no longer be able to log into your server.