While installing Ubuntu alongside Windows can be a fun experiment, there are times when you might want to remove it for various reasons. If you’re looking to remove Ubuntu from a dual-boot system on a Windows 10/11 Legacy (MBR) computer, don’t worry, this article will provide you with a step-by-step guide.
Uninstall Ubuntu Dual Boot on Your Windows PC
Before we dive in, just a heads-up: removing Ubuntu from a dual-boot setup means restoring the Windows boot menu (removing GRUB) and deleting Ubuntu’s partitions. This will erase everything on those partitions, so be sure to back up any important files before you start!
Step 1. Restore Windows Boot Loader
To restore the Windows boot loader on your Legacy (MBR) system, we’ll use a tool called Bootice. Bootice is a free utility that allows you to manage boot entries and partition tables.
- Download the Bootice archive from [link] and extract the files to a convenient location on your computer.
- Open the extracted folder and run the
BOOTICE*.EXEfile.
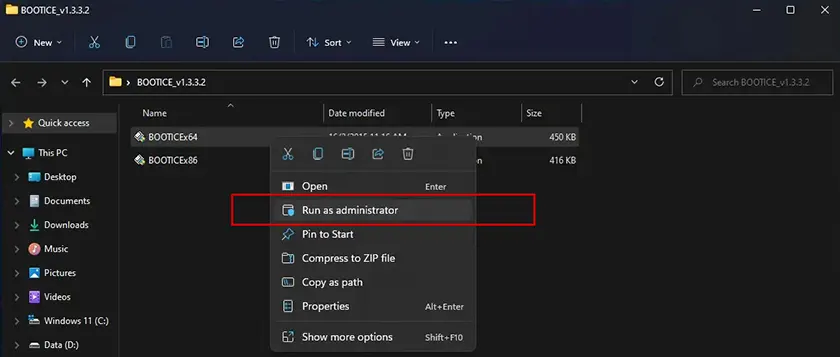
In the “Physical disk” tab, choose the hard drive where both Windows and Ubuntu are installed from the “Destination Disk” dropdown menu. Then click the “Process MBR” button (See the screenshot below.).

Continue select “Windows NT 5.x/6.x MBR” and click “Install/Config”.
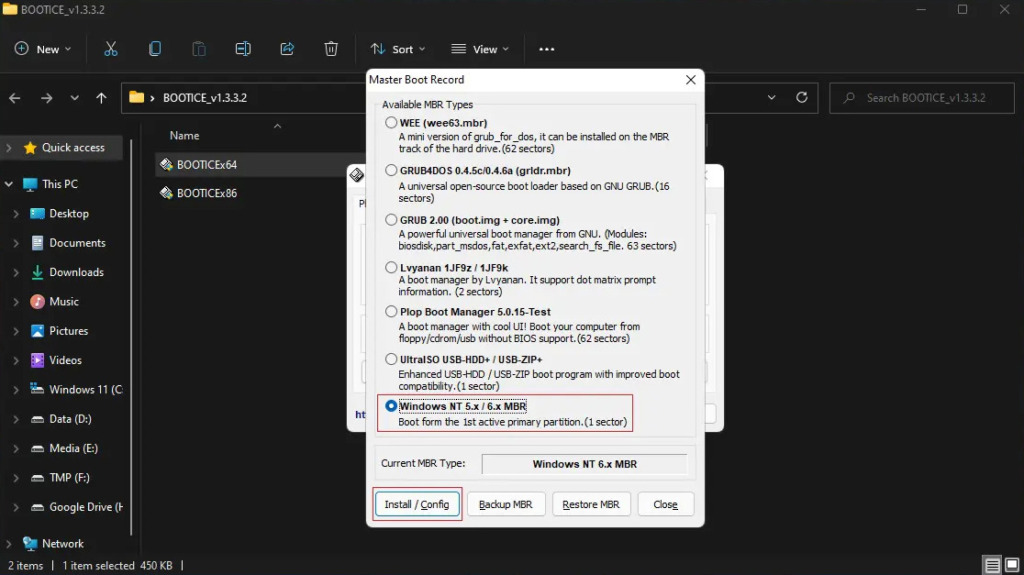
Next, choose “Windows NT 6.x MBR” to reinitialize the MBR with the Windows boot loader.
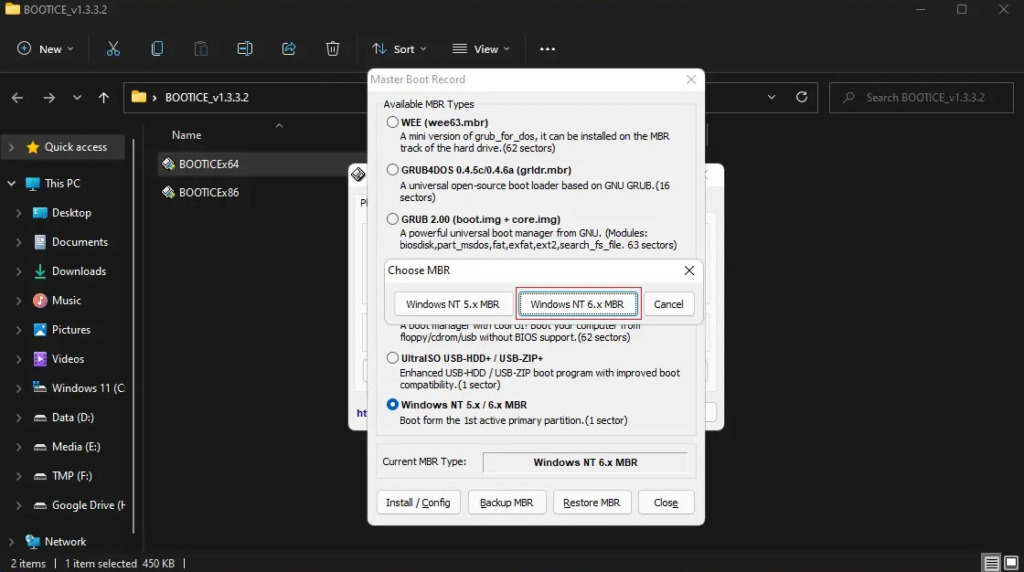
Final, Click “OK” to confirm the changes.
Step 2. Delete Ubuntu boot menu and Ubuntu partition
To remove the boot menu (GRUB menu) and Ubuntu partitions, follow steps 2 and 3 in this article: Remove Ubuntu and Free Up Disk Space on Windows.
It is important to follow each step accurately to ensure the successful removal of Ubuntu. If you have any questions or ideas, feel free to leave a comment below.