The split-screen feature on laptops significantly boosts productivity by allowing users to seamlessly multitask on a single screen. In this article, we will share 4 methods for using split screen on Windows 10 and 11.
How to Activate Split Screen in Windows 10/11
Step 1: Enabling Multitasking Mode (Required)
Windows Multitasking lets you juggle multiple apps or windows effortlessly. To split your screen and work on different tasks simultaneously, you’ll need to turn on this feature.
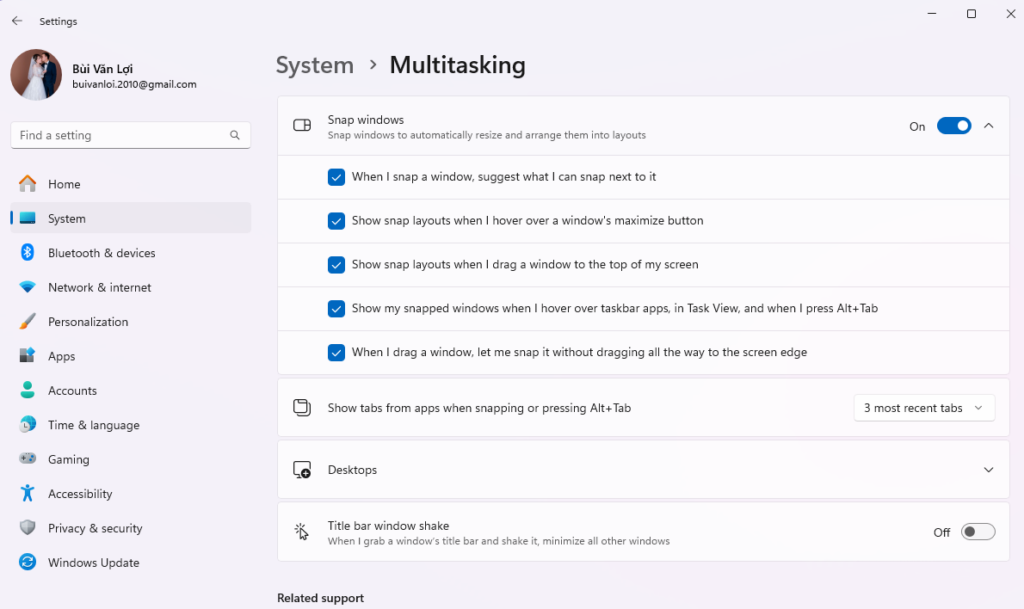
1: First, go to Settings. Then, select System.
2: Choose Multitasking, then turn on Snap windows.
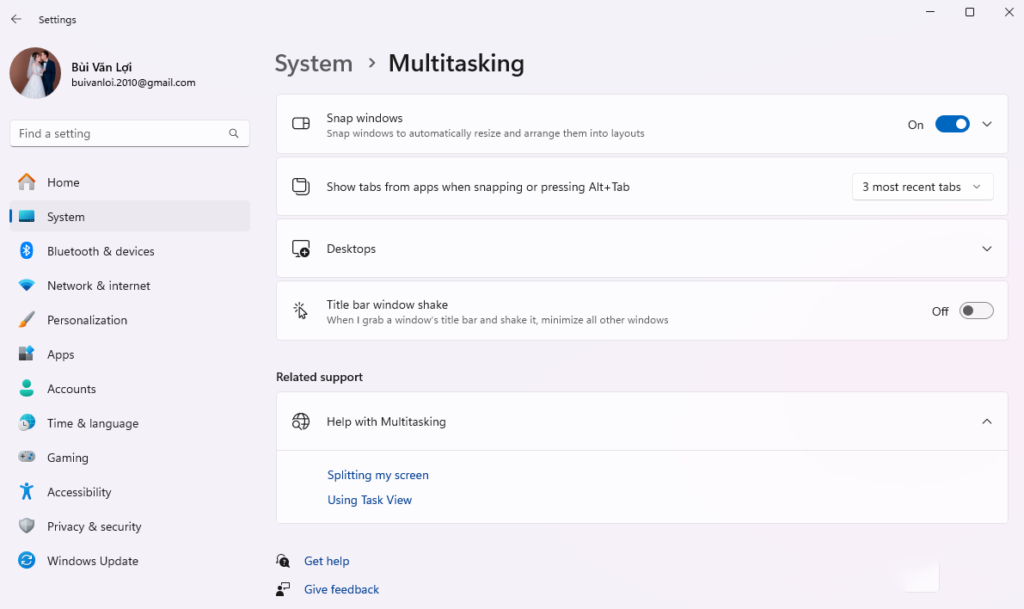
3: You will see 5 related settings, and you can select them according to your needs.
- Suggest what I can snap next to it: When you snap a window, this setting suggests where you can snap additional windows next to it.
- Show snap layouts when I hover over a window’s maximize button: Displays snap layout options when you hover over the maximize button of a window for easy arrangement.
- Show snap layouts when I drag a window to the top of my screen: Shows layout options when you drag a window to the top of the screen, making it easier to position the window.
- Show my snapped windows when I hover over taskbar apps, in Task View, and when I press Alt+Tab: Lets you see the arrangement of snapped windows when you hover over taskbar icons, open Task View, or use Alt+Tab.
- Let me snap it without dragging all the way to the screen edge: Allows you to snap a window to a part of the screen without needing to drag it to the very edge.
Step 2: Split Your Screen on Windows 10/11
Method 1: Split-Screening with Keyboard Shortcuts
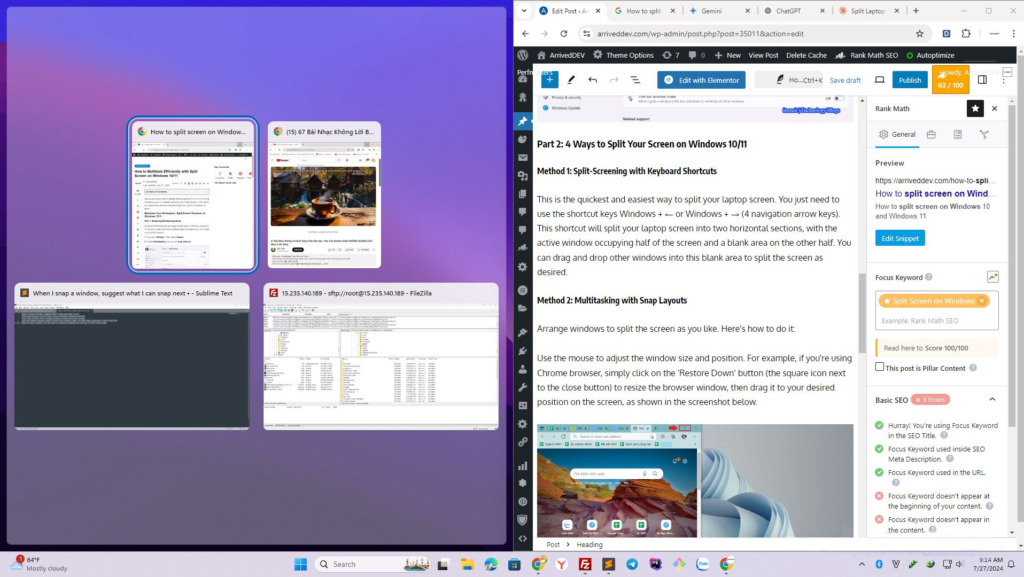
This is the quickest way to split your screen. Simply use the shortcut keys Windows key + left arrow or Windows key + right arrow.
For example, if you’re writing a document in Word and want to reference a website, press Windows key + right arrow to split the screen in half, then drag the browser tab into the empty space.
Method 2: Multitasking with Snap Layouts
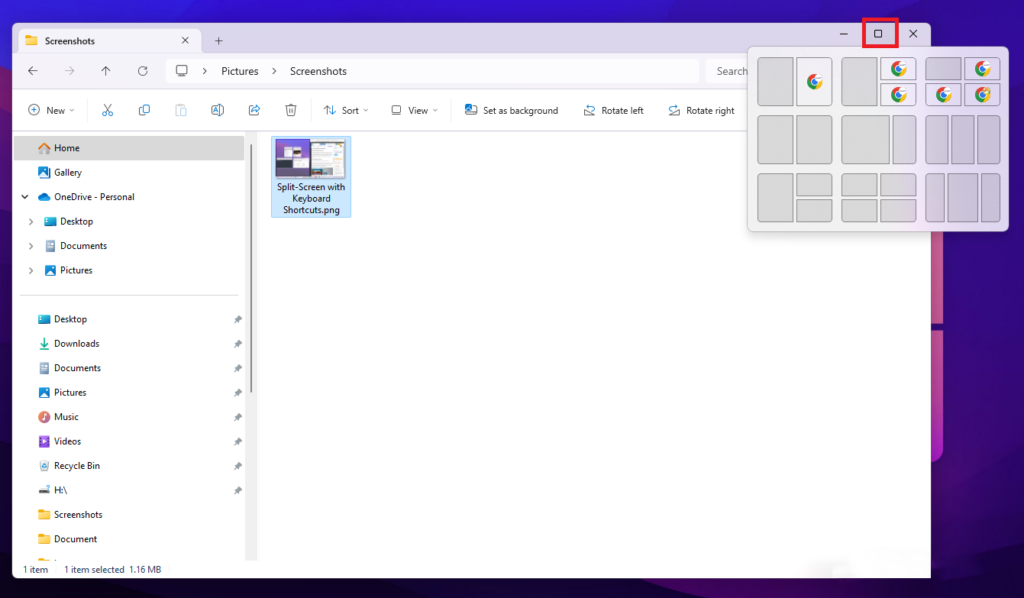
Arrange windows to split the screen as you like. Here’s how to do it:
Use the mouse to adjust the window size and position. For example, if you’re using Chrome browser, simply click on the ‘Restore Down’ button (the square icon next to the close button) to resize the browser window, then drag it to your desired position on the screen, as shown in the screenshot below.
Drag the second window to the remaining area of the screen using the mouse.
Method 3: Using Task View to Split Your Screen
Task View on Windows allows you to manage and switch between open windows and virtual desktops, helping you organize your work more efficiently and easily. You can use this feature to create additional desktop screens by following these steps:
For Windows 10:
- Click on the Task View button on the taskbar (the icon with two overlapping rectangles).
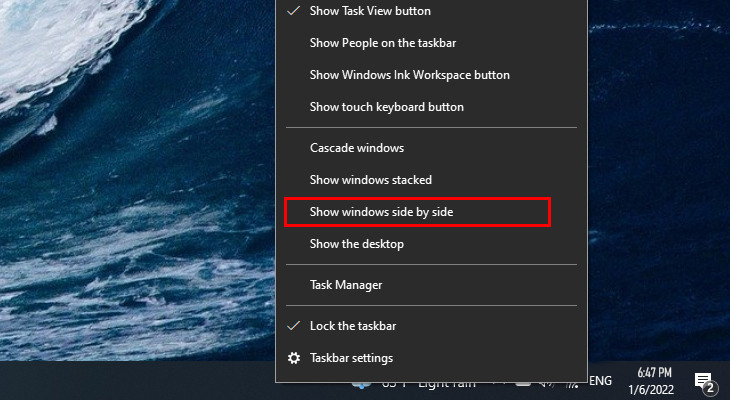
- Click on New Desktop at the top of the screen to create a new virtual desktop.
- To switch between desktops, click on the Task View button again and select the desktop you want to switch to.
- You can drag and drop windows between desktops or move windows to a specific desktop by right-clicking on the window and selecting Move to.
For Windows 11:
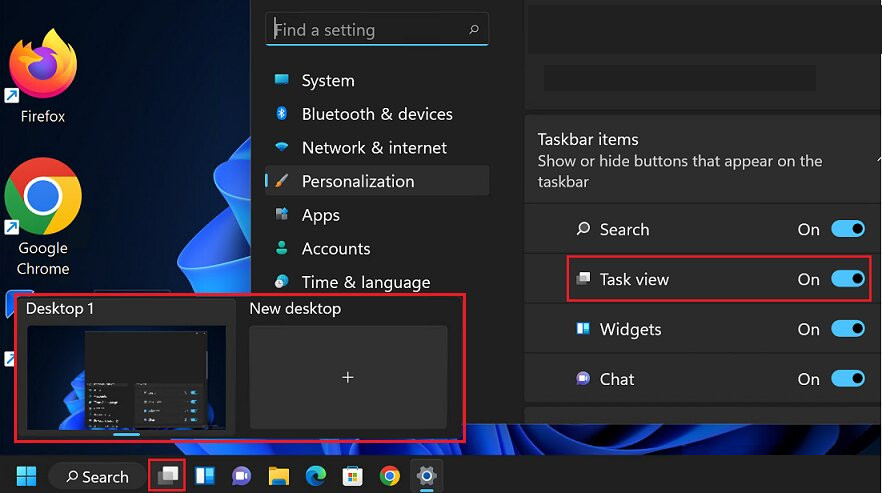
- Open Settings -> Personalization -> Taskbar.
- Click to enable the Task View option.
Now, the Multitask icon will appear on the taskbar. You can click on it to add and manage different virtual desktops, as shown in the screenshot below.

Method 4: Third-Party Applications for Split-Screening
Besides the built-in Windows methods, you can also use third-party software to split your computer screen with more flexible options and features. Some popular software includes:
- DisplayFusion
- FancyZones
- AquaSnap
With various split-screen methods, Windows 10 and 11 offer users a high degree of flexibility in managing their workspace. Customize your window layouts to suit different tasks and enjoy a more efficient workflow.


