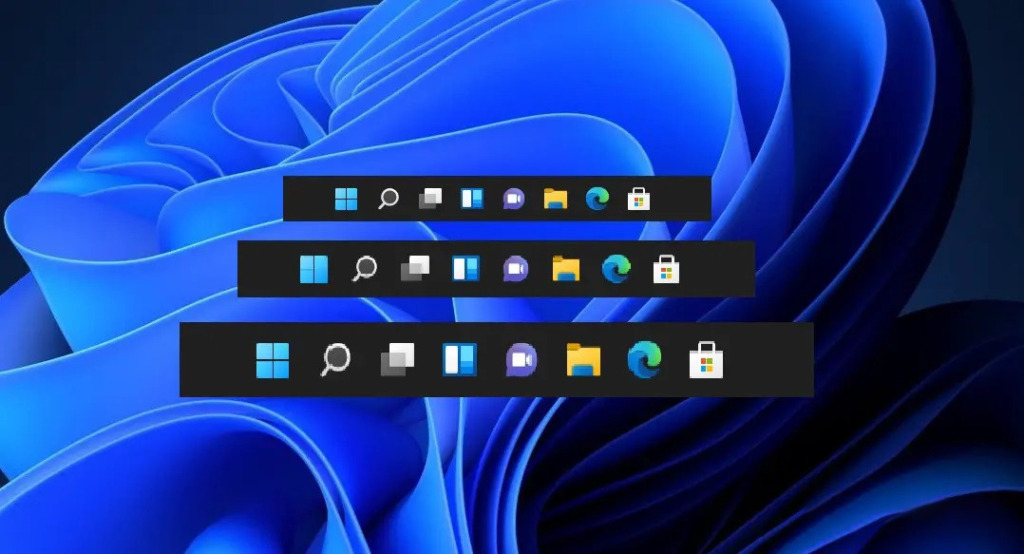
By default, the Taskbar in Windows 11 is sized to fit most screen displays. However, if you wish to customize or resize the Windows 11 Taskbar to suit your personal preferences, this process is easily achievable.
Step-by-step: Customize or change Taskbar size on Windows 11
The taskbar height on Windows 11 can vary depending on the screen resolution, but on a full HD screen, the average taskbar height is 48 pixels, large is 72 pixels, and small is 32 pixels. The following steps will guide you on how to resize the taskbar on Windows 11 to make it smaller or larger. Let’s get started.
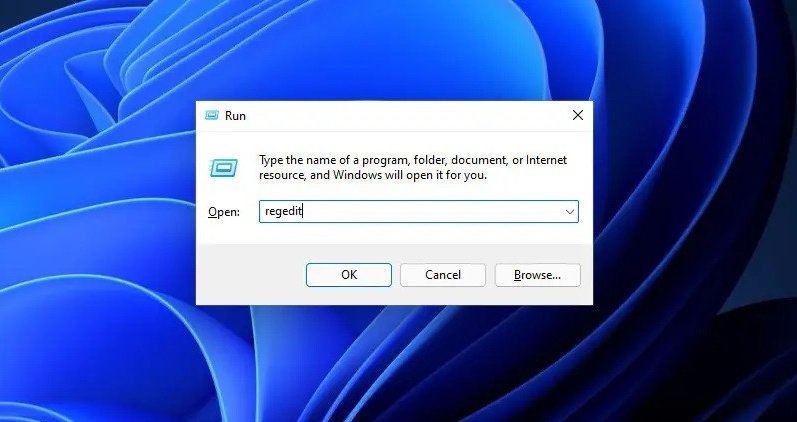
Step 1: Open Regedit
To open the regedit panel, Press the “Windows + R” key combination and enter regedit or by searching for the keyword regedit in the search bar.
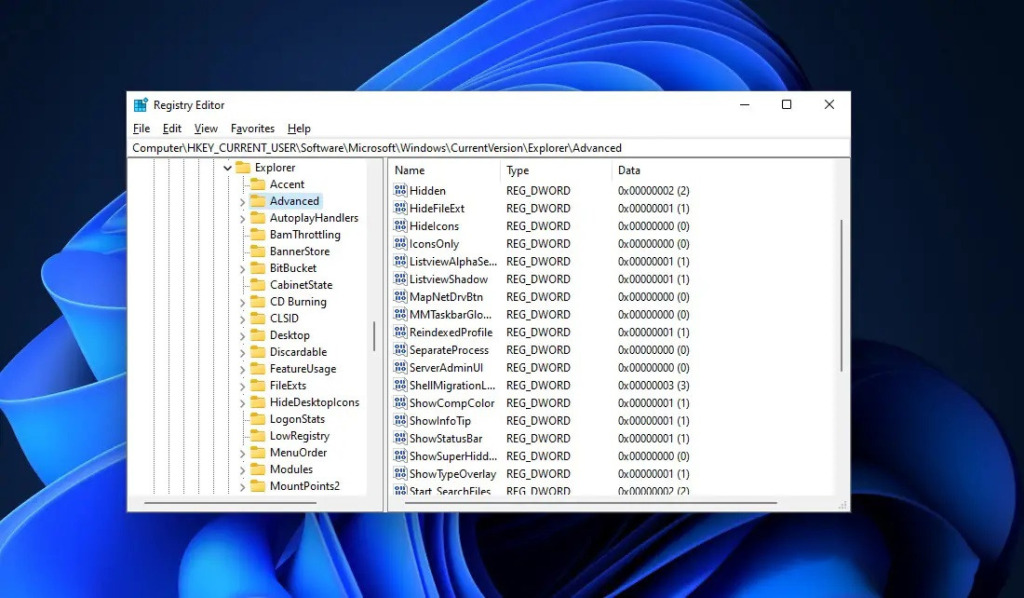
Step 2: Locate the Folder
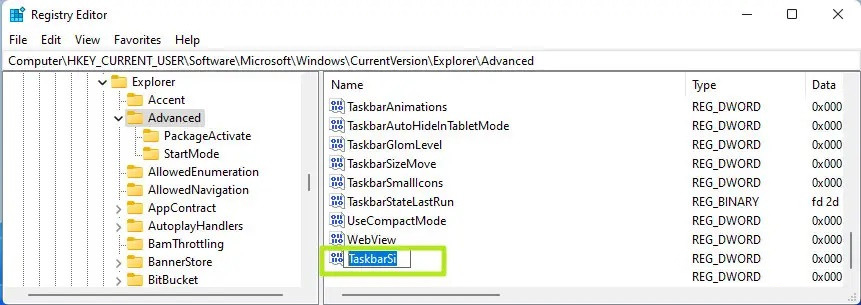
Open the folders one by one according to the path: HKEY_CURRENT_USERSoftwareMicrosoftWindowsCurrentVersionExplorerAdvanced.
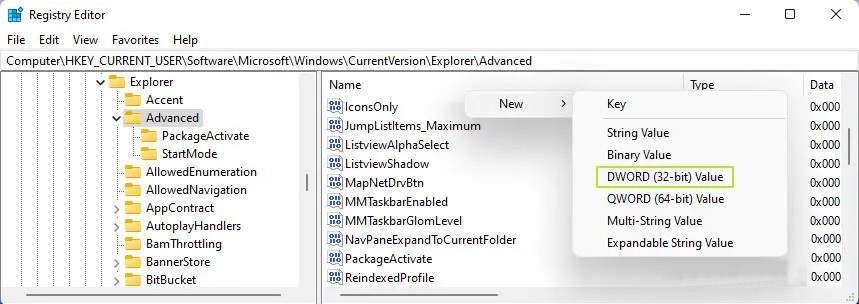
Step 3. Create new DWORD value (32-bit)
To change the Windows 11 Taskbar size, right-click on the right window frame, select “New -> DWORD (32-bit)” as shown below, and name the value “TaskbarSize”.
Step 4. Set size and customize taskbar Windows 11
By double clicking on TaskbarSi, set the value for it to 0, 1 or 2, which gives you small, medium or large. Click “OK” then restart your computer.
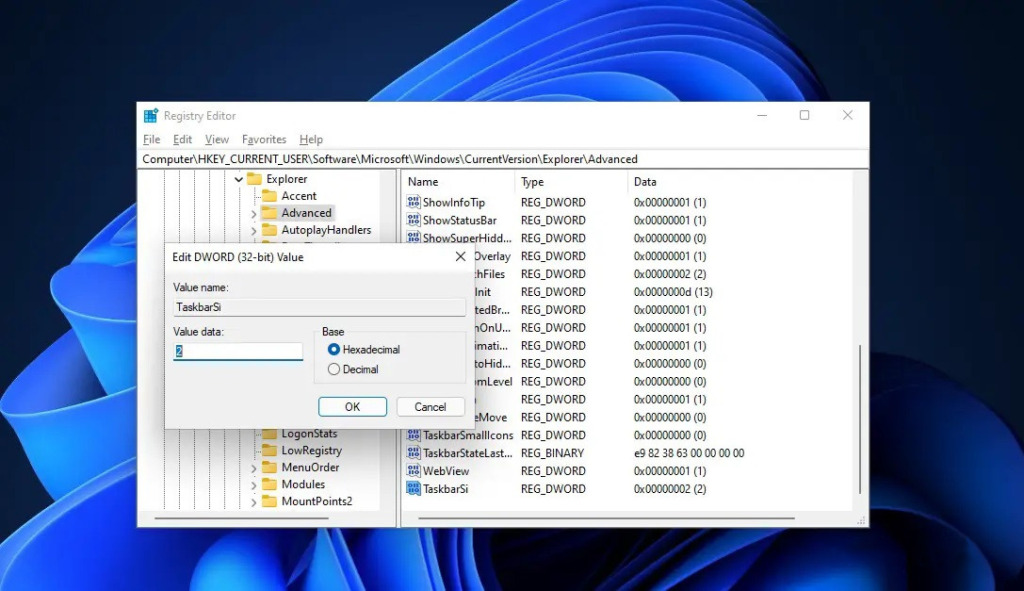
Above are the steps to guide you in customizing, minimizing, or resizing the Windows 11 and Windows 10 taskbar. Now you will see the taskbar icons at the size you’ve set. If you don’t like it, simply delete the created DWORD (32-bit) and restart your computer.
In addition to how to customize the Taskbar, you can also customize your Search bar more beautifully. You can refer to the article on how to customize the Search bar on Windows 11 with ViveTool.


