Step-by-step guide on how to change DNS on Windows 11 or Windows 10, including both IPV4 and IPV6. DNS stands for Domain Name System, and changing DNS on your computer can help improve browsing speed, enhance stability, and ensure better security while accessing the web. Moreover, DNS can also assist you in accessing websites blocked by network providers, such as adult websites, Facebook, and more.
How to change DNS IPV4 or IPV6 on Windows 10, 11 and macOS

In this tutorial we will share a list of secure and reputable DNS as well as configuration steps to change DNS on Windows 10, 11 or MacBook (macOS) operating systems.
Some lists of high-speed and secure DNS to use
| Supplier | IPv4 | IPv6 |
|---|---|---|
| Yandex DNS | 77.88.8.8 77.88.8.1 | 2a02:6b8::feed:0ff 2a02:6b8:0:1::feed:0ff |
| Google DNS | 8.8.8.8 8.8.4.4 | 2001:4860:4860::8888 2001:4860:4860::8844 |
| Cloudflare DNS | 1.1.1.1 1.0.0.1 | 2606:4700:4700::1111 2606:4700:4700::1001 |
| Open DNS | 208.67.220.220 208.67.222.222 | 2620:119:35::35 2620:119:53::53 |
| CleanBrowsing DNS | 185.228.168.9 185.228.169.9 | 2a0d:2a00:1::2 2a0d:2a00:2::2 |
| Comodo Secure DNS | 8.26.56.26 8.20.247.20 | 0:0:0:0:0:FFFF:081A:381A 0:0:0:0:0:FFFF:0814:F714 |
| DNS.Watch | 84.200.69.80 84.200.70.40 | 2001:1608:10:25::1c04:b12f 2001:1608:10:25::9249:d69b |
| VeriSign Public DNS | 64.6.64.6 64.6.65.6 | 2620:74:1b::1:1 2620:74:1c::2:2 |
| Quad9 DNS | 9.9.9.9 149.112.112.112 | 2620:fe::fe 2620:fe::9 |
| AdGuard DNS | 94.140.14.14 94.140.15.15 | 2a10:50c0::ad1:ff 2a10:50c0::ad2:ff |
How to change DNS on Windows 11/10 to speed up access
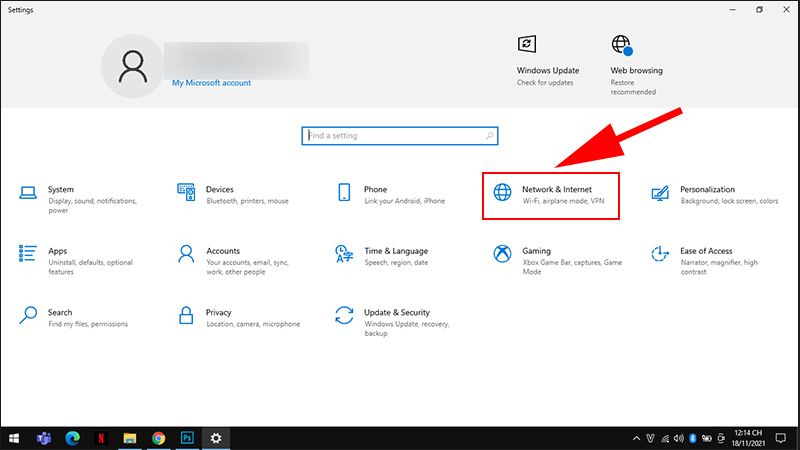
Step 1: Go to Settings -> Network & Internet.
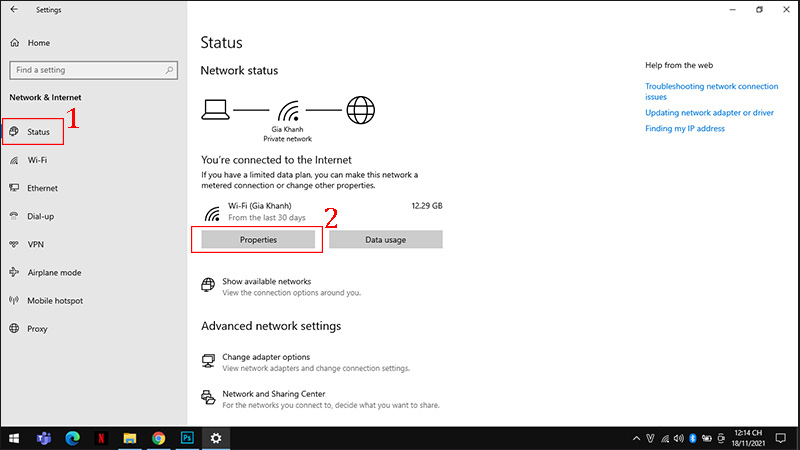
Step 2: Click Status -> In the WiFi section select “Properties“ -> Click “Edit” .
Note: In this step, change DNS on Windows 11 or on Windows 10 may be different. You can click on “Status” or “Change adapter options” or “Network and Sharing Center” then search for “Ethenet” or “name of the network you are connecting to” as long as it shows the same image as in step 4.
Step 3: Select Manual -> A new window will appear, scroll down to the DNS section -> Enter DNS in Preferred DNS and Alternate DNS -> Save .
Note: Preferred DNS is primary DNS, Alternate DNS is secondary when primary DNS is down. You can choose a DNS from the list we provided earlier to change DNS on Windows 10 or Windows 11.
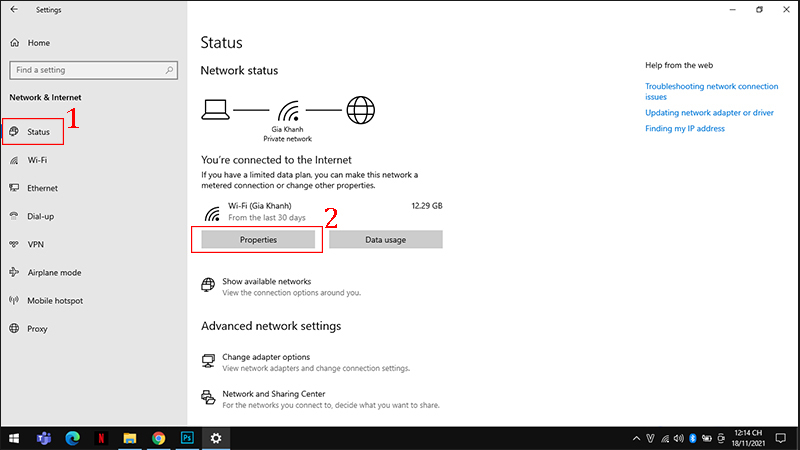
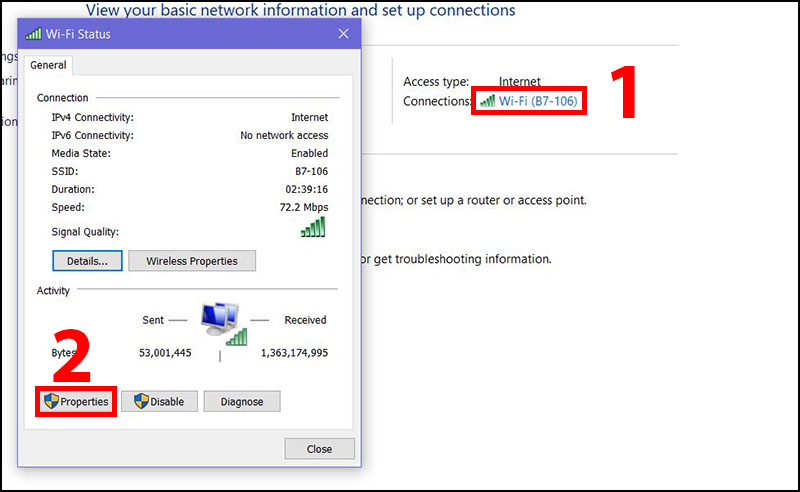
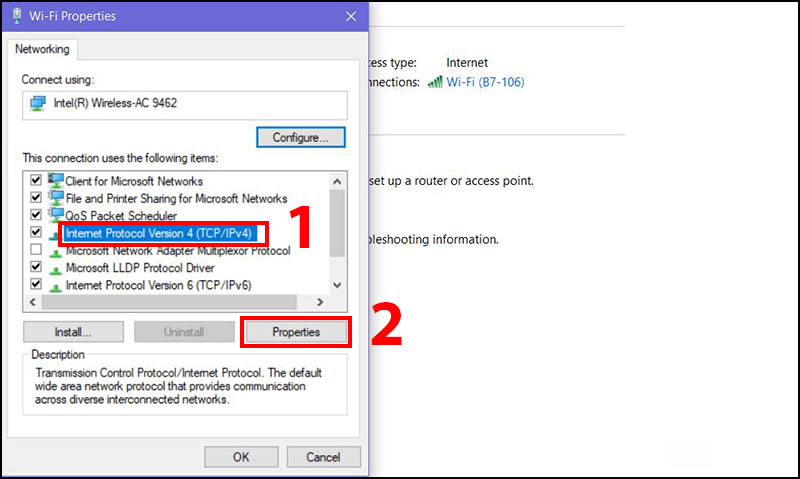
Step 4: Select Wi-Fi in the connections section, the Wi-Fi Status Windows appears -> Select Properties .
Step 5: Select next to Internet Protocol Version 4 (TCP/IPv4) -> Click Properties .
Step 6: You check the box “Use the following DNS server addresses” and enter the DNS from one of the providers in the list we provided earlier. For example, in the picture, I am changing the DNS on Windows 11 to use Google’s DNS.
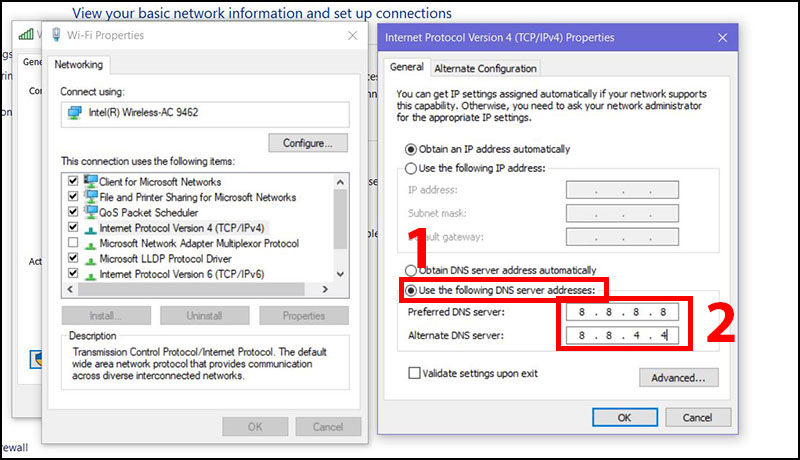
Similarly, if you need to change DNS IPV6 Windows 11, then check Internet Protocol Version 4 (TCP/IPv6) -> Click Properties , then act the same as with IPV4.
How to change Google DNS on Macbook (macOS)
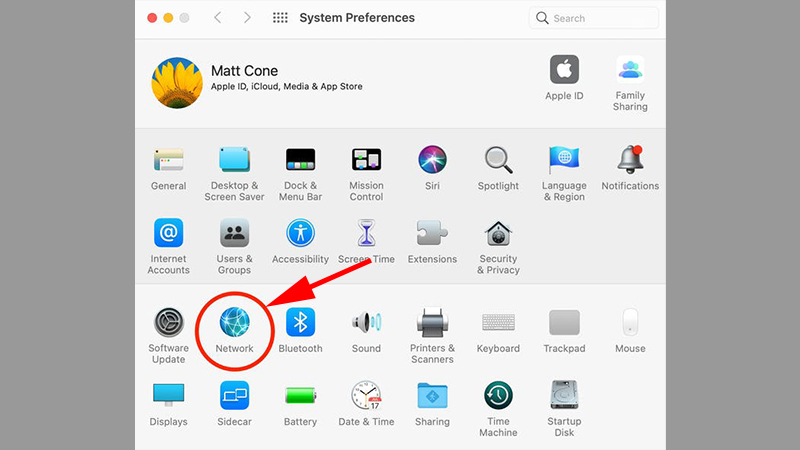
Step 1: Click on the “Apple” menu in the upper left corner of the screen -> then select “System Preferences“. The System Preferences window appears, click on the “Network” section .
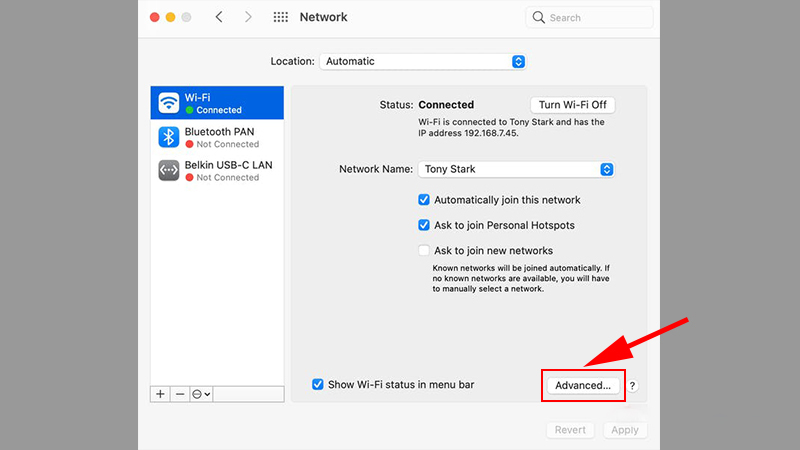
Step 2: Open advanced options for Network by clicking on Advanced…
Step 3: Switch to the DNS tab and click the plus icon ‘+’ to add the “Preferred DNS”. Here, you can choose DNS services from providers like Google, Cloudflare, as we demonstrated earlier for changing Google DNS on Macbook (macOS).
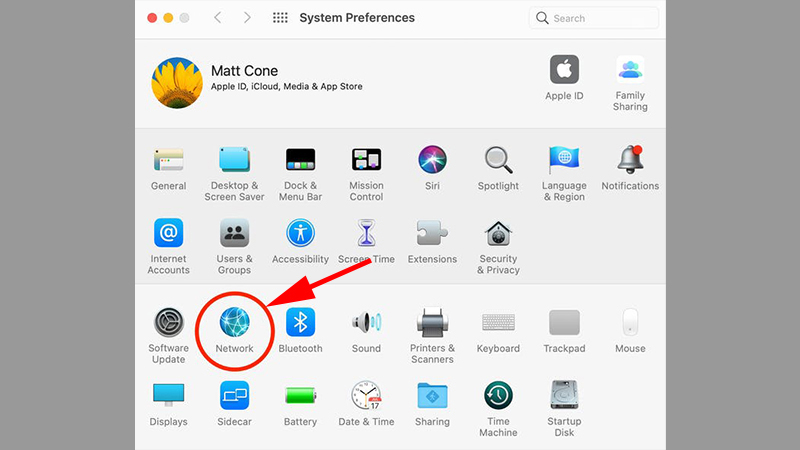
Step 4: Select the plus icon “+” again to add Altemnate DNS -> Click OK and Apply to save the changes.
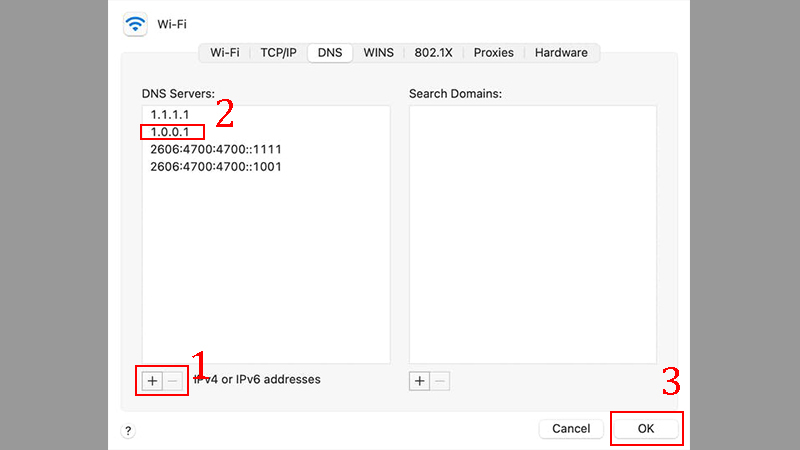
Note: 2 lines 2606:4700 are IPv6, you can enter IPv6 to change DNS using IPV6 or just enter 2 IPv4 lines.
These are change Google DNS on macOS, as well as DNS changes for Windows 10/11, to help you access a more stable and secure internet, and especially to access websites that are blocked by network operators. If you encounter any issues when changing DNS, you can simply clear the DNS settings to return to your default internet address.


