Want to experience the open-source world of Ubuntu without giving up your familiar Windows environment? Dual-booting is the perfect solution! This guide will walk you through the steps to install Ubuntu alongside your existing Windows 10/11 installation, covering both UEFI and Legacy boot modes.
Step-by-Step: Installing Ubuntu Dual-Boot with Windows 10/11
On laptops, to dual-boot Linux/Ubuntu and Windows, you’ll need to disable Fast Startup in Windows and in the BIOS (if available). In Windows, open CMD as administrator and run the following command to disable Fast Startup:
powercfg /h offHere’s a summary of the process:
- Select “Install third-party”… instead of Download Updates.
- When there is a notice “Unmount partition” … then select “No” to continue
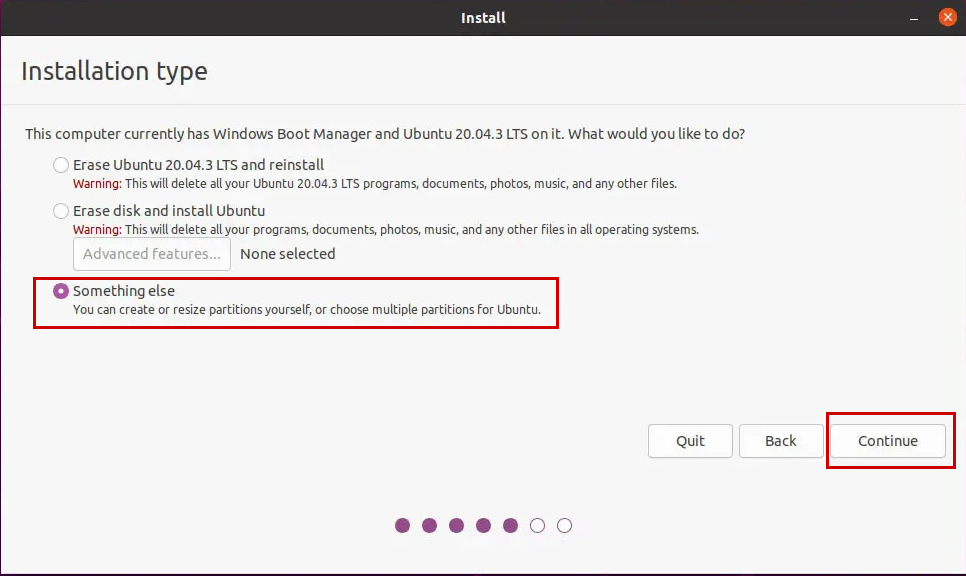
- Select something else in the step Installation type
- Create the Swap partition first, then the Ext4. partition
- Device to a boot you must select the Windows boot partition
Step 1. Prepare the Ubuntu ISO file and create a bootable USB
- Download the latest Ubuntu ISO file from the official Ubuntu website.
- Use a tool like Rufus to create a bootable USB drive with the downloaded ISO.
- Prepare a partition for Ubuntu that has 25GB or more of available storage.
Step 2: Boot from the USB and Prepare the Partition
- Restart your computer and boot from the USB drive. Access your computer’s boot menu by pressing the designated key during startup (often F12, Esc, or Del). Select the USB drive as the boot device.
- Choose “Try or Install Ubuntu“. Then, search for and select “GParted” from the applications menu. In GParted Partition Editor, right-click on the partition you want to resize to create space for Ubuntu, and select “Resize/Move“. (See the screenshot below)
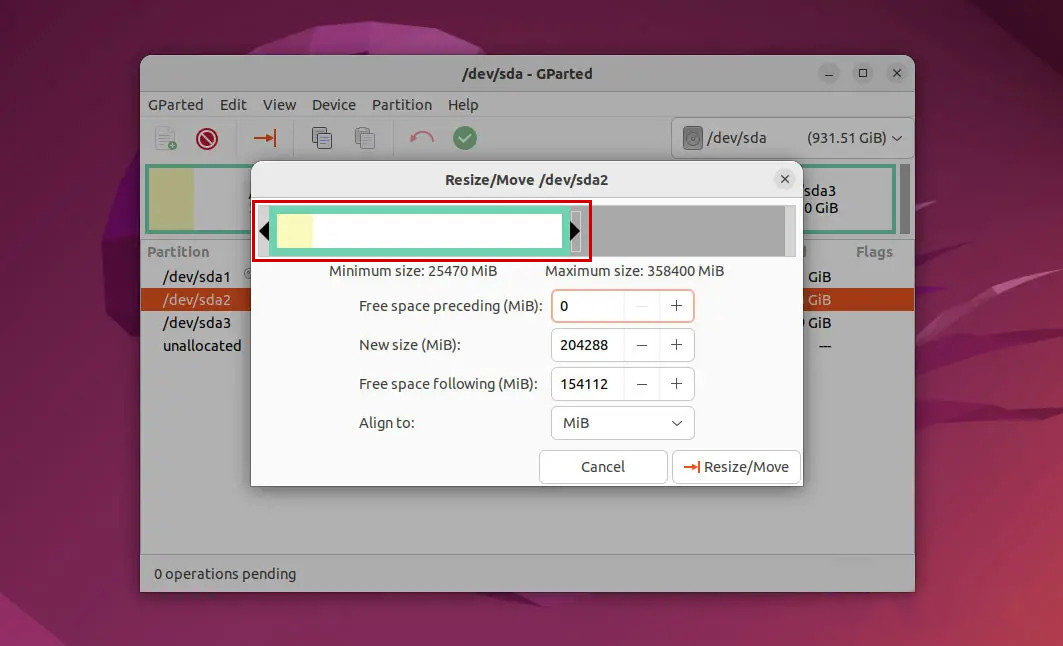
- Drag the black arrow to the left to shrink the existing partition and create a new unallocated space. Ensure the new unallocated space has at least 25GB of free space for Ubuntu. When you’re satisfied with the size, click “Apply All Operations” to apply the changes. (See the screenshot below)
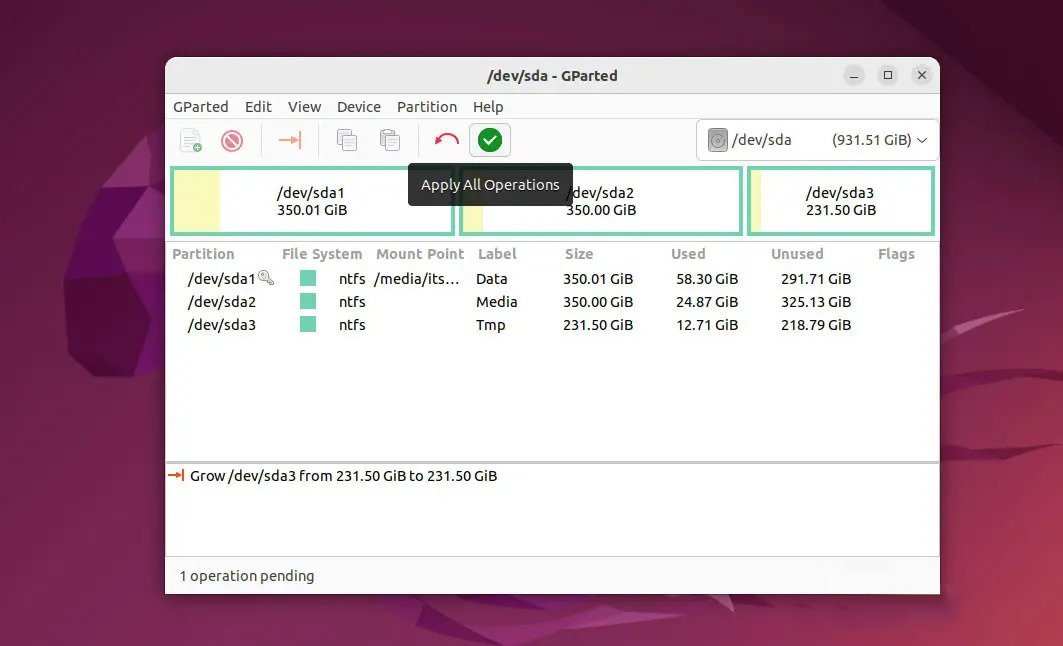
Close GParted and click “Install Ubuntu” on the Ubuntu desktop.
Step 3. Install Ubuntu dual boot Windows 10/11
Run the “Install Ubuntu” icon on the desktop, then select the language and establish an internet connection to download the necessary packages. Choose English as the language.
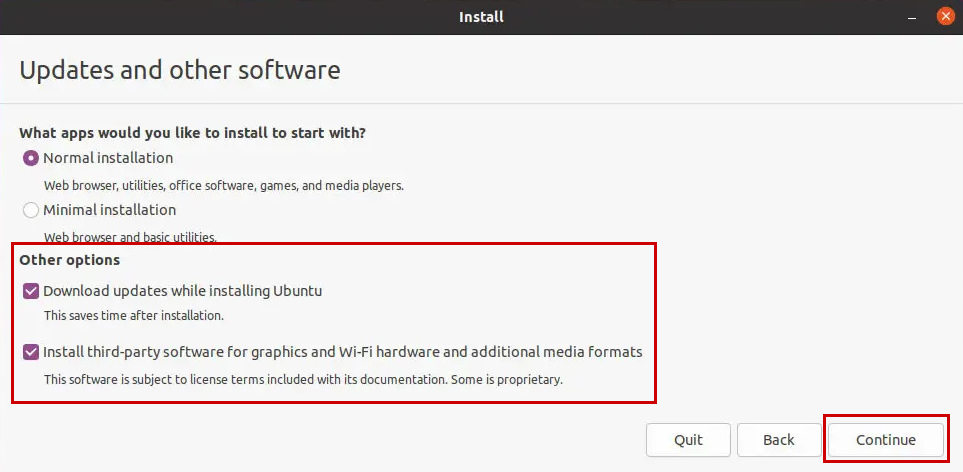
Select Download, and Install third-party to help Install Ubuntu dual boot Windows 11 faster. When asked if Unmount USB (/dev/sdb) or not? Choose No as shown in the picture.
Selecting this option “Something else” will not result in data loss, and you can also create a swap partition.
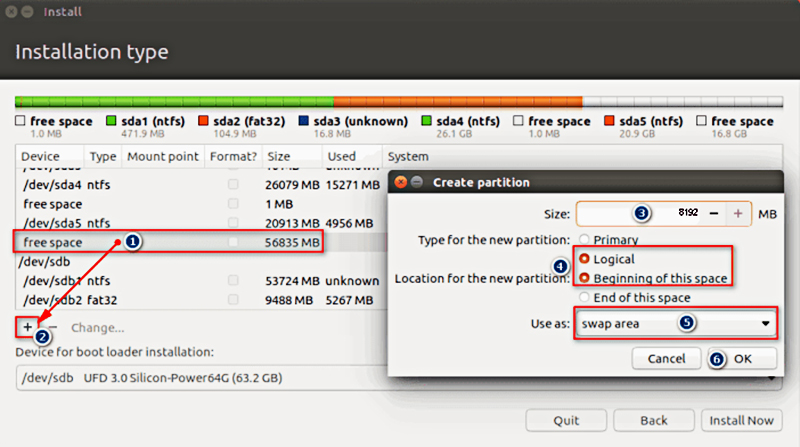
Step 4. Create a Swap partition and a partition to install Ubuntu
1. Creating a swap partition:
If your computer has 16GB of RAM or less, follow the steps below to create a swap partition. If you have more than 16GB, you don’t need a swap partition, but you can still create one if you prefer (for example, when working with memory-intensive applications or to improve performance when your RAM is full).
Steps:
- Select the partition-free space created with Gparted. Click the “+”
- Enter the size of Swap partition (larger than Ram is fine). For example, I put 8192Mb equivalent to 8Gb
- Choose Logical and Beginning of this space.
- Line for “Use as”, select Swap area.
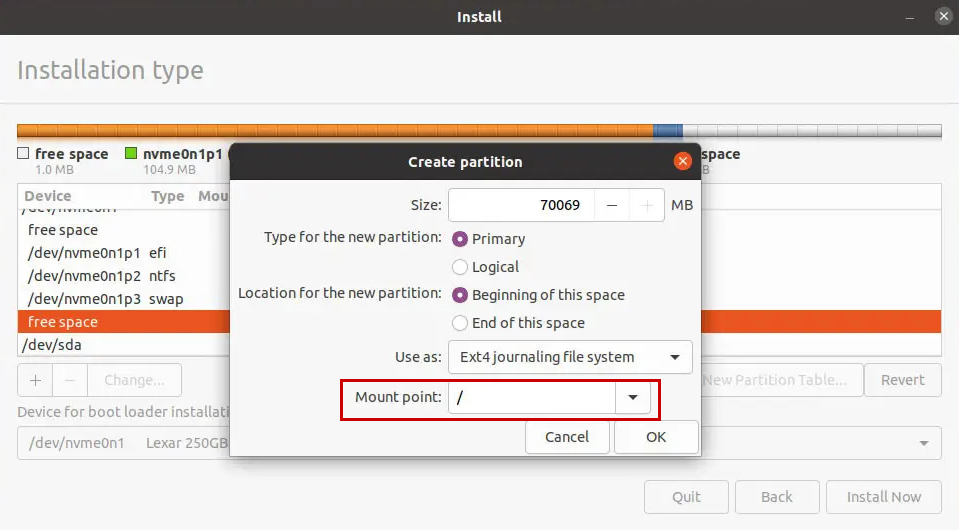
2. Create a Partition for Ubuntu OS
- Select the partition free space created with Gparted. Click the “
+“ - Check Primary.
- In the “Use as” line, enter the / symbol.
In the “Device for boot loader installation” section, select the Windows Boot Manager partition. This ensures that when you install Ubuntu, you can dual boot with Windows without encountering errors that mean you can’t access Windows or Ubuntu.

Click “Install Now “to proceed with the installation. When asked, select “Continue”.
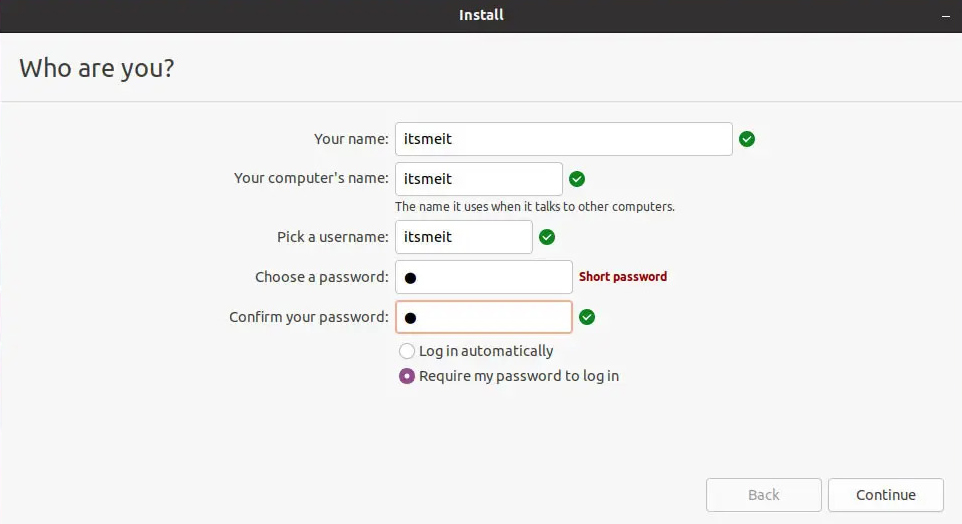
Step 5: Set up Time Zone and User, then Boot Ubuntu
Upon launching the installation, you’ll be prompted to select your language. Choose your preferred language and proceed by clicking ‘”Continue”.
Next, in the Account settings, set a simple password, such as the number 1. This is because Ubuntu frequently requires password input, and a shorter password will streamline your workflow during the installation and initial setup.
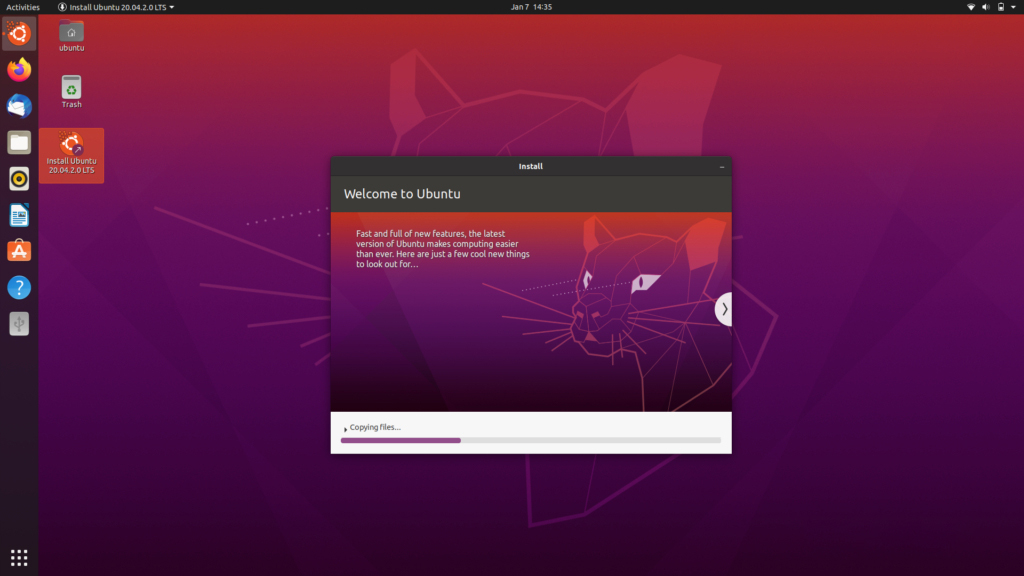
Finally, click “Continue” and wait for the installation process to complete. This may take some time.
In conclusion, setting up a dual-boot system with Ubuntu and Windows 10/11, whether using UEFI or Legacy, allows you to enjoy the flexibility and benefits of both operating systems on a single machine. By following these steps carefully, you ensure a smooth installation process while maintaining the integrity of your data. Enjoy the best of both worlds with your dual-boot setup!