The xemvn.vn/vi.liveen.vn virus is a dangerous malware that can infect your computer through malicious websites or unsafe software, typically targeting Windows systems. It causes many unpleasant issues such as displaying advertisements, redirecting you to fraudulent websites, and monitoring your online activities. To eliminate the virus and completely remove it from your computer, follow the steps we outline in this article.
Protect Your Browser: Remove xemvn.vn & vi.liveen.vn Hijackers
Step 1: Remove the Targeted Virus Advertising Link
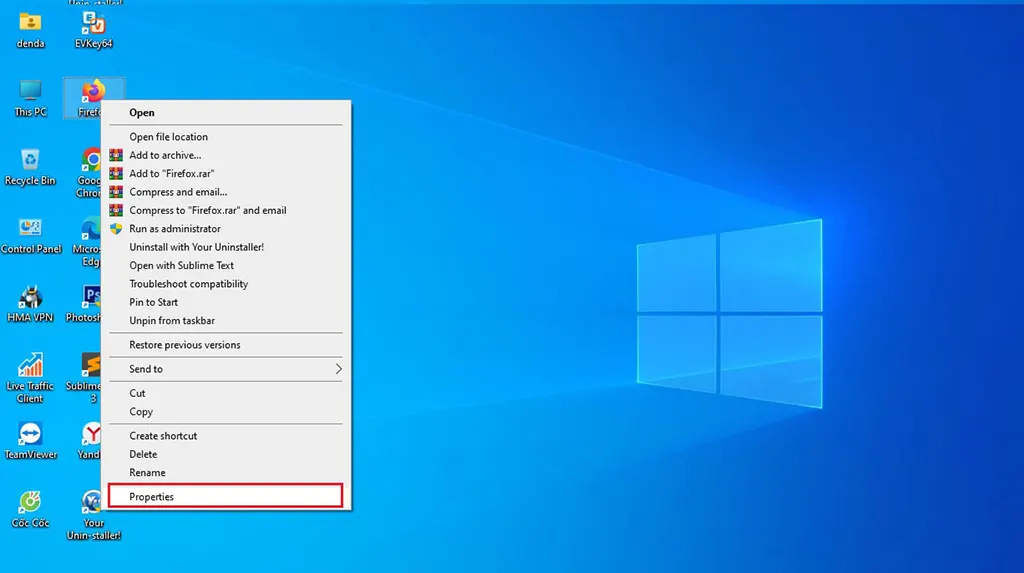
Removing or deleting automatically opened virus advertising links in your browser is a simple process. Let We show you how to handle this problem in the steps below. On your desktop, right-click on the browser icon that has the ad link and select Properties.

In the “Shortcut” section, locate the line starting with “Target:”. It should contain the path “C:Program FilesGoogleChromeApplicationchrome.exe”, followed by unwanted advertising links or strange characters. Remove everything except the main path “C:Program FilesGoogleChromeApplicationchrome.exe”.
Note: If you’re using a web browser other than Chrome, search for and perform a similar method to remove advertising links in the “Shortcut” section of that browser.
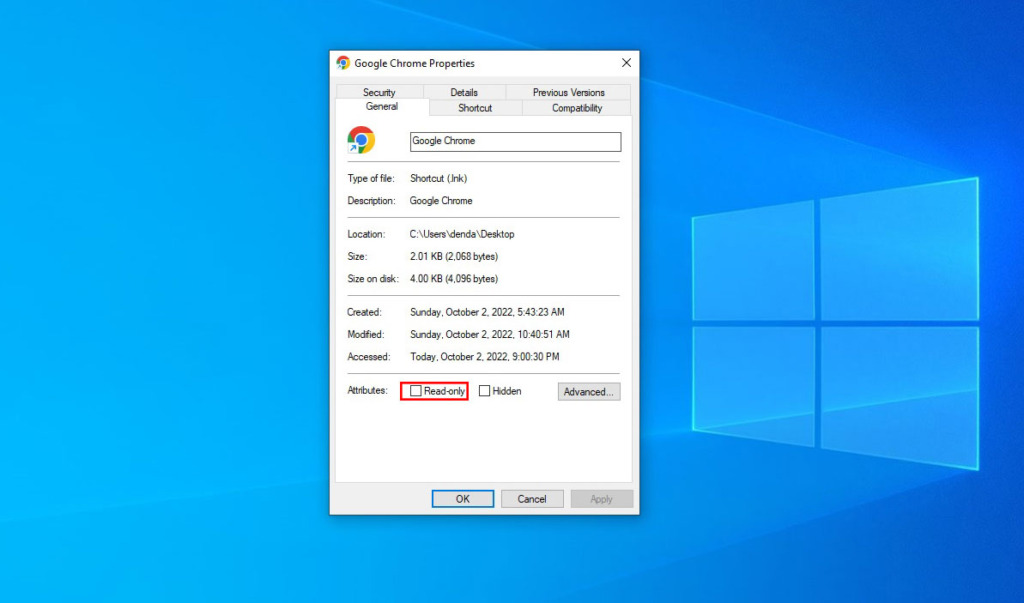
Tab General uncheck the box Read-only then click Apply and OK. If you do not uncheck the box, you will not be able to Apply and report an error Access is denied (Unable to save changes to ‘Coc coc.lnk’).

Note: After completing Step 1, the virus should typically be removed from your computer. However, you should check the “Task Manager” to see if any unfamiliar applications are running and consuming a lot of CPU resources. If so, proceed to Step 2 to ensure the safety of your computer.
Step 2. Remove browser addons
If you install strange extensions, your browser may be infected with an ad virus. To remove the vi.liveen.vn virus and delete suspected extensions, you can do the following on Chrome browser:
- Click on the 3-dot icon in the right corner of the screen and select “More tools”.
- Select “Extensions” to manage extensions.
- Here you can remove any extensions that you suspect are causing the problem.
- Similarly, you can perform the same steps on other browsers such as Coc Coc, Firefox to remove extensions that cause ad virus infections.
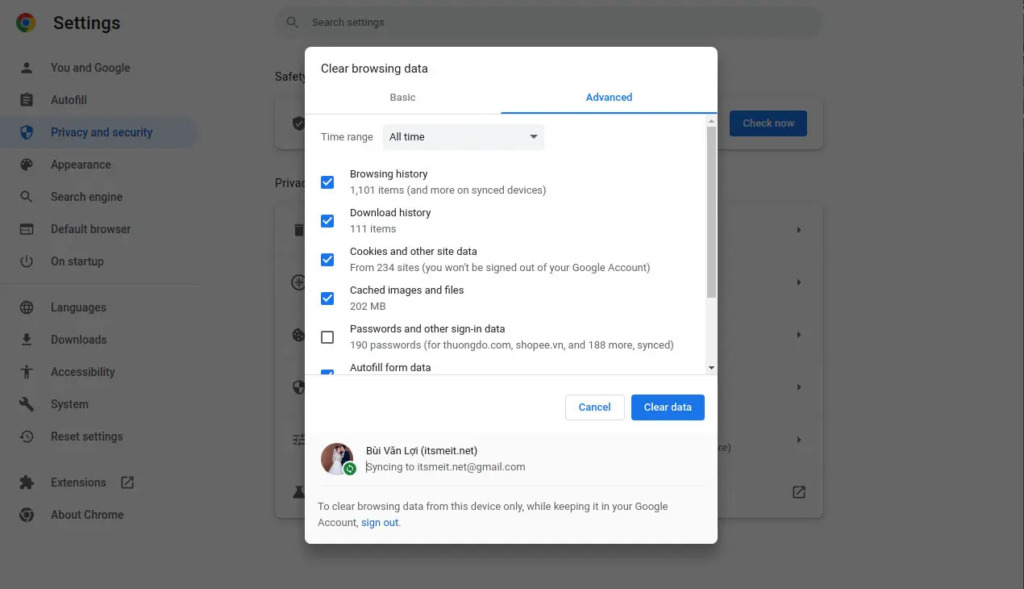
To remove any traces of the vi.liveen.vn or xemvn virus links from your browser’s history, you can use either the key combination Ctrl+ALT+DEL or click on the 3-dot icon in the upper-right corner of the screen and select “History.” From there, you can clear your browsing history by selecting “Clear browsing data” -> “Basic/Advanced,” choosing “All time,” checking all the boxes except for “Passwords,” and then clicking “Clear data.”

Step 3. Uninstall Suspicious Virus-Infected Software
To remove any suspicious software that may be infected with a virus, follow these steps:
- Open Control Panel: Press
Windows + R, typeControl Panel, and hitEnter. - Go to “Uninstall a Program”: In the Control Panel, click on “Uninstall a Program” (under “Programs” or “Programs and Features”).
- Scan for Suspicious Software: Look through the list of installed programs for any suspicious or unknown software that you don’t remember installing.
- Uninstall Infected Software: Right-click on the suspicious software and select “Uninstall”. Follow the on-screen prompts to complete the uninstallation process.
- Restart Your Computer: After uninstalling, restart your computer to ensure all traces of the virus are removed.
This step helps eliminate any potential threats that could be impacting your system’s security and performance.
Step 4. Cleaning Up Windows System
Press the key combination Ctrl + R and enter %temp%, then press Ctrl + A and hold down SHIFT + DEL to delete all temporary files on your Windows computer. (If any files are in use and cannot be deleted, click “Skip” to proceed.)
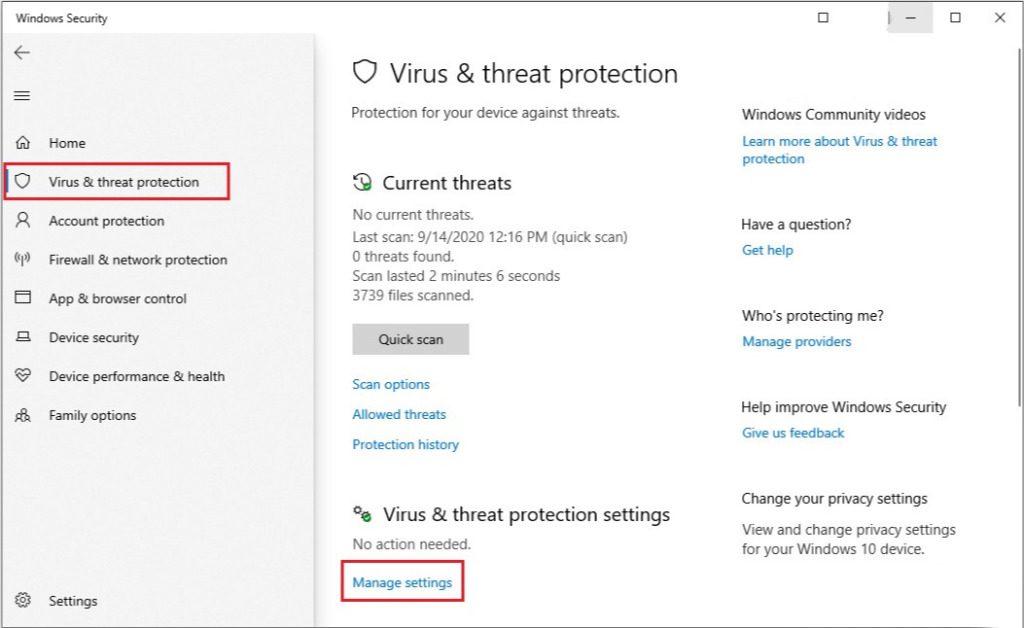
Moreover, we also recommend that you open the Windows Defender tool. This is a free antivirus software integrated into the Windows operating system. It provides multi-layered protection capabilities to prevent security threats such as viruses, malware, spyware, and other online attacks.

You can also use dedicated antivirus software like Kaspersky to make your computer more secure and have peace of mind when using it.