Social Schema is a part of Schema Markup that allows you to declare the social media account links of an organization or individual. This helps search engines like Google better understand your online presence and improve how your information is displayed in the search results.

Why is Social Schema Important for SEO?
✅ 1. Increased Visibility
When you declare your social media accounts, Google can display these links in search results, making it easier for users to find you.
Real-world example: If you search for a major brand like Nike, you’ll notice that their social media links appear right below their website description.
📌 According to research from Moz, websites with clearly defined social information can increase click-through rates (CTR) by up to 20%.
✅ 2. Enhanced Credibility & Brand Trust
Google uses Social Schema to verify your brand. By linking to official social media accounts, Google can determine the trustworthiness of your website and reduce the risk of being confused with fake or unofficial pages.
📌 John Mueller (Google Search Advocate) has emphasized:
“Accurately linking your social media profiles helps Google better understand your entity in search.”
How to Set Up Social Schema in RankMath SEO
Step 1: Install and Activate RankMath SEO
First, you need to install and activate the RankMath SEO plugin on your WordPress website. If you haven’t installed it yet, you can download it from the WordPress plugin directory and activate it.
Step 2: Set Up Social Meta
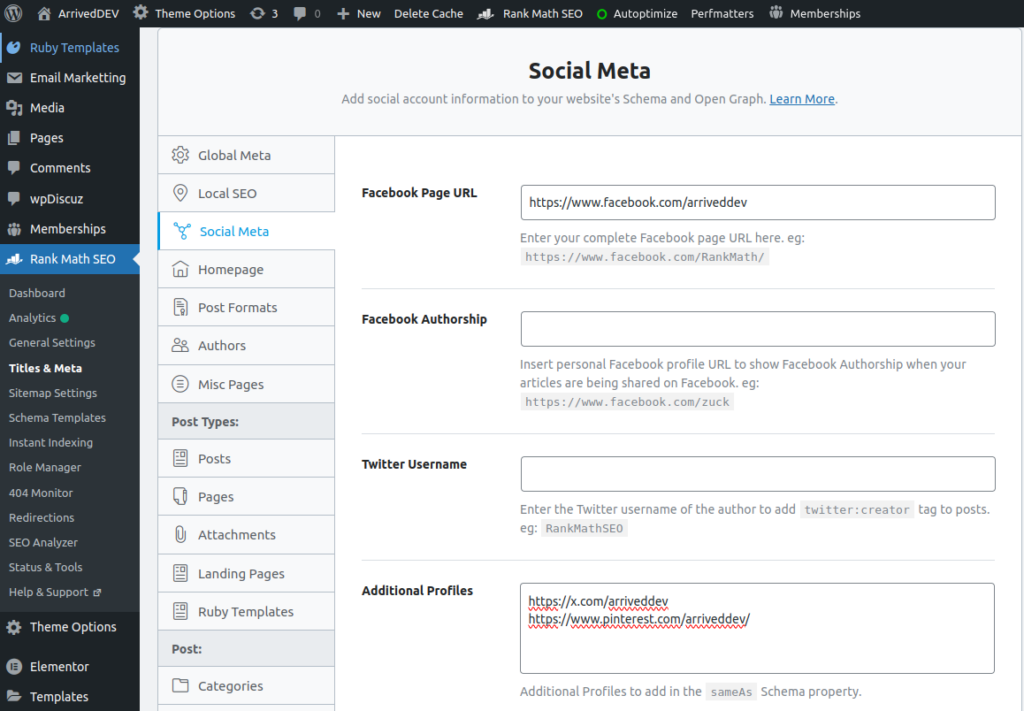
In the “Titles & Meta” section, select the Social Meta tab. This is where you can declare your social media accounts.
Step 3: Enter Your Social Media Account Links
In the Social Meta tab, you will see the “Facebook Page URL” field first, which allows you to enter the link to your Facebook page. Scroll down to the “Additional Profiles” section, and in this field, you can enter all the social links you want to add to the Schema, such as Twitter, Instagram, Pinterest, YouTube, etc. Enter each social link on a new line, as shown in the screenshot below.

After entering all the information, remember to click Save Changes to save your settings.
Verify Social Schema Configuration
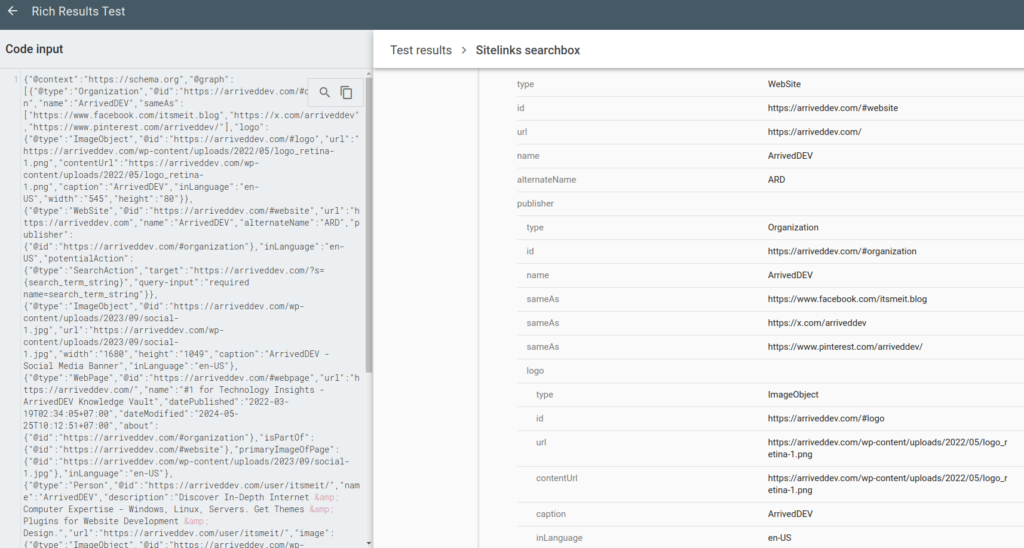
To check if your Social Schema configuration is correct, you can use Google’s Rich Results Test tool. Simply enter your website’s URL and run the test. This tool will let you know if your Social Schema information has been properly declared.

Configuring Social Schema is an important step to improve your SEO and increase your online visibility. With RankMath SEO, this setup becomes simple and straightforward. Make sure you declare all your social media accounts to fully leverage the benefits that Social Schema provides.
After implementing social schema markup, it’s a good idea to use Google Search Console to check if the pages with schema are indexed properly. If you encounter any indexing issues, follow the steps to fix page indexing errors in Google Search Console to resolve them and ensure better visibility in search results.


