Looking to install MySQL on Ubuntu 22.04 or 24.04 LTS? This guide provides a detailed, easy-to-follow walkthrough to get MySQL up and running quickly, so you can get started on your application development or data management projects.
Two Ways to Install MySQL on Ubuntu 22.04 and 24.04
Method 1: Installing MySQL from the Official Ubuntu Repository
Step 1: Update the Application Repository
First, update the application repository to ensure a smooth installation, with the latest versions of packages that are safer and more compatible with your system. This is a basic and necessary step to avoid errors during the installation process.
Open the terminal and run the following commands:
sudo apt update && sudo apt upgrade -yStep 2: Install MySQL
This command will download and install the stable MySQL version available in the Ubuntu repository.
sudo apt install mysql-serverAfter installation, verify the MySQL version to confirm the installation was successful:
mysql --versionMethod 2: Installing MySQL from the Official MySQL Repository
If you encounter the error “E: Package ‘mysql-server’ has no installation candidate”, it may be because your Ubuntu repository does not include the MySQL package version or you accidentally deleted it. In this case, use the official MySQL repository.
Step 1: Open the Terminal and Download the .deb File
Visit the MySQL APT repository download page: https://dev.mysql.com/downloads/repo/apt/ to download the latest version. For example, the command below will download it using wget.
cd ~/Downloads
wget https://dev.mysql.com/get/mysql-apt-config_0.8.33-1_all.deb
Step 2: Add the Repository Configuration
Add the official MySQL repository configuration to your Ubuntu system. This allows you to install MySQL Server, Client, and other tools from this repository.
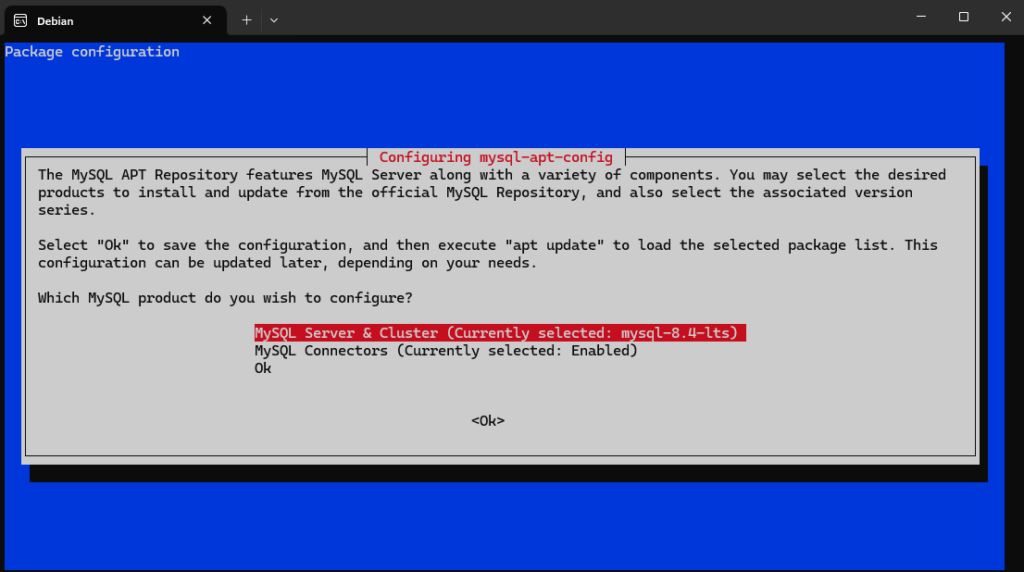
sudo dpkg -i mysql-apt-config_0.8.33-1_all.debWhen running the dpkg command, you’ll see an interface as shown below:

Select the first line, “MySQL Server & Cluster (Currently selected: mysql-8.4-lts),” and press the TAB key to move to the “OK” button, then press Enter. This is the MySQL Server 8.4 LTS version you will install (the latest version with long-term support).
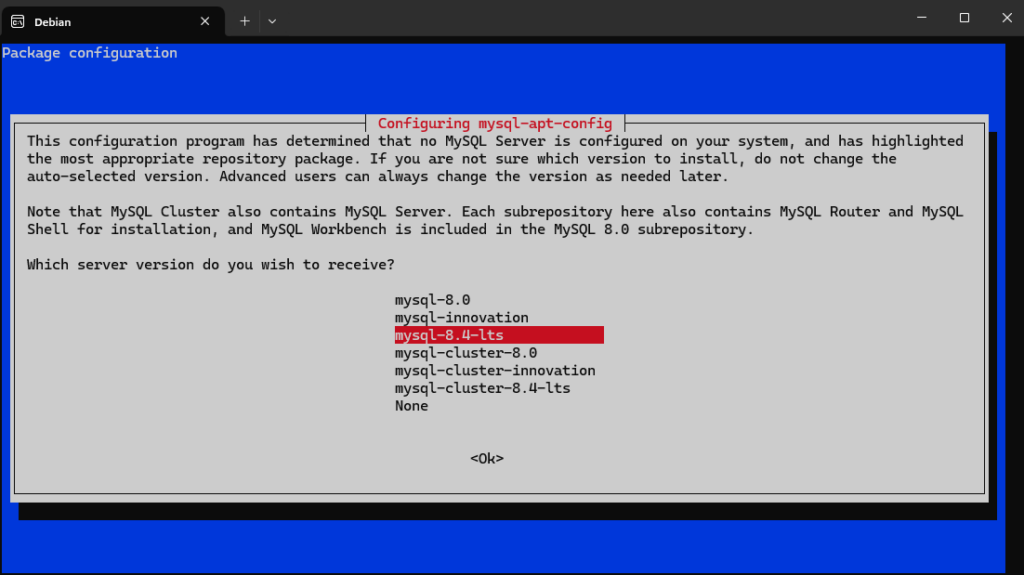
In the next interface, you’ll see another prompt, as shown below:
Use the arrow keys to navigate and select the appropriate version:
- Recommendation: Choose
mysql-8.4-ltsfor stability and long-term support. - If you only need a common version, choose
mysql-8.0.

Press Enter after selecting to save the configuration and continue.
Step 3: Update the System for the Newly Added SQL Repository
sudo apt updateStep 4: Install MySQL
The official MySQL repository usually provides the latest version and security updates faster than the Ubuntu repository.
sudo apt install mysql-serverHow to Secure MySQL
The MySQL installation process comes with a script named “mysql_secure_installation” that allows you to easily configure the default root account and customize the security settings of your database server.
sudo mysql_secure_installation- Switch to unix_socket authentication [Y/n]: Enter
nif you are only using MySQL locally, meaning only for the current computer or server. - Please set the password for root here: Press Enter to skip setting a password. (If you want better security, set a password.)
- Remove anonymous users? [Y/n]: Enter
Yto remove unnecessary users created by default by MySQL. - Disallow root login remotely? [Y/n]: Similar to “unix_socket,” enter
nif you are only using MySQL locally, meaning only for the current computer or server. - Remove test database and access to it? [Y/n]: Select
Yto remove the default test database created by MySQL. - Reload privilege tables now? [Y/n]: Select
Yto reload the root privileges.
Note: If you want to set up MySQL in a production environment, it is recommended to set a strong password for the root account and not skip the security steps. These settings help protect the server from common risks such as uncontrolled accounts, unauthorized access, and security vulnerabilities from test databases.
Check MySQL Status
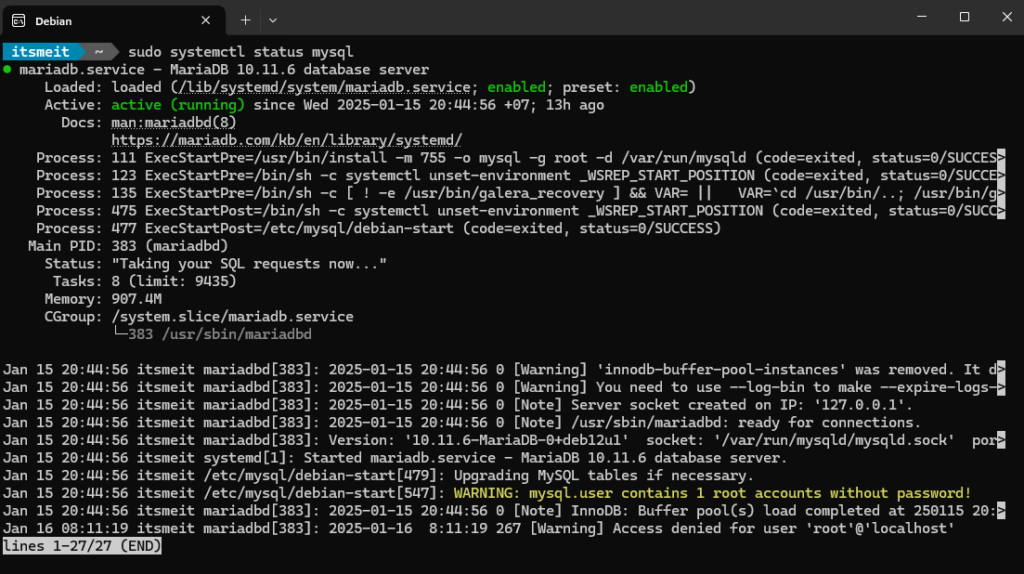
After the installation is complete, you can check if the MySQL service is running by using the command:
sudo systemctl status mysql
If the result shows the status as active (running), as shown in the screenshot, MySQL has been installed and is running. Now, you can start using the system and customize the configuration, as well as optimize SQL performance to ensure the project runs smoothly.
How to Log in to MySQL
Log in to MySQL using the command:
sudo mysqlIf you set a password for root in the security step, use the command:
mysql -u root -pInstalling MySQL on Ubuntu 22.04 only takes a few simple steps. With high security and good compatibility, MySQL is an ideal choice for applications and websites. If you run into any installation or usage problems, we have a helpful guide on troubleshooting MySQL errors on Ubuntu.