When you install new versions of Office on your computer and overwrite the old version, the new version will not be activated and will continue to run the old version. To be able to use the new version, you need to remove or delete the old Office key from your Windows computer so that the new version can be activated and working.
Step 1: Find and determine the Office Product Key
To delete or remove Office key on Windows 10/11, you can follow these steps:
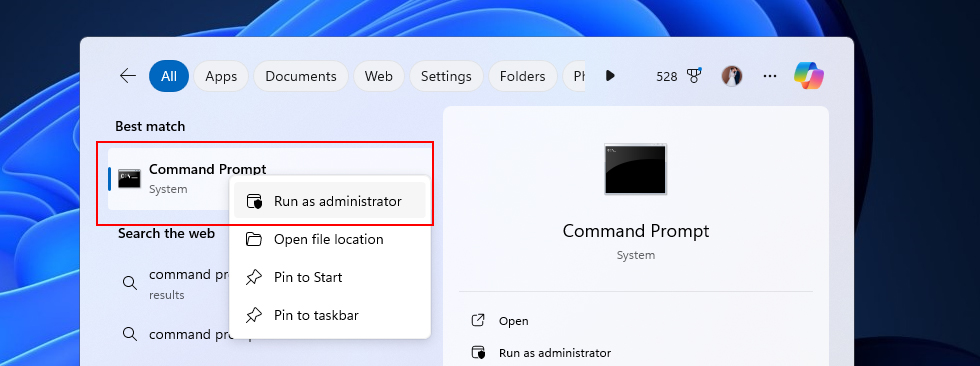
First, open find CMD and right-click open with administrative rights (Run as Administrator).

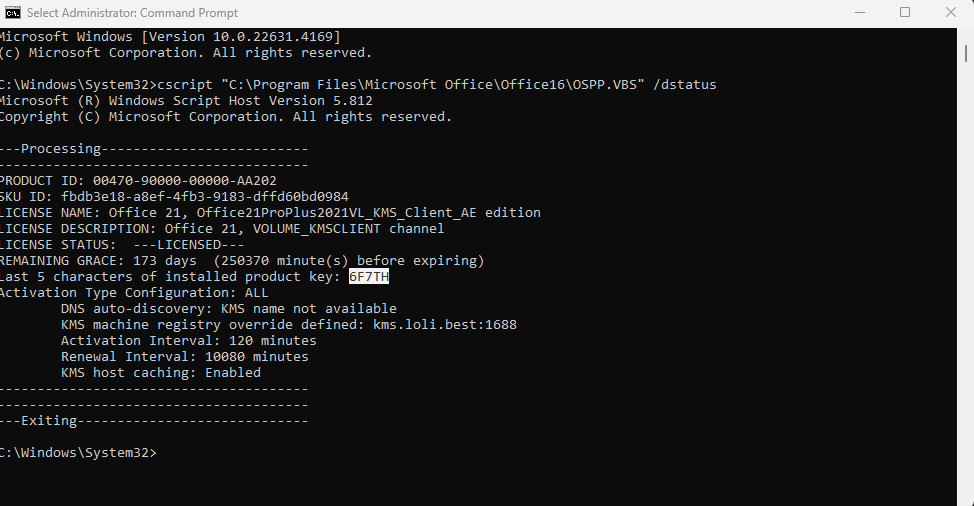
In the Command Prompt Windows, enter the following command to view the list of installed Office keys on the computer:
cscript "C:Program FilesMicrosoft OfficeOffice16OSPP.VBS" /dstatus
Note that the path “C:Program FilesMicrosoft OfficeOffice16OSPP.VBS” may vary depending on the version of Office you are installing on your computer. If you use another version, replace the path accordingly.
After running the above command, a list of Office keys will be displayed. Find the Office key you want to delete.

Step 2: Remove key Office using cmd
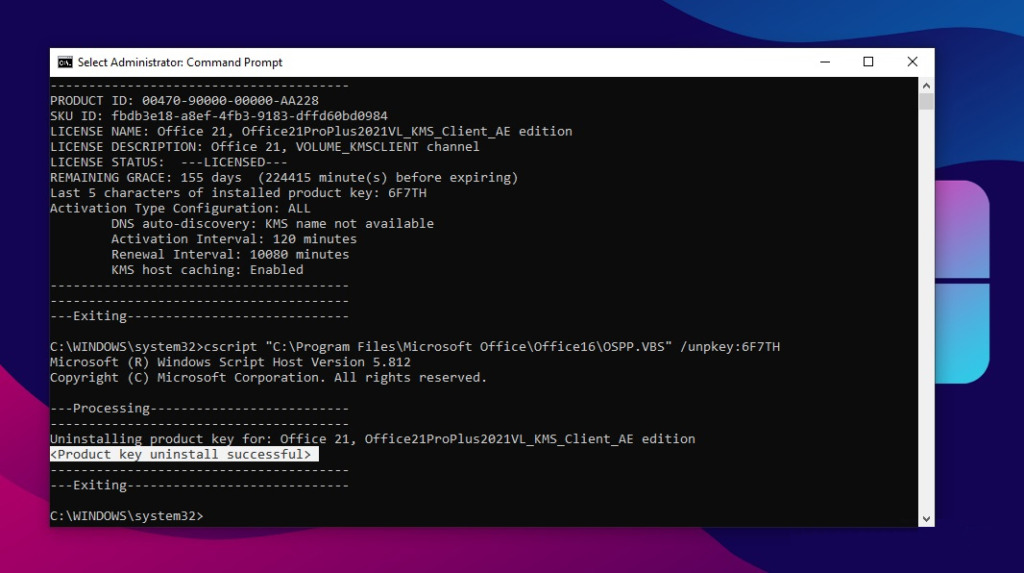
To remove Office key CMD, enter the following command (Replace 6F7TH with the last 5 characters of the Office key you found):
cscript "C:Program FilesMicrosoft OfficeOffice16OSPP.VBS" /unpkey:6F7TH
Note that the path and Office version may be different in your case. Please replace the corresponding information correctly. If many Key codes exist, enter the last 5 characters of the key in turn to remove Office key on Windows.

Removing the Office key will not uninstall Office from your computer. To completely remove Office, you can use the “Add or Remove Programs” utility in Control Panel (Windows 10) or “Apps & Features” in Settings (Windows 11), depending on the version of Office you are using.


