Are you looking to set up a fast, stable, and easy-to-manage web server? NGINX is the perfect choice! With high performance and the ability to handle heavy traffic loads, NGINX has become one of the most popular web servers worldwide. In this guide, we will walk you through the installation of NGINX on Ubuntu 22.04, 24.04, and other Linux systems in the simplest and most detailed way possible.
Prerequisites
Before getting started, ensure you have the following:
- A Linux system (Ubuntu or any other Linux distribution).
- Root privileges or a user with sudo permissions.
- A stable internet connection to download necessary packages.
If you’re ready, let’s dive into NGINX installation!
Install NGINX on Linux | Ubuntu 20.04/22.04/24.04
Step 1: Update the System
Always start by updating your system. This ensures you have the latest security patches and software updates. Run the following command:
sudo apt updateStep 2: Install NGINX
NGINX is available in most Linux distributions’ repositories, making installation extremely simple. Just run the following command:
sudo apt install nginx -yThis command will automatically install NGINX along with its dependencies. Within seconds, you’ll have a powerful web server ready to go!
Step 3: Configure the Firewall (UFW)
If you’re using UFW (Uncomplicated Firewall) to protect your system, allow HTTP (port 80) and HTTPS (port 443) traffic so that NGINX can function properly. Run the following command:
sudo ufw allow 'Nginx Full'Then, check the UFW status to ensure the ports are open:
sudo ufw statusYou should see ports 80 and 443 listed, ready to accept traffic from the outside world.
Step 4: Verify NGINX Installation
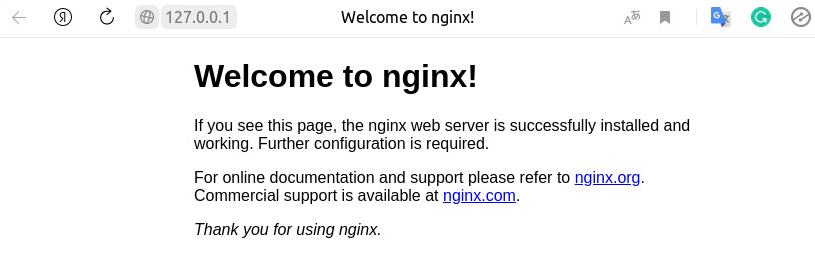
Once the installation is complete, check if NGINX is running. Open a web browser and enter your server’s IP address (e.g., http://your_server_ip). If everything is working correctly, you’ll see the default NGINX welcome page with the message:
“Welcome to NGINX!”
Additionally, you can check the NGINX service status with the command:
sudo systemctl status nginxIf everything is active (running) and displayed in green, it means NGINX has been successfully installed. Now you can begin configuring your projects, such as installing WordPress, Magento, etc.
Managing the NGINX Service
Use the following commands to control NGINX:
Start NGINX:
sudo systemctl start nginxStop NGINX:
sudo systemctl stop nginxRestart NGINX:
sudo systemctl restart nginxCheck NGINX status:
sudo systemctl status nginxThese commands allow you to manage NGINX easily, whether you’re a beginner or an experienced system administrator.
Important Configuration Files
To better understand how NGINX works, familiarize yourself with these important configuration files and directories:
- /etc/nginx/nginx.conf – The main NGINX configuration file.
- /etc/nginx/sites-available/ – Stores individual website configuration files.
- /etc/nginx/sites-enabled/ – Contains symbolic links to active site configurations.
- /var/log/nginx/access.log – Stores access logs.
- /var/log/nginx/error.log – Stores error logs.
Exploring these files will help you gain a deeper understanding of how NGINX operates.
Optimizing NGINX Configuration.
To make managing server blocks (virtual hosts) easier and more professional in the future, configure NGINX to automatically load all configuration files from the sites-available directory. Add the following line to /etc/nginx/nginx.conf inside the http {} block:
include /etc/nginx/sites-available/*.conf;Example:
http {
    # ...
    include /etc/nginx/conf.d/*.conf;
    include /etc/nginx/sites-available/*.conf;
}
This allows you to manage multiple websites and server blocks efficiently without manually creating symbolic links.
Common NGINX Errors and How to Fix Them
If you encounter errors with NGINX, check the logs at /var/log/nginx/error.log to identify and resolve issues.
1. NGINX fails to start:
Error: NGINX fails to start: “Address already in use” (bind to 0.0.0.0:80 failed or 0.0.0.0:443 failed)
Cause:
Port 80 or 443 is already in use by another service.
Solution:
Check which process is using the port:
sudo netstat -tuln | grep :80
sudo netstat -tuln | grep :443
If the output shows Apache (or another service) using these ports, you have two options:
Option 1: Stop/Disable Apache to use NGINX instead:
sudo systemctl stop apache2
sudo systemctl disable apache2
Then restart NGINX:
sudo systemctl restart nginxOption 2: Change NGINX to use a different port (if you need to keep Apache running):
Open all configuration files in /etc/nginx/sites-available/, find and change the listen directive to a different port. If you are using HTTPS, you also need to change the HTTPS port, for example:
listen 81;
listen 444 ssl;
Allow port on firewall (if needed):
sudo ufw allow 81/tcp
sudo ufw allow 444/tcp
Then save the file and restart NGINX.
In my case, Nginx was stuck on port 80 and couldn’t start. Therefore, I will completely stop Nginx before restarting it.
sudo pkill -f nginx & wait $!
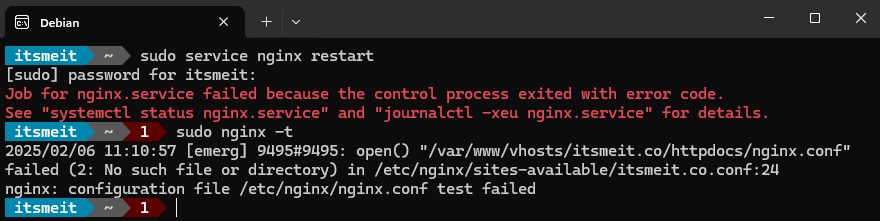
sudo systemctl start nginx2. Error: “Job for nginx.service failed…”
Cause:
Incorrect NGINX configuration or missing configuration files.
Solution:
- Check for syntax errors:
sudo nginx -t - Fix any errors mentioned in the output and restart NGINX.
Using nginx -t and checking the logs are the fastest ways to diagnose and fix NGINX errors.
By following this guide, you have successfully installed and configured NGINX on your Linux system. NGINX is not just a web server but also a powerful reverse proxy and load balancer, helping optimize web performance, enhance security, and improve user experience.
Start exploring NGINX’s full potential and take your web hosting to the next level!