To extract .tar.gz, .tgz or .gz files on Windows 11, you can use some external software tools or use built-in features of the operating system. Here are two methods of extracting files on Windows 11.
Method 1: Use 7-Zip to extract files on Windows 10, 11
7-Zip is a popular and powerful decompression tool that can support decompressing .tar.gz, .tgz or .gz files. You can follow these steps:
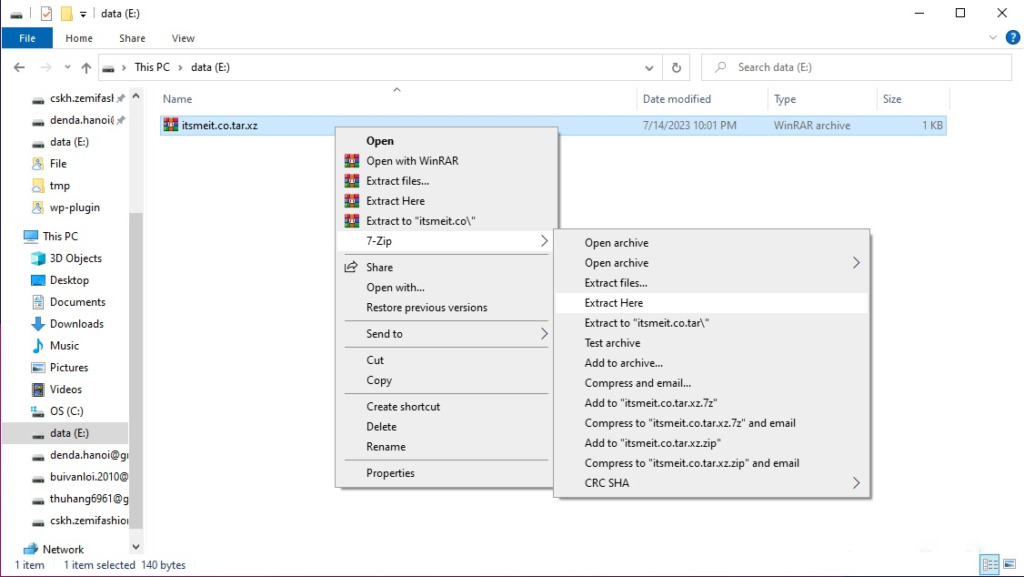
– Step 1: First, download and install 7-Zip from its official website: 7-zip.org. Note to choose the 32bit or 64bit version suitable for your operating system.
– Step 2: When the installation is complete, right-click on the .tar.gz, .tgz or .gz file that you want to extract.
– Step 3: Select “7-Zip” in the menu then select “Extract Here” or “Extract to…” (Extract to a folder named <filename>) depending on your needs.
– Step 4: 7-Zip will start the decompression process and you will see the extracted files in the same folder.

Method 2: Use PowerShell/CMD to extract File .gz .tgz .gz .xz
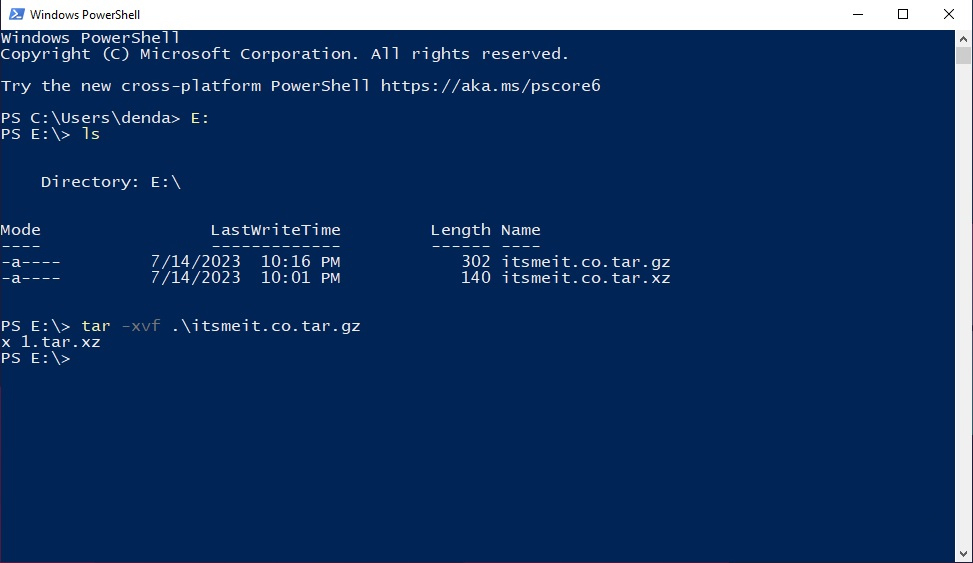
Windows 11 comes with PowerShell, a powerful and flexible command environment (CMD). You can use PowerShell to extract .tar.gz, .tgz or .gz files by following these steps:
– Step 1: Press the “Windows + R” key combination to open the “Run” dialog box. Type “Powershell” and press Enter to open the Powershell tool.
– Step 2: In the PowerShell window, move to the folder containing the .tar.gz, .tgz or .gz files to be extracted with the “cd” command (eg: cd C:\directory\path).
- For .tar.gz or .tgz files use the following command to extract the file:
tar -xvf filename.tar.gz

- For .gz file you can use the following command to extract the file:
gunzip filename.gz
Replace “filename” with the actual name of the file you want to extract. Then PowerShell will perform the decompression process and the extracted files will appear in the same folder.
These are two common methods to decompress .tar.gz, .tgz or .gz files on Windows 11. You can choose the method that is right for you and proceed to decompress the file easily.


