After installing Ubuntu in a dual boot setup with Windows, a common issue is the computer booting directly into Windows or Ubuntu without displaying the GRUB menu. This is often caused by the loss of GRUB2. This article will guide you through fixing the boot error in a Windows and Ubuntu dual boot setup for UEFI (GPT).
Why Grub2 fails
- Reinstalling Windows can overwrite GRUB2 with the Windows bootloader, making Ubuntu inaccessible.
- Updating the BIOS can sometimes lead to GRUB2 corruption or deletion, especially on UEFI systems.
- Incorrect installation of GRUB2 during the Ubuntu installation process can result in the computer booting directly into Windows.
- Failing to update GRUB2 after installing new kernels or making changes to partitions can prevent booting into Windows or older Ubuntu versions.
- Windows updates may modify or delete files crucial for GRUB2 to function correctly.
- Software bugs or conflicts can cause GRUB2 to malfunction or disappear.
- Changes to the boot order in BIOS/UEFI settings can prioritize Windows over GRUB2.
- In some cases, hardware issues or disk errors can also affect GRUB2.
Don’t worry if you encounter any of these issues; we will guide you on how to reinstall GRUB in Ubuntu below.
Fix GRUB Errors Dual-Boot Ubuntu vs Windows for UEFI (GPT)
Method 1: Use Boot-Repair to reinstall grub (Recommended)
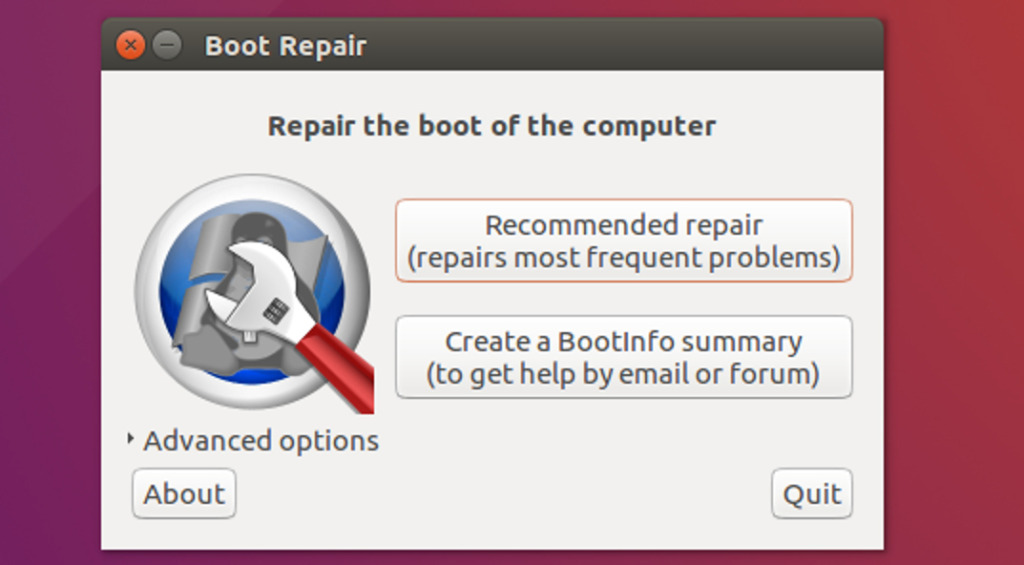
This method is highly recommended for its simplicity and automation. Boot-Repair is a powerful tool that automatically diagnoses and fixes boot problems, including GRUB2 errors. It can restore the GRUB2 boot menu and ensure proper booting of both Windows and Ubuntu.
Requirements: A bootable USB drive with a current version of Ubuntu. You can use Rufus to create one.
- Step 1: Restart your computer and boot from the USB drive. Select “Try or Install Ubuntu” to run Ubuntu in live mode.
- Step 2: Connect to the internet: Ensure you have an active internet connection.
- Step 3: Press
Ctrl+Alt+Tto open a Terminal window. - Step 4: Install Boot-Repair: Run the following commands in the Terminal:
sudo add-apt-repository ppa:yannubuntu/boot-repair
sudo apt-get update
sudo apt-get install -y boot-repair && boot-repair- Step 5: Boot-Repair tool will automatically scan, select Recommended repair to fix the error. Once it’s done, you just need to restart your computer and select Ubuntu or Windows from the boot menu.
- Step 6: Restart your computer: Once the repair is complete, restart your computer and select Ubuntu or Windows from the GRUB menu.
Method 2: Using Command update Grub
This method involves manually reinstalling GRUB2 using Terminal commands. It’s slightly more advanced but offers greater control over the process.
This method involves manually reinstalling GRUB2 using Terminal commands. It’s a bit more technical but offers greater control over the process.
Requirements: A bootable USB drive with Ubuntu.
Note: The methods described here are specifically for NVMe SSDs and SATA SSDs, respectively. They are not interchangeable.
Steps:
For NVMe SSD drives
Reboot your system and boot into the USB. Choose “Try or Install Ubuntu”. Press Ctrl+Alt+T to open the Terminal and enter the command:
sudo fdisk -l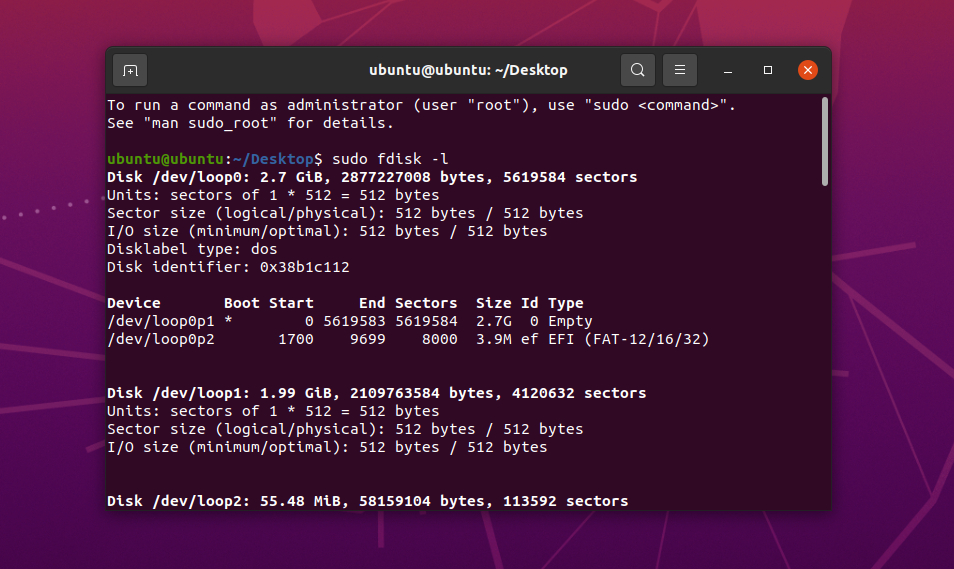
This command lists all the partitions on your hard drives. Carefully examine the output and identify the following:
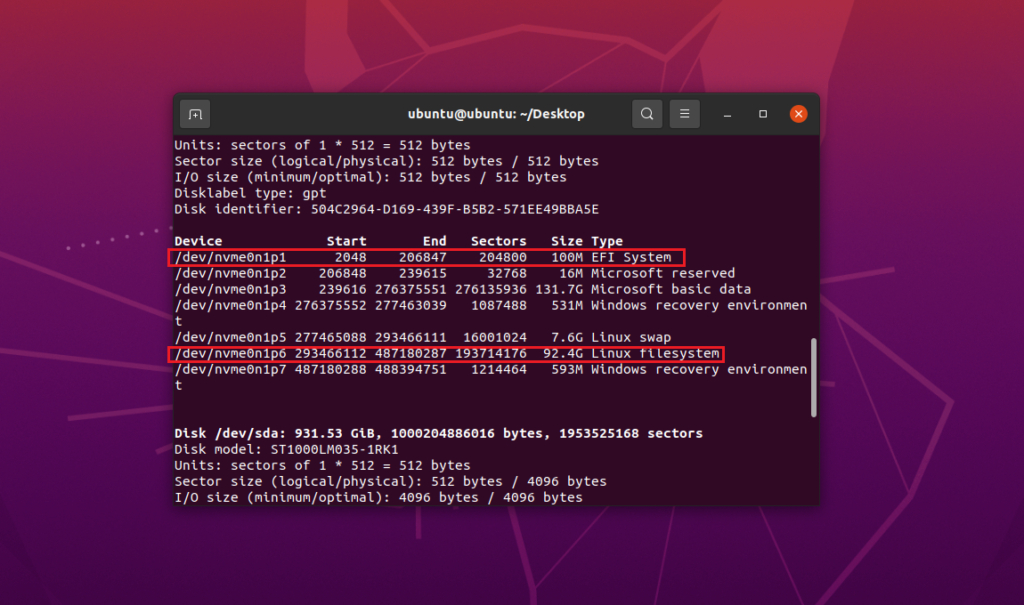
Ubuntu partition: Look for a partition with the “Linux” type. This is where your Ubuntu system is installed. Note down its name, which will look something like /dev/nvme0n1p6.
EFI System Partition: For systems using UEFI, locate the “EFI System” partition. This partition stores the boot loader for your operating system. Remember its name, which could be something like /dev/nvme0n1p1 (see the image below).
Important notes:
- NVMe drives usually have names starting with
/dev/nvme, followed by a number and then the partition number. For example,/dev/nvme0n1p6refers to partition number 6 on the first NVMe drive. - It’s crucial to identify the correct partition names, as you’ll need them in the following steps. Double-check the output of
fdisk -lto avoid mistakes.
Now enter the following commands one by one, you should copy the command and edit the partition name, double check before proceeding to handle the can’t boot Windows after installing Ubuntu Linux.
sudo mount /dev/nvmeon1p6 /mnt
sudo mount /dev/nvmeon1p1 /mnt/boot/efi
sudo chroot /mnt
grub-install /dev/nvmeOn1p
update-grub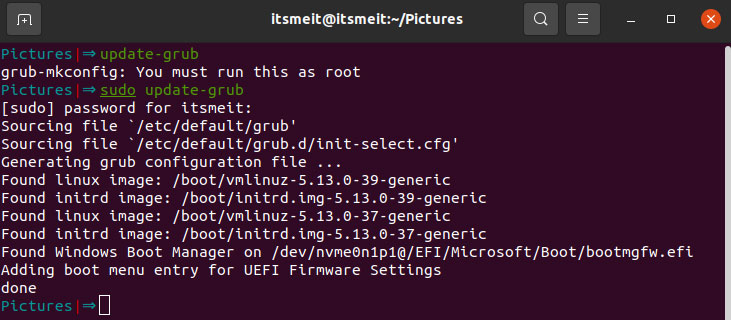
In there:
- nvmeOn1p6: This is the Ubuntu partition.
- nvmeOn1p1: This is the EFI or ESP partition (for UEFI systems).
- nvmeOn1p: This is the dual boot partition for Ubuntu and Windows.
Need to replace the correct nvmeOn1p(xx) partitions that you found in the fdisk -l command, the nvmeOn1p symbol is for the new generation SSD NVME hard drive
For SSD drives but not NVME
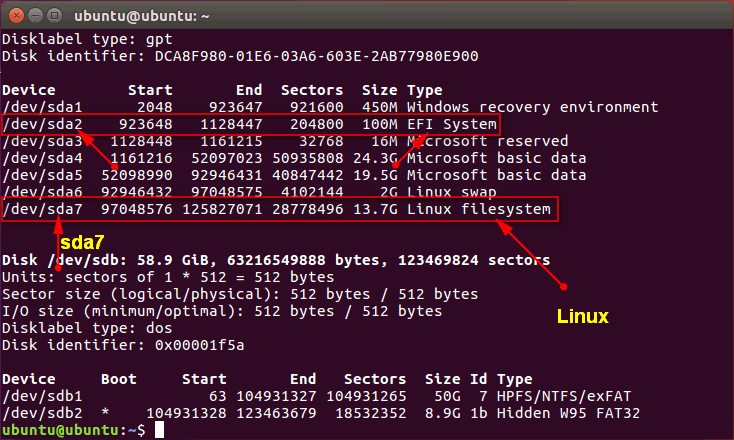
Use the command fdisk -l to list all the partitions of the hard drives. See which partition Ubuntu is installed on (Linux name), as shown in the picture above is the sda7 partition. With UEFI device, you need to see more about where the EFI partition is (pictured above is sda2). Please make note of the names of the partitions mentioned above in order to correctly enter the commands listed below to fix GRUB error Ubuntu.
sudo mount /dev/sda7 /mnt
for i in /dev /dev/pts /proc /sys; do sudo mount -B $i /mnt$i; done
sudo chroot /mnt
grub-install /dev/sda
update-grub
Replace the appropriate “sdxx” partitions that you discovered using the “fdisk -l” command. Please note that the “sdxx” symbol represents a non-NVME hard drive. Then, restart the computer. If the GRUB error in Ubuntu persists and you are still unable to enter Windows, double-check the steps to ensure their accuracy.