Want to freshen up your computer and banish desktop boredom? Automatically changing your wallpaper is a fantastic way to do it! This guide provides a simple, step-by-step walkthrough for setting up automatic wallpaper changes on both Windows 10 and Windows 11.
Why use automatic wallpaper changes?
- Keeps things fresh and exciting: A new wallpaper can boost your mood and motivation while you work or play.
- Sparks inspiration and creativity: Beautiful images can trigger new ideas and get your creative juices flowing.
- Expresses your personality: Choose wallpapers that reflect your unique style and interests.
Automatically Changing Wallpaper on Windows 10
– Step 1: Gather your wallpapers
First, create a new folder and fill it with your favorite images. Need some inspiration? Download stunning 4K wallpapers here.
– Step 2: Set up the slideshow
- Right-click on your desktop and select Personalize.
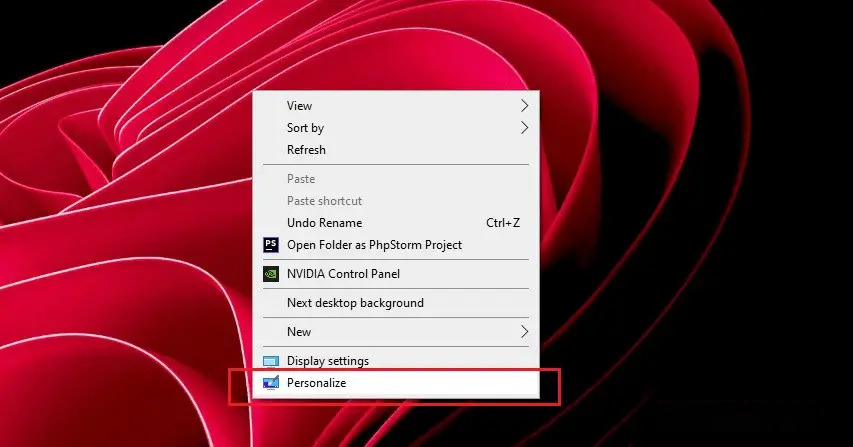
- In the Background section, select Slideshow. Continue to click Browse and select the wallpaper folder you created earlier.
- In the “Change picture every” section, select 10 minutes. Or set the time to your liking.
- Click Browse and select the folder of wallpapers you created in Step 1.
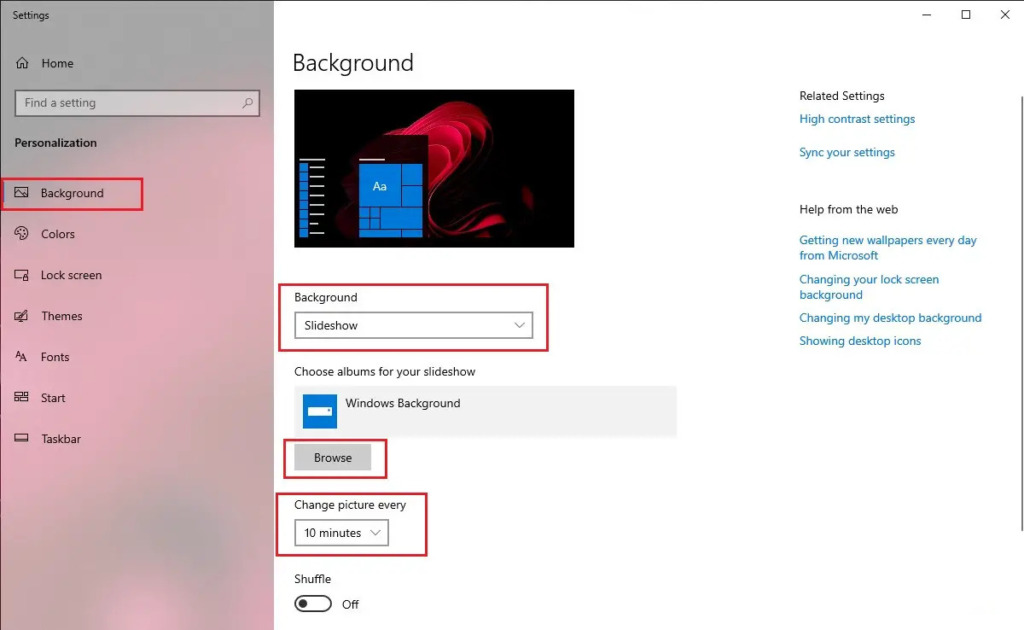
Under “Change picture every,” choose how often you want the wallpaper to change. For example, every 10 minutes, 30 minutes, or 1 hour.
Step 3: Enjoy the show!
That’s it! Your computer will now automatically cycle through your chosen wallpapers.
Note: Keep in mind that running a slideshow may use slightly more battery power.
Automatically Changing Wallpaper on Windows 11
The process for Windows 11 is very similar to Windows 10, with minor interface differences.
Step 1: Access Personalization settings
Right-click on your desktop and select Personalize.
Step 2: Choose Slideshow mode
- In the Background section, select Slideshow.
- Click Browse and select the folder containing your wallpapers.
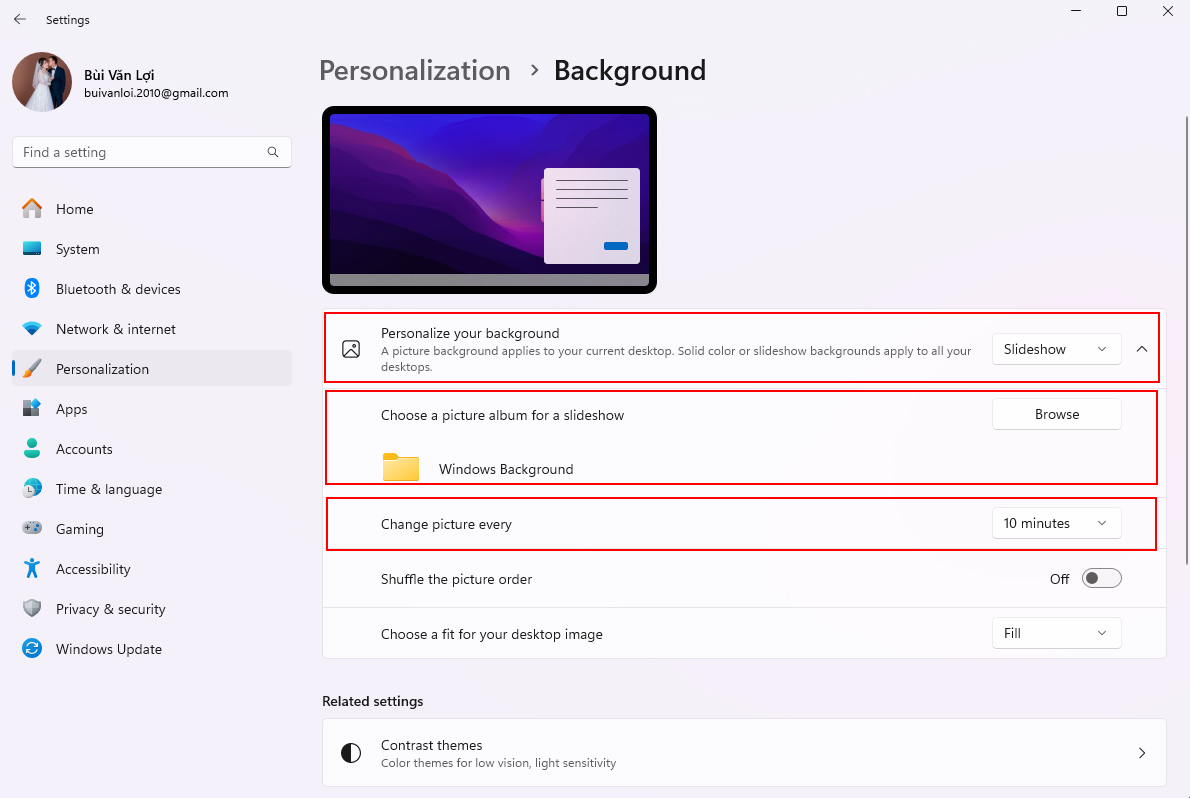
Step 3: Set the interval:
Choose how often you want the wallpaper to change using the “Change picture every” setting.
Step 4: Enable/disable Shuffle:
The “Shuffle the picture order” option lets you randomize the order in which the wallpapers are displayed.
Tips for saving battery life when using automatic wallpaper changes:
- Choose a longer interval between wallpaper changes.
- Reduce screen brightness.
- Use static wallpapers instead of animated ones.
We hope you found this guide helpful! Feel free to share it with your friends.


